
Card Class November 17th
The last card making class on November 17th, we made some fun cards!!! We explored the world of Spray Inks, creating designs with Circle Die-Cuts, and made a Holiday Card!!
Check out the cards we made!!

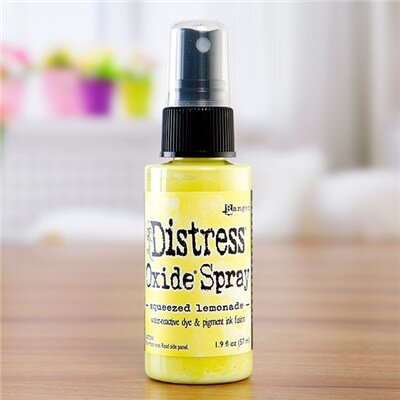
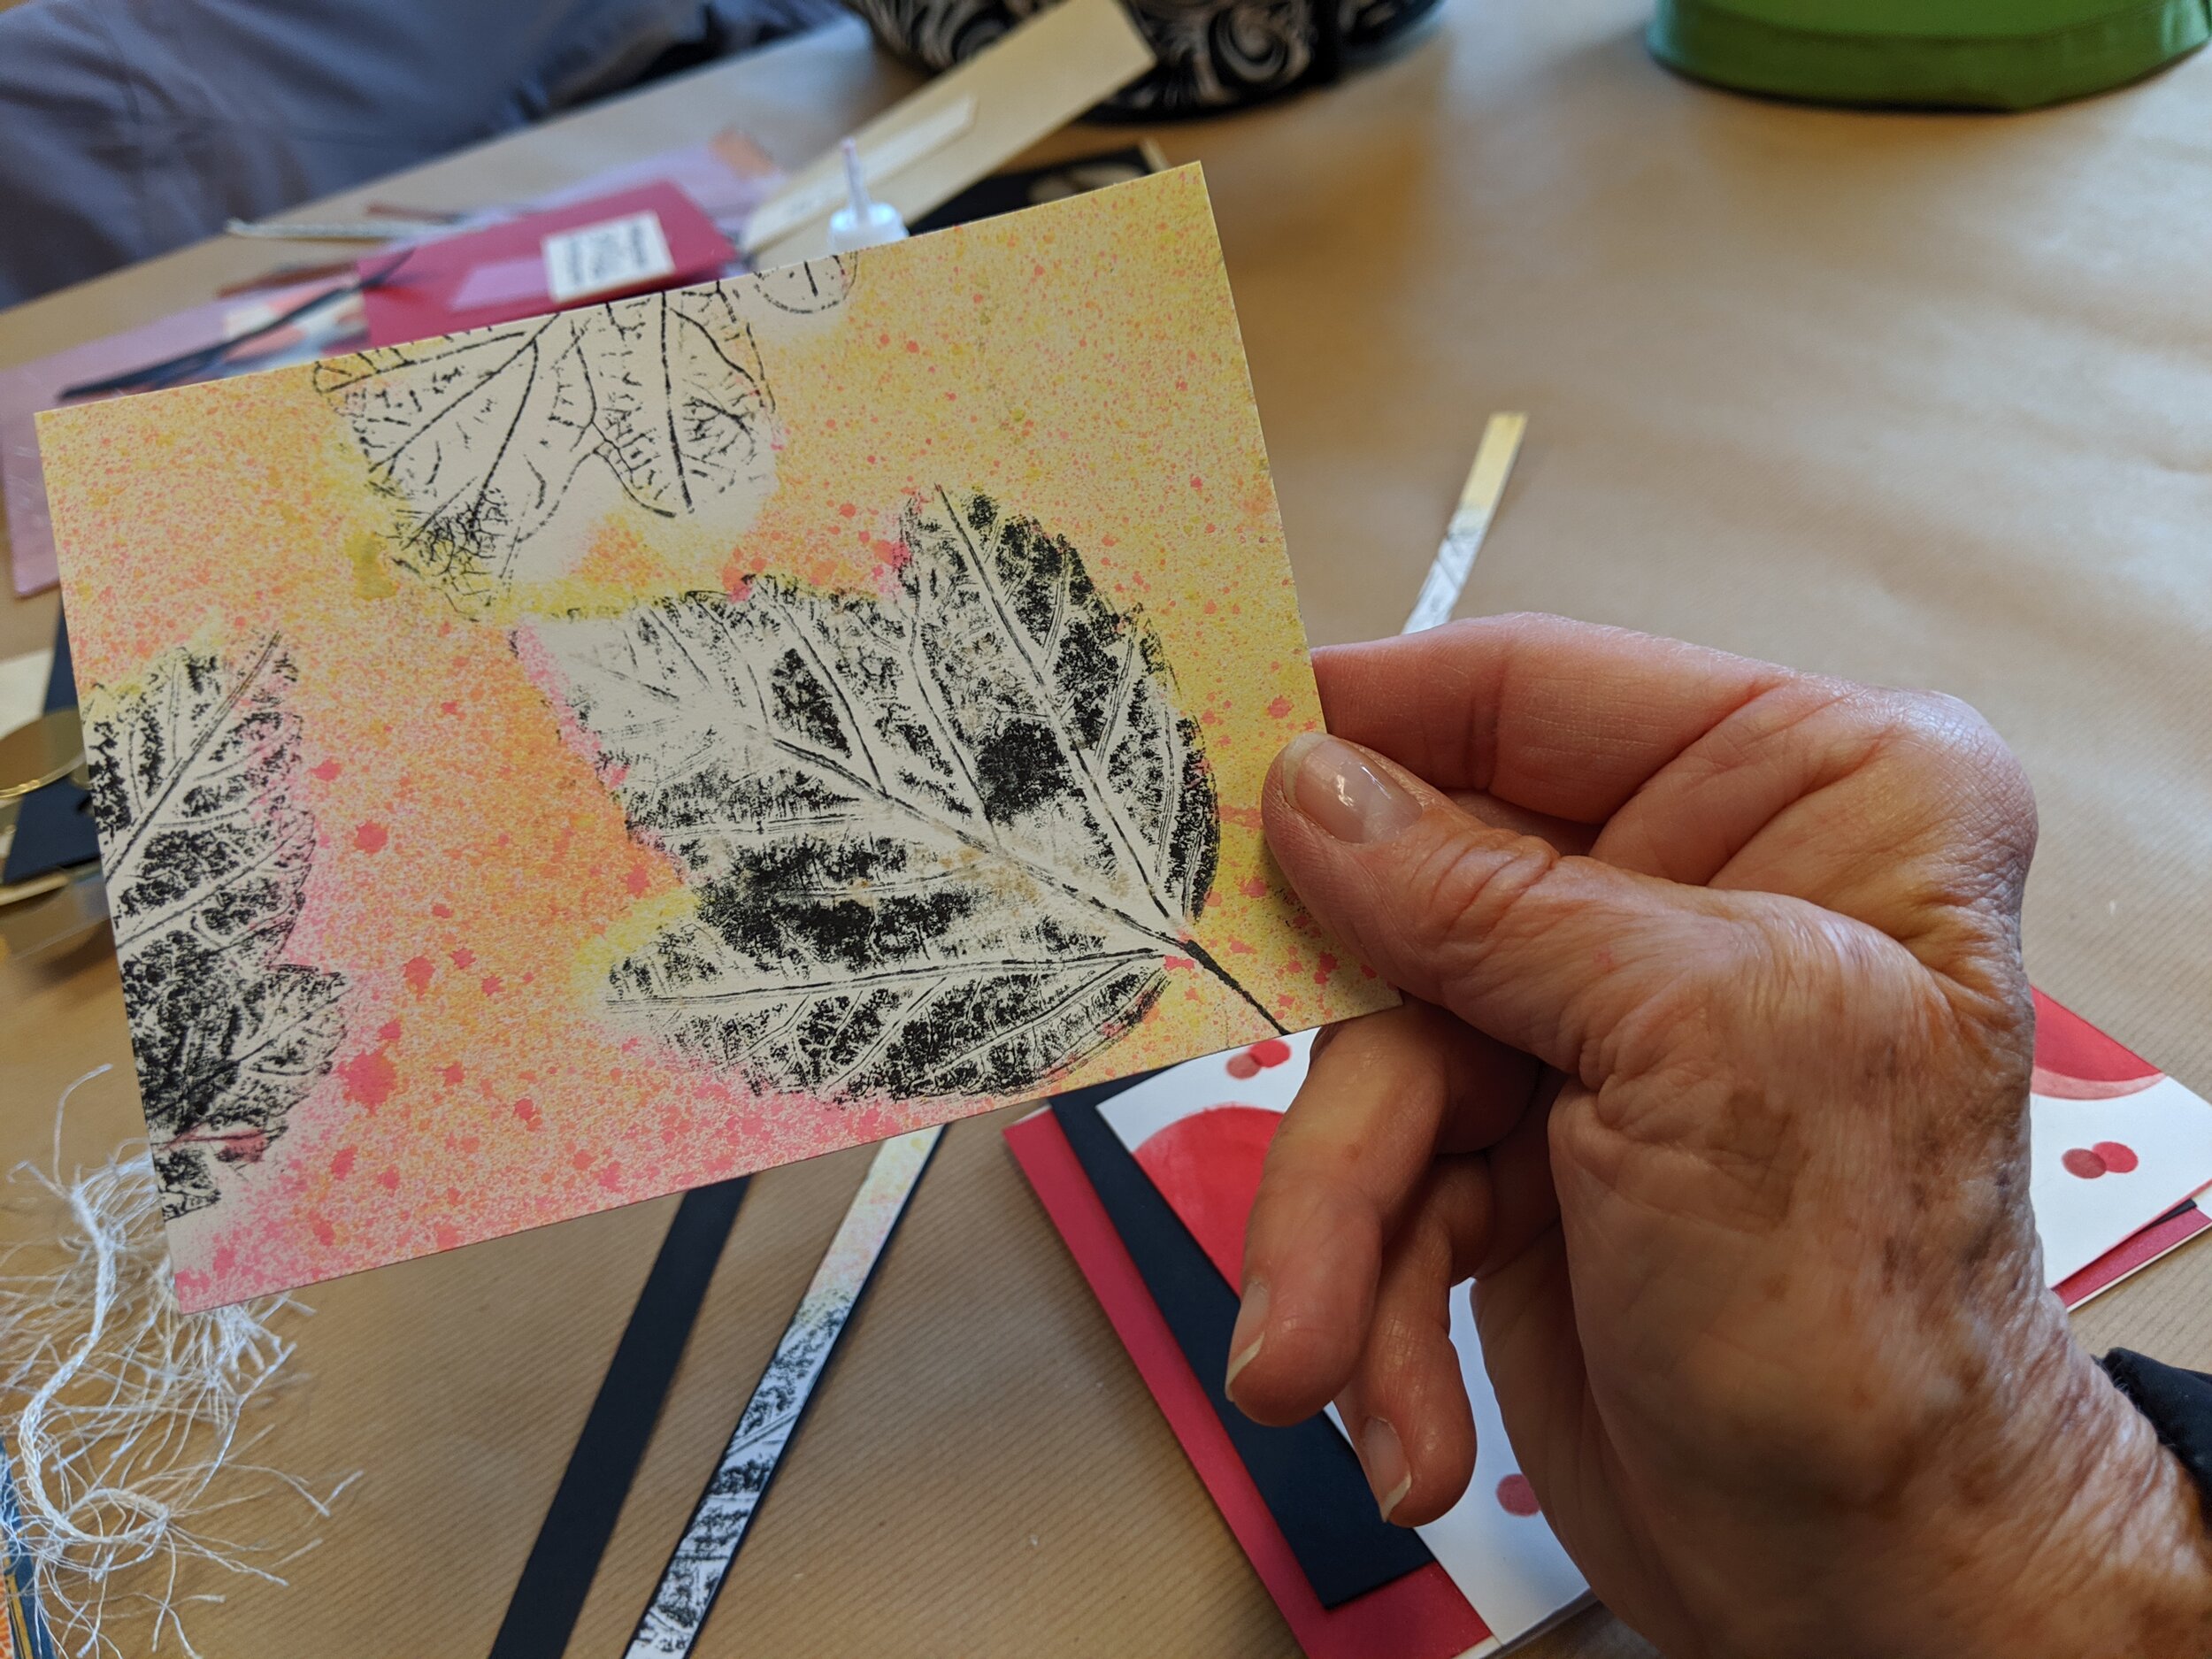
The first card we made was inspired from Altenew Liquid Watercolor, Crimson, as well as Distress Oxide Spray ink, Squeezed Lemonade and some leaves we found outside!!
To make the card:
Start out with a piece of Solar White card stock
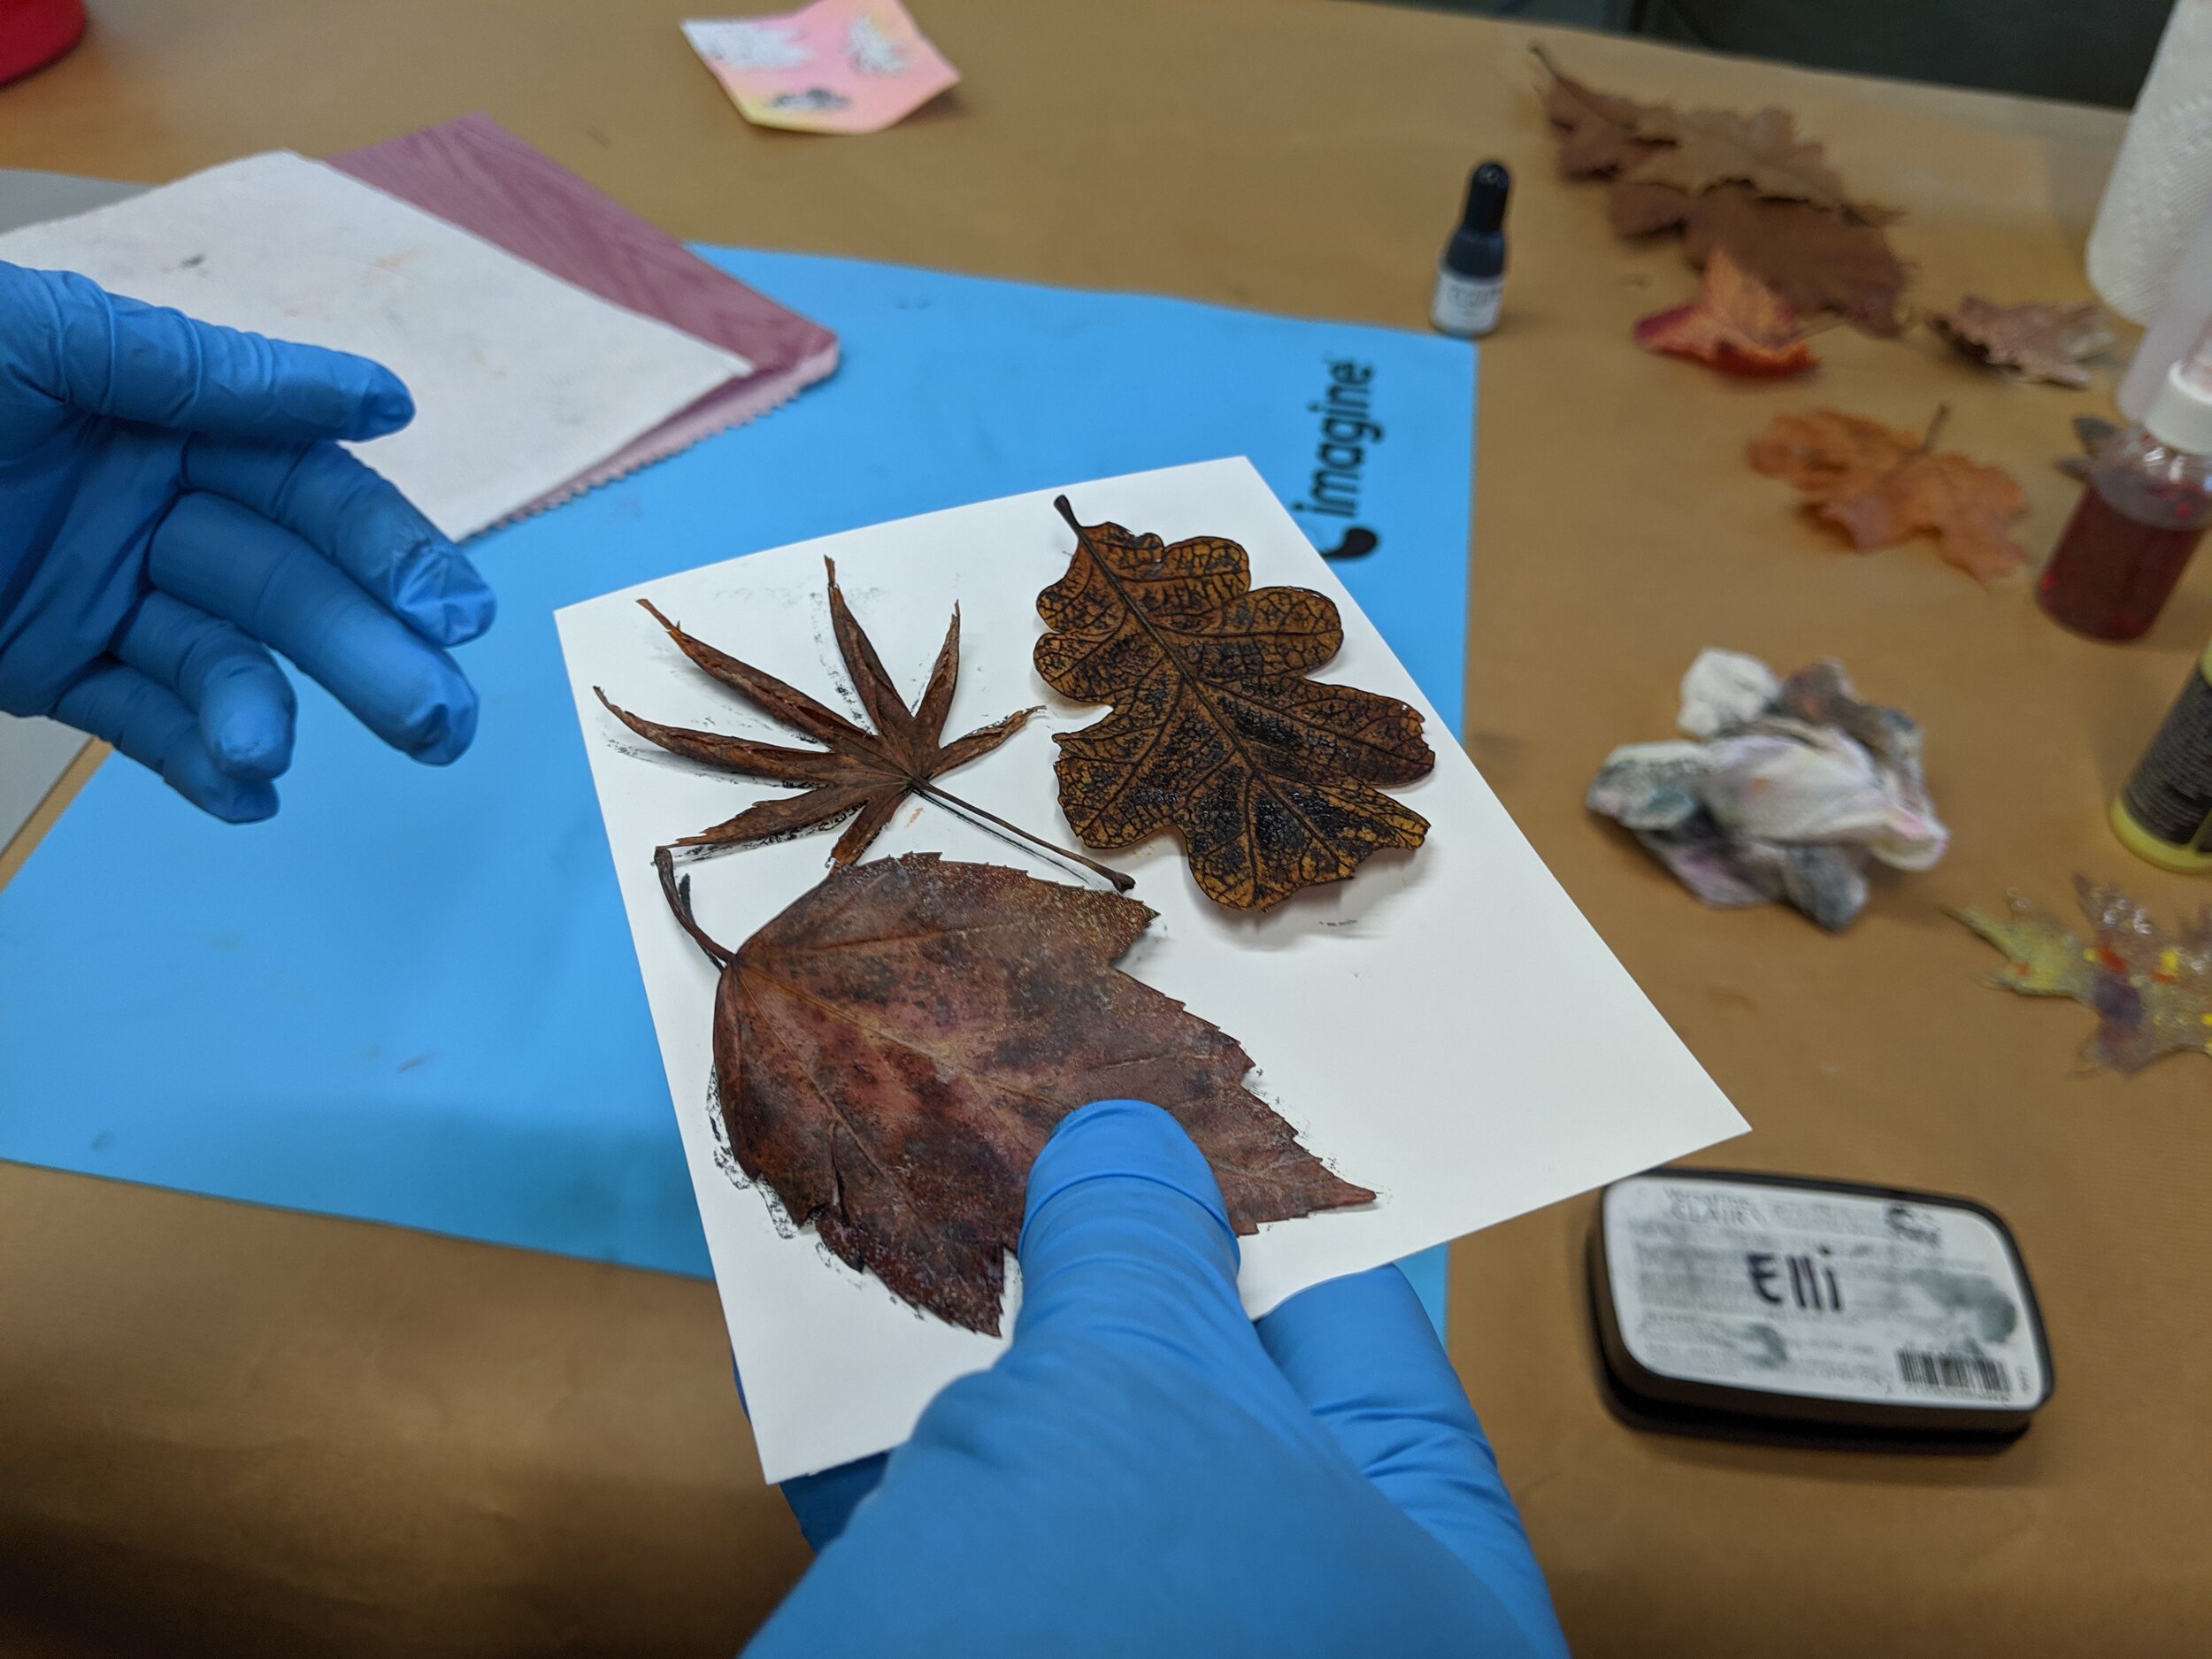
Use Versafine Clair Nocturne ink and apply ink to some leaves (If you are using FRESH leaves, make sure they are fully dried. You can press leaves between the pages of a heavy book while they dry out and THEN do this technique)
Once you’ve applied the ink to the leaves, lift them up and apply them onto your piece of Solar White card stock. Lay a paper towel on top of that, then lay a piece of card stock (or paper) on TOP of the paper towel and then press down evenly on all the leaves so that the leaf images transfer onto your paper
NOW keep the leaves in place and apply spray inks. I MADE A SPRAY INK by adding 50 drops of the Liquid Watercolors into a spray bottle and added water.
I spritzed my paper with the dye-based ink (that I just made) FIRST then I spritzed the paper with the Oxide Ink and removed the leaves. What you are left with are beautiful leaf impressions with the ink colors all around them.
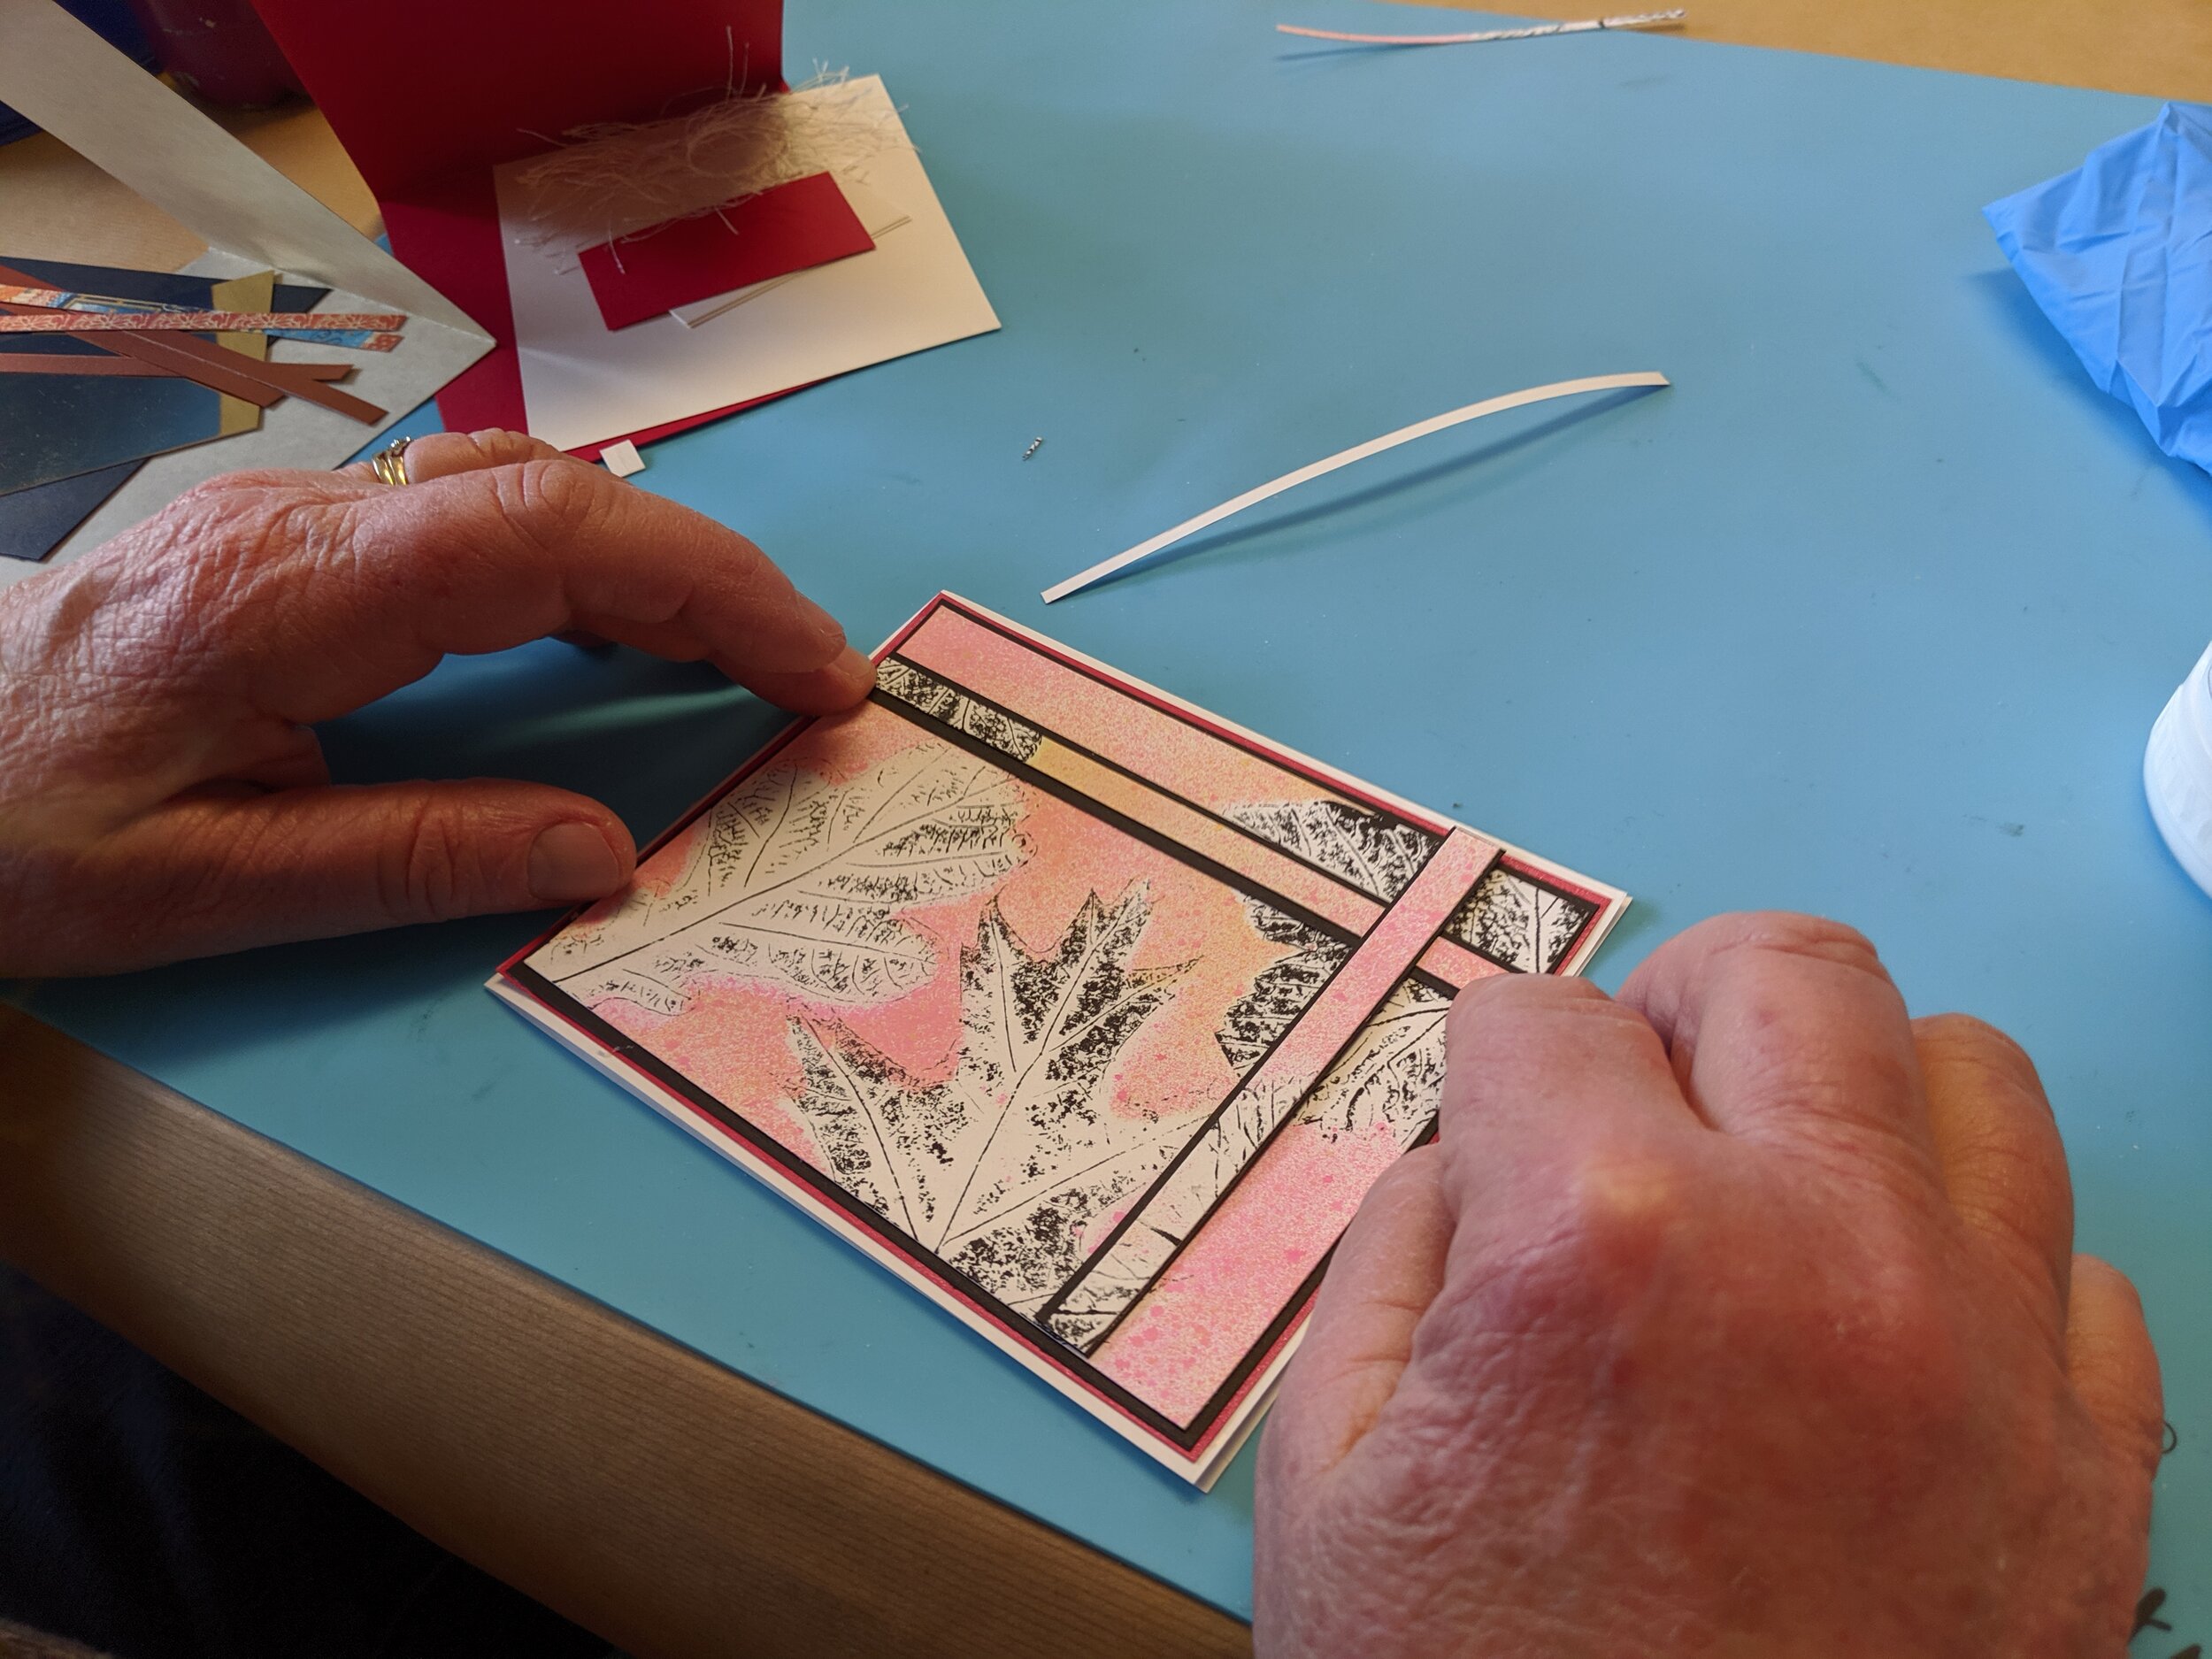
I trimmed the edges of the image off and mounted those scraps on strips of black paper and put them in a fun criss-cross on the front of the card.
I mounted the leaf image onto a piece of black paper, then red paper, and mounted the entire thing onto a white card stock base.
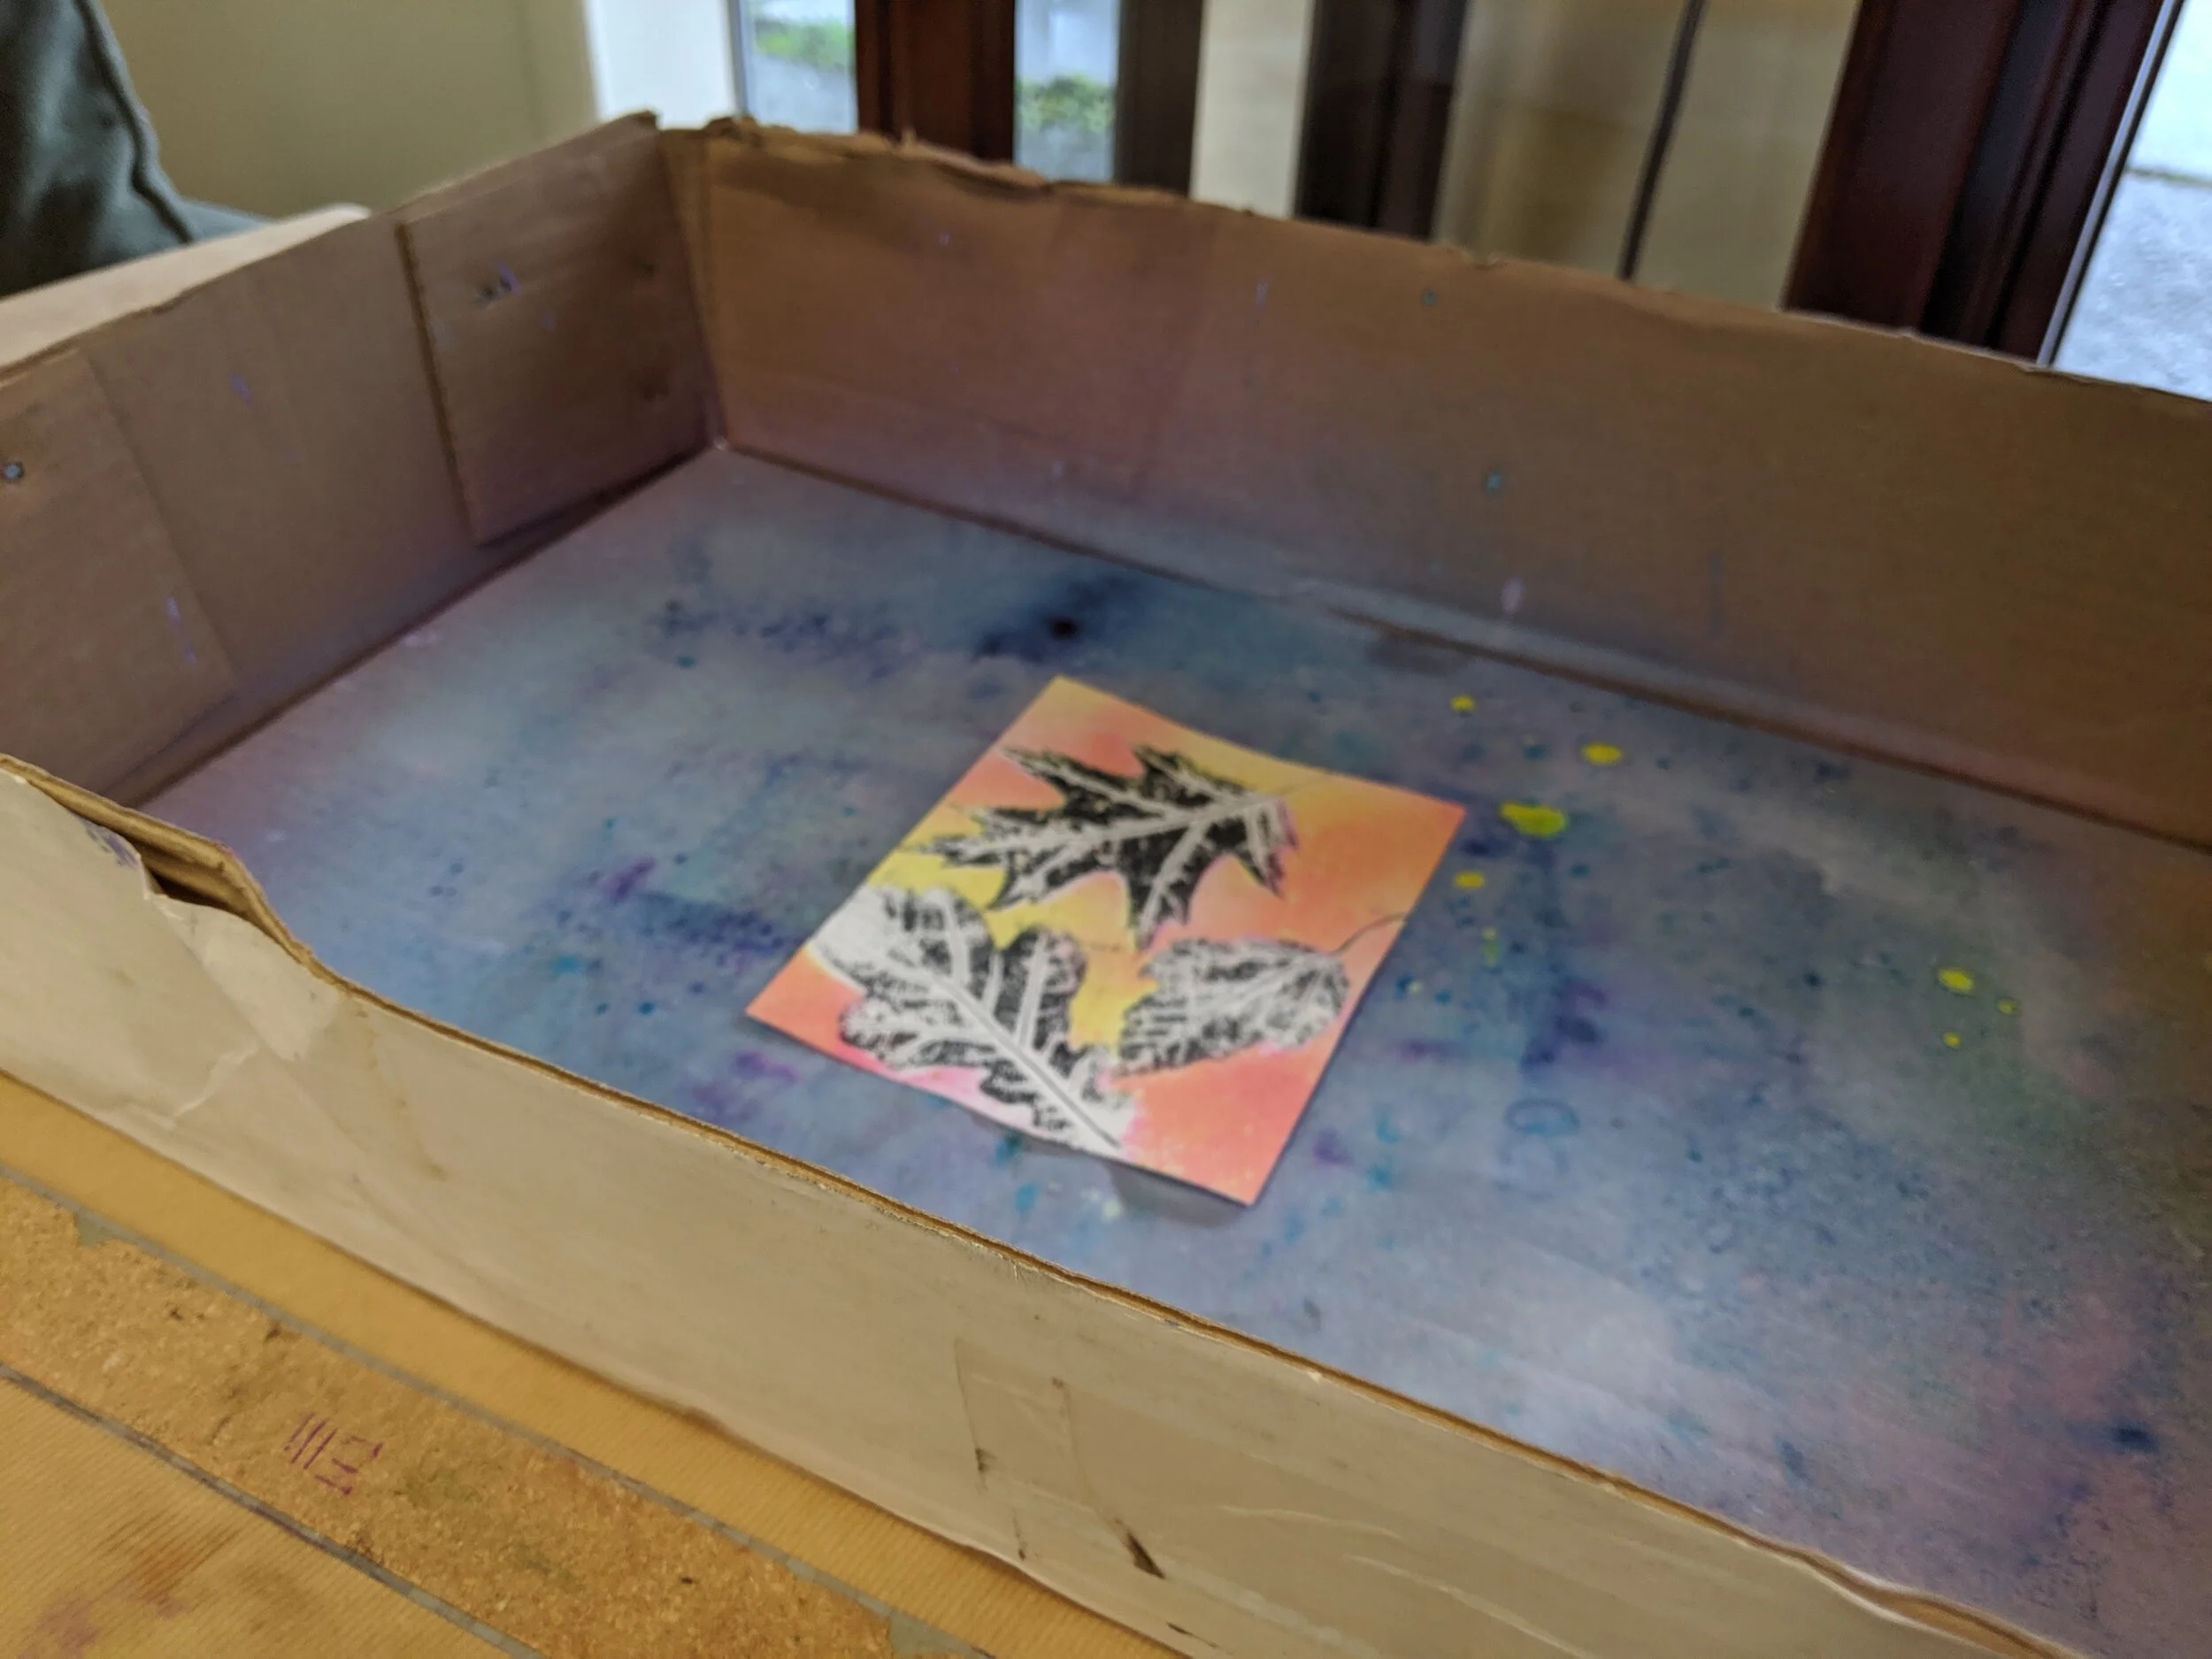
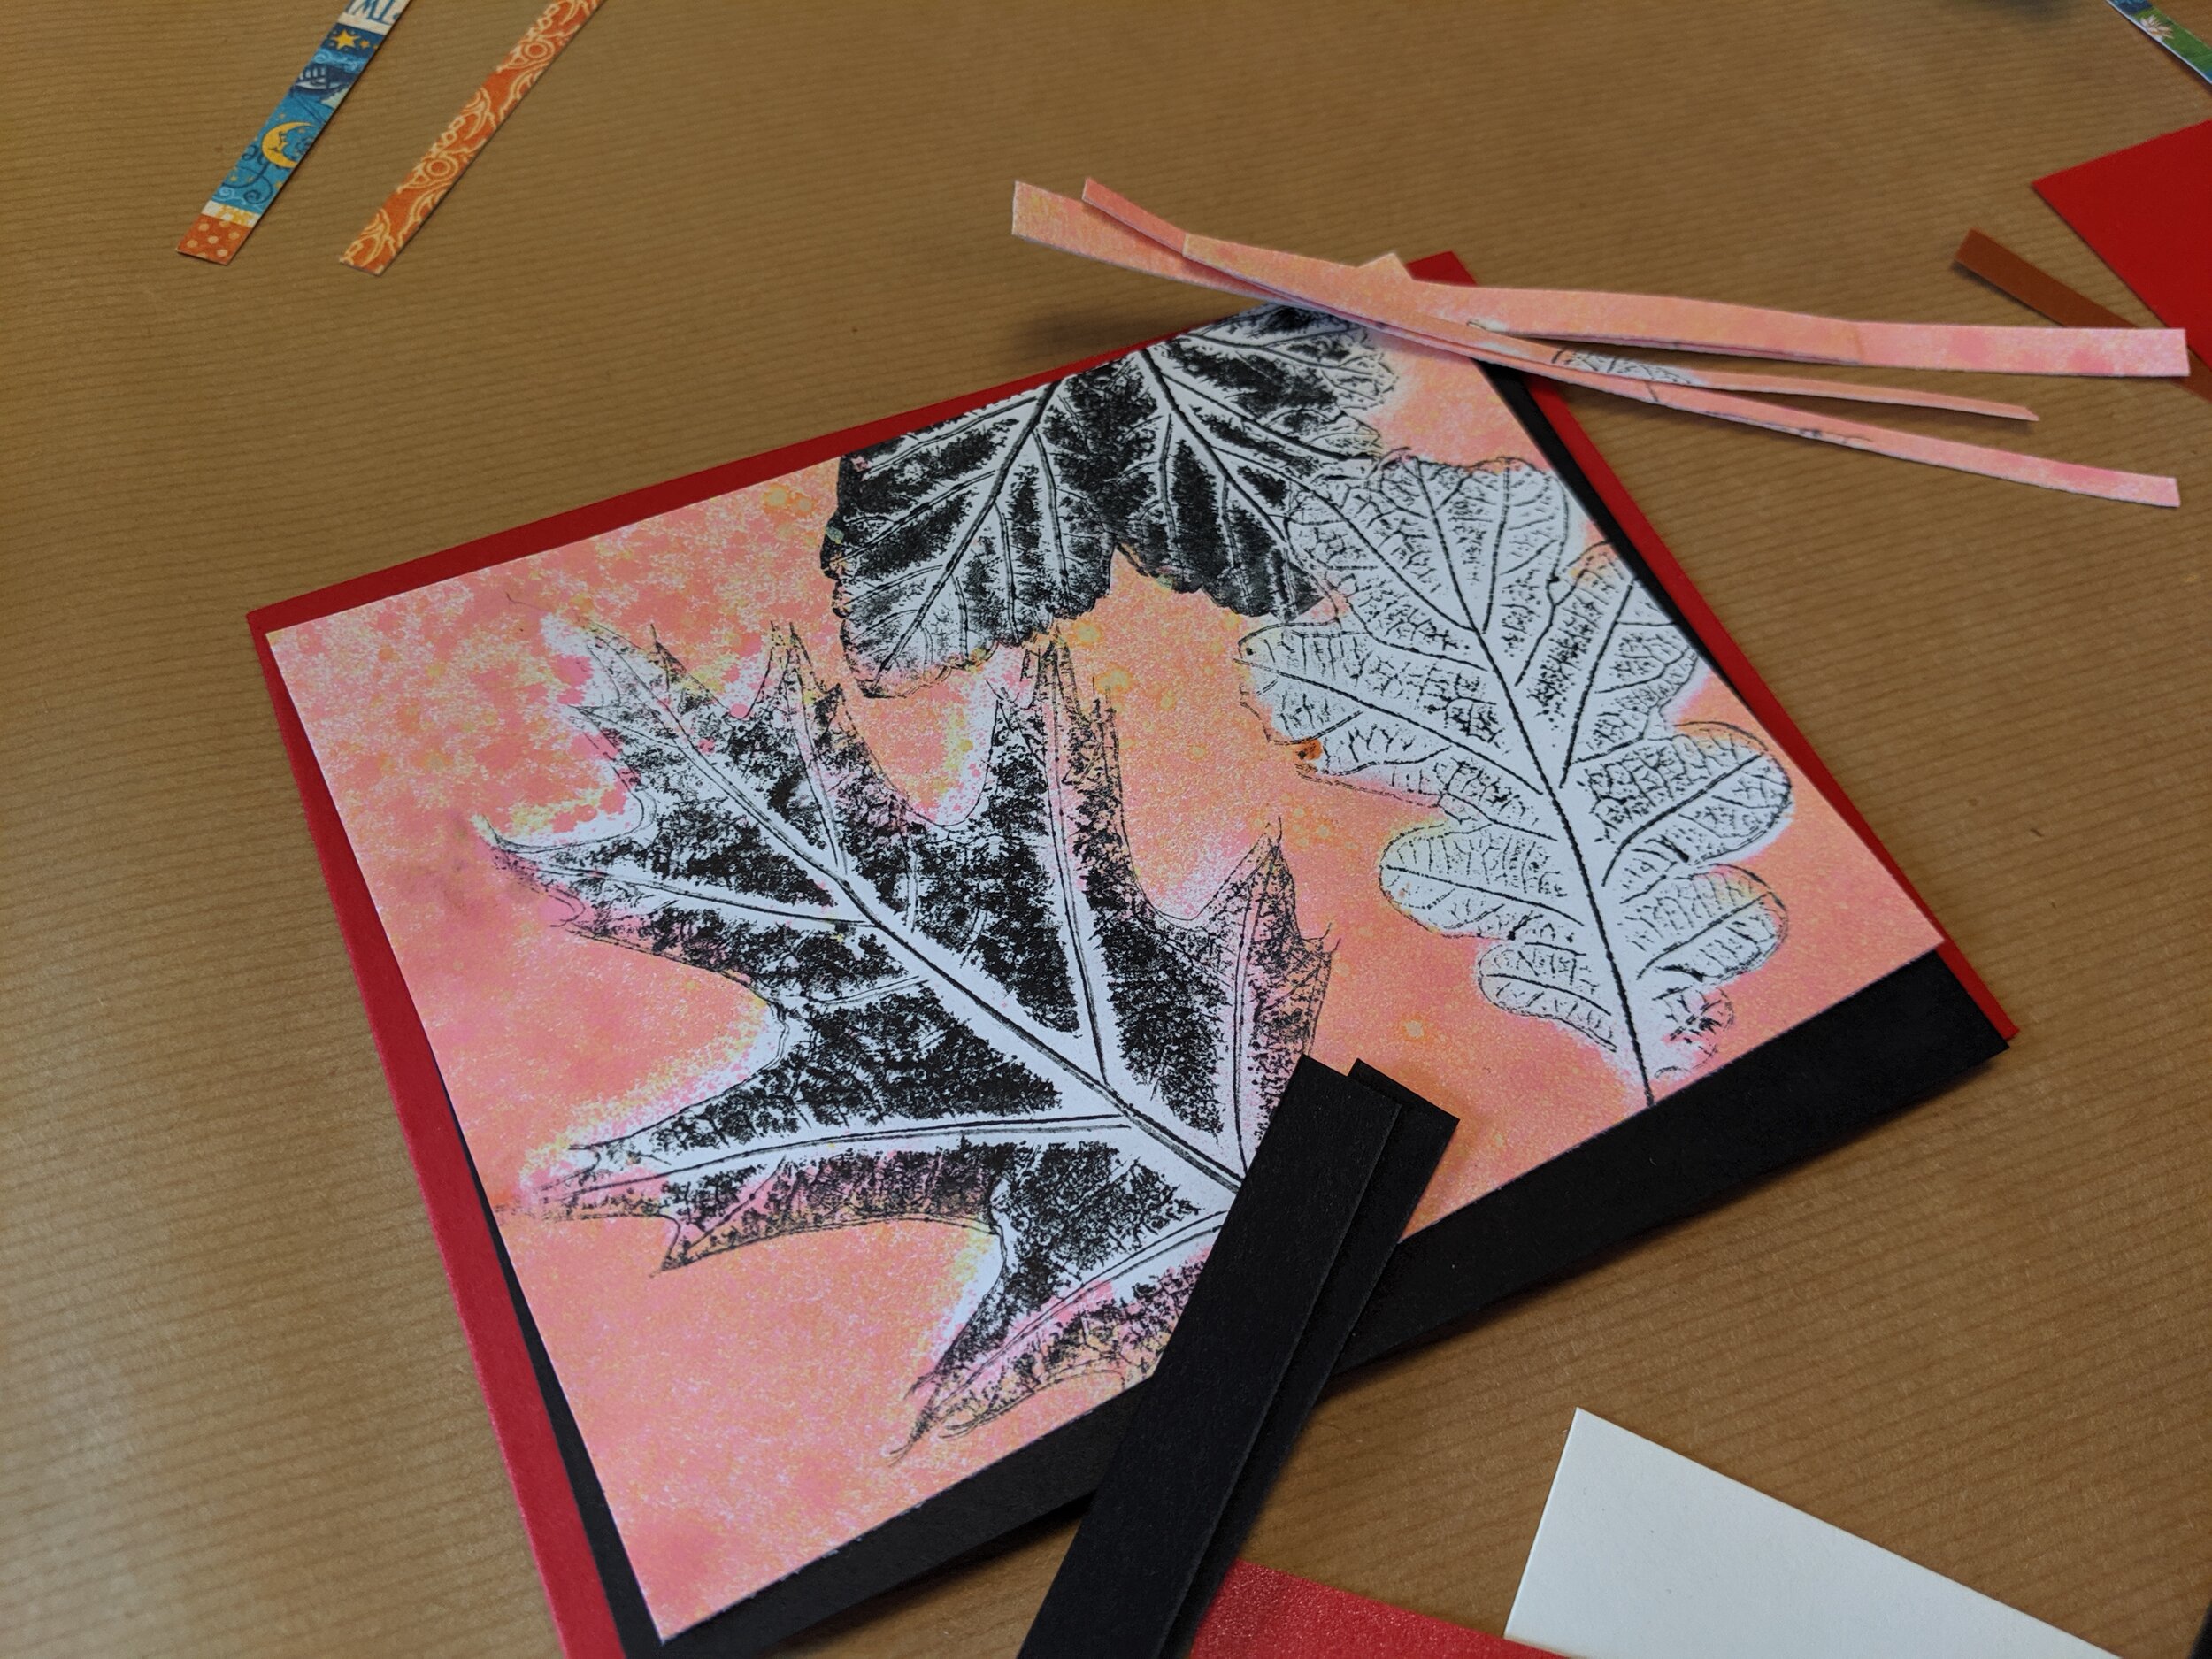
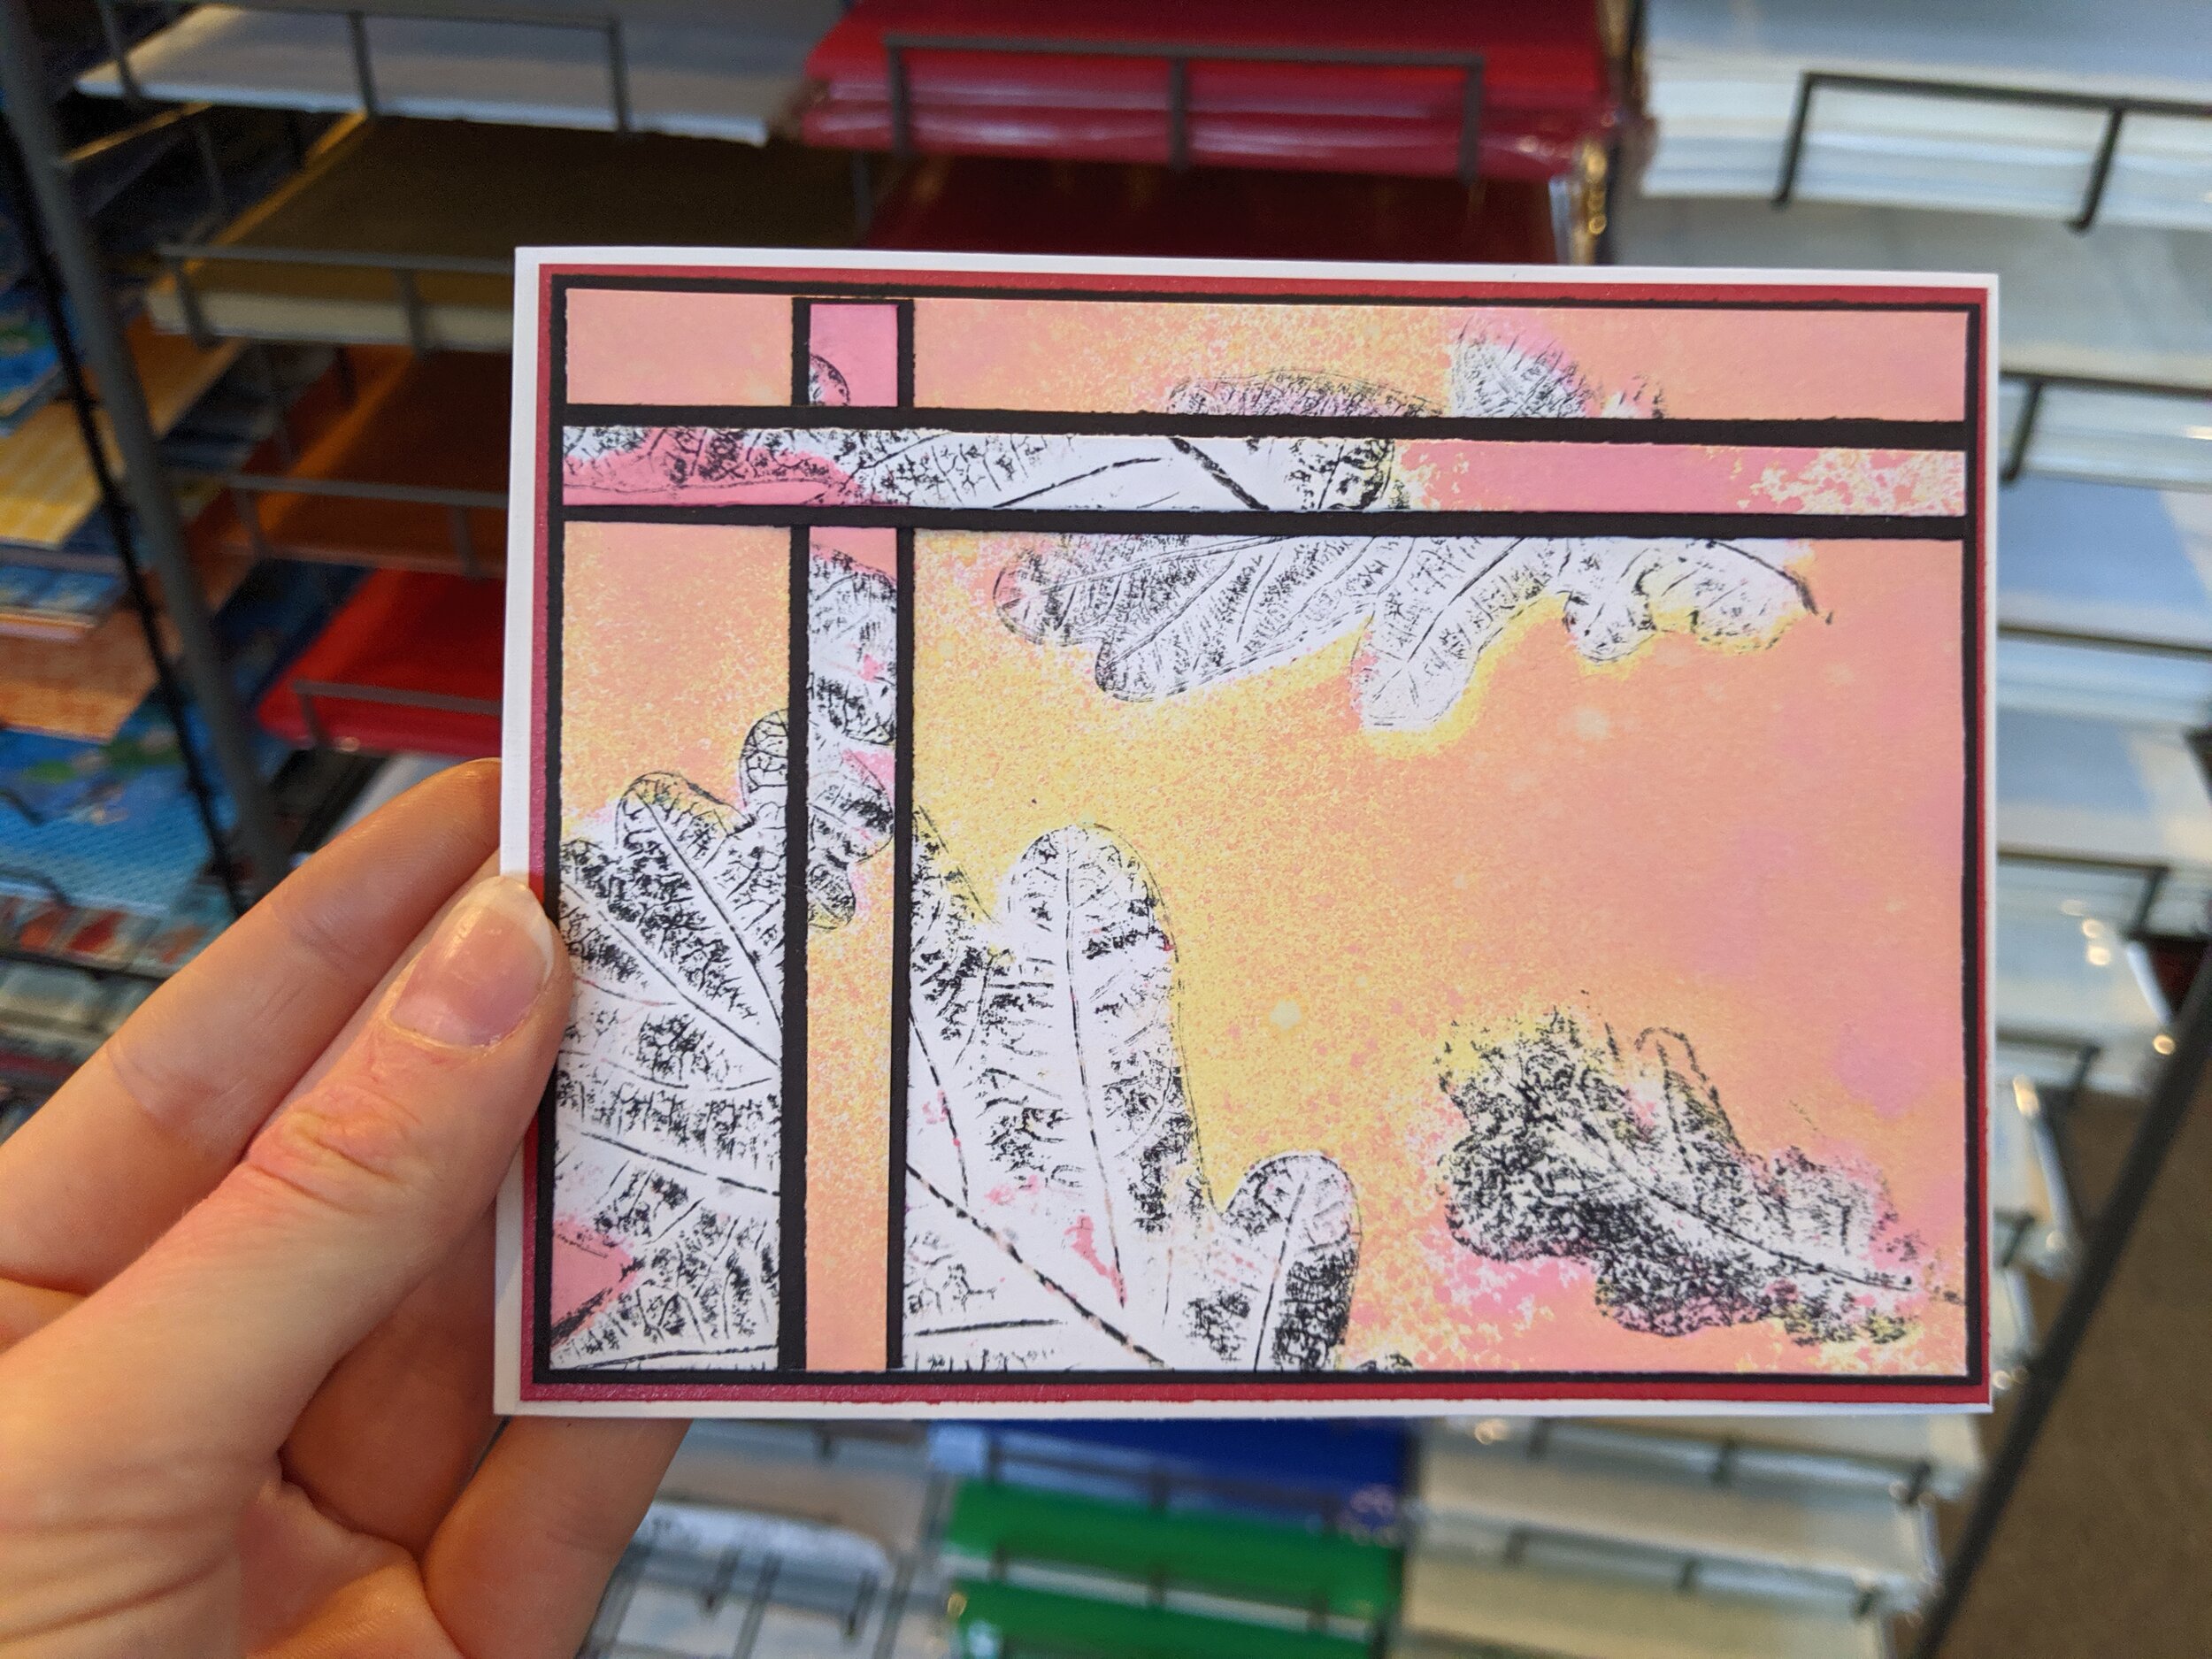
I love how fun this card is!!! We used a variety of different leaves in class so it was fun to see how everyone’s came out a little different.

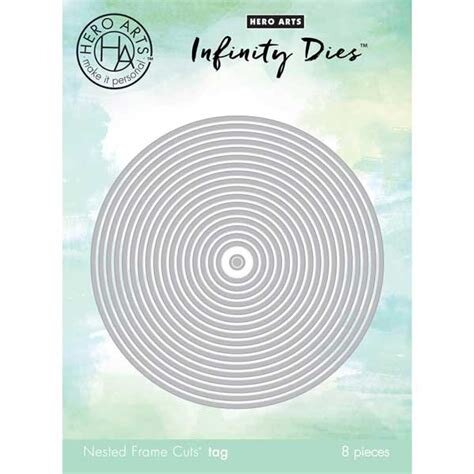
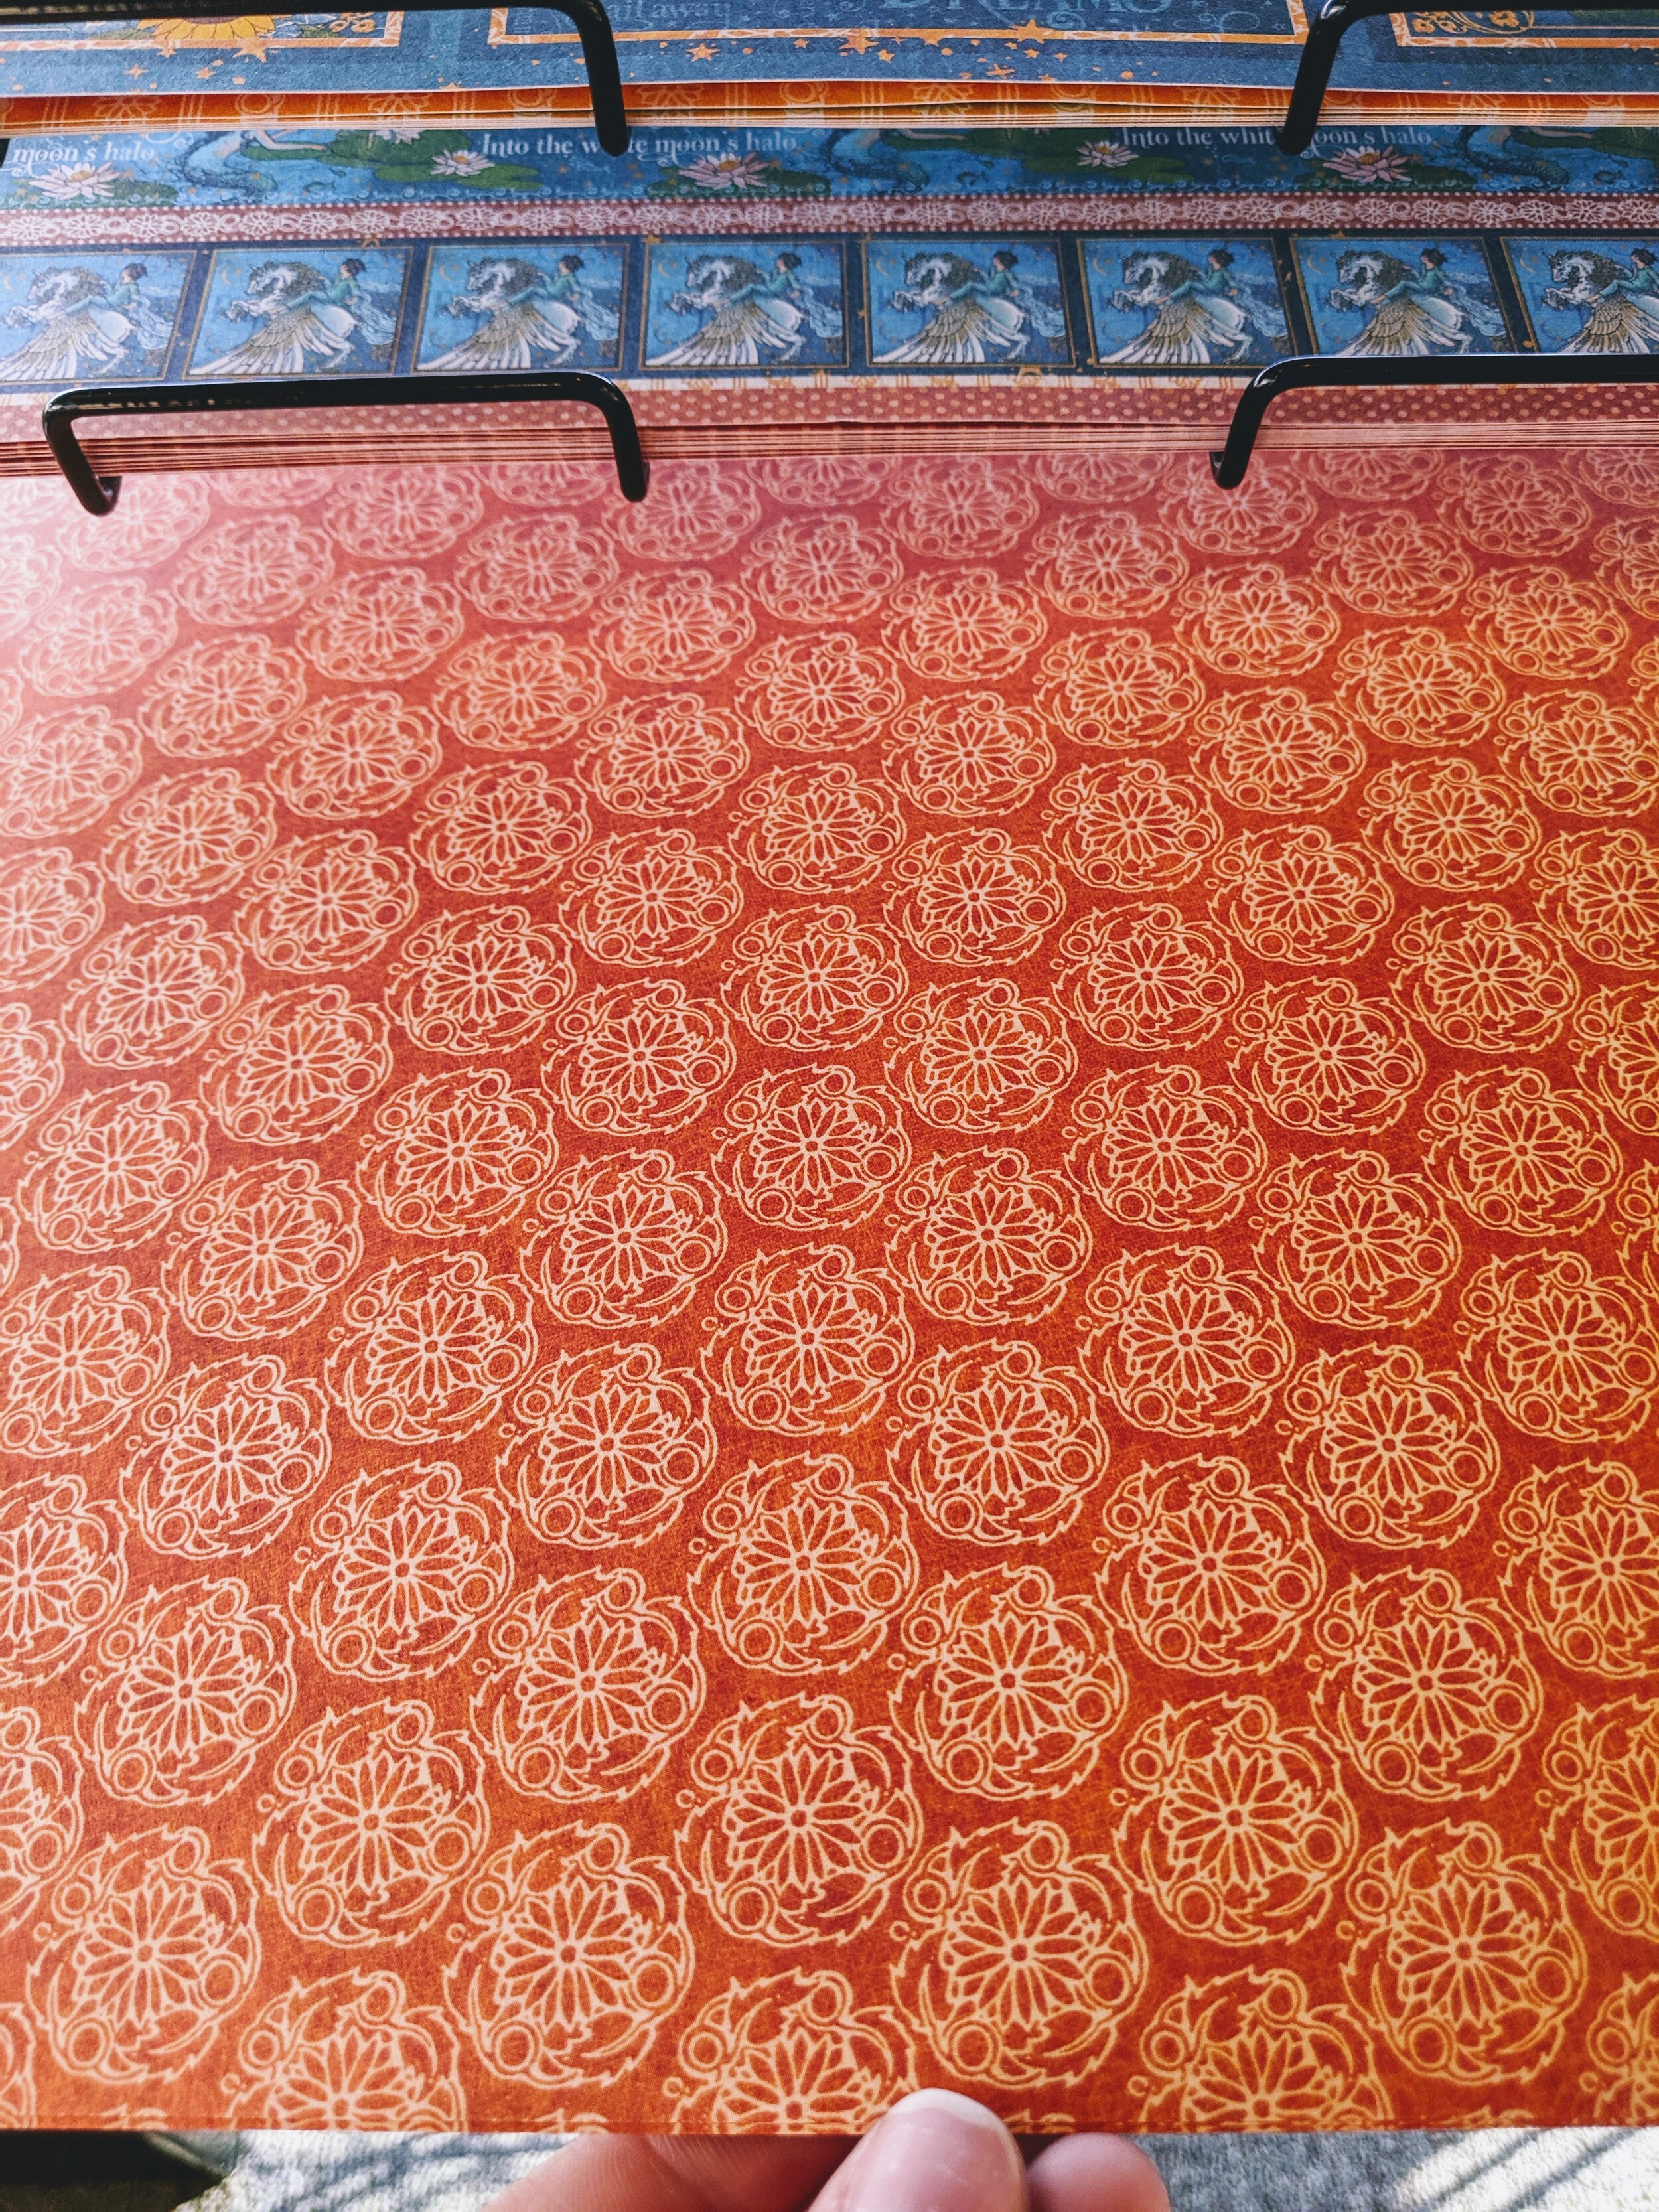
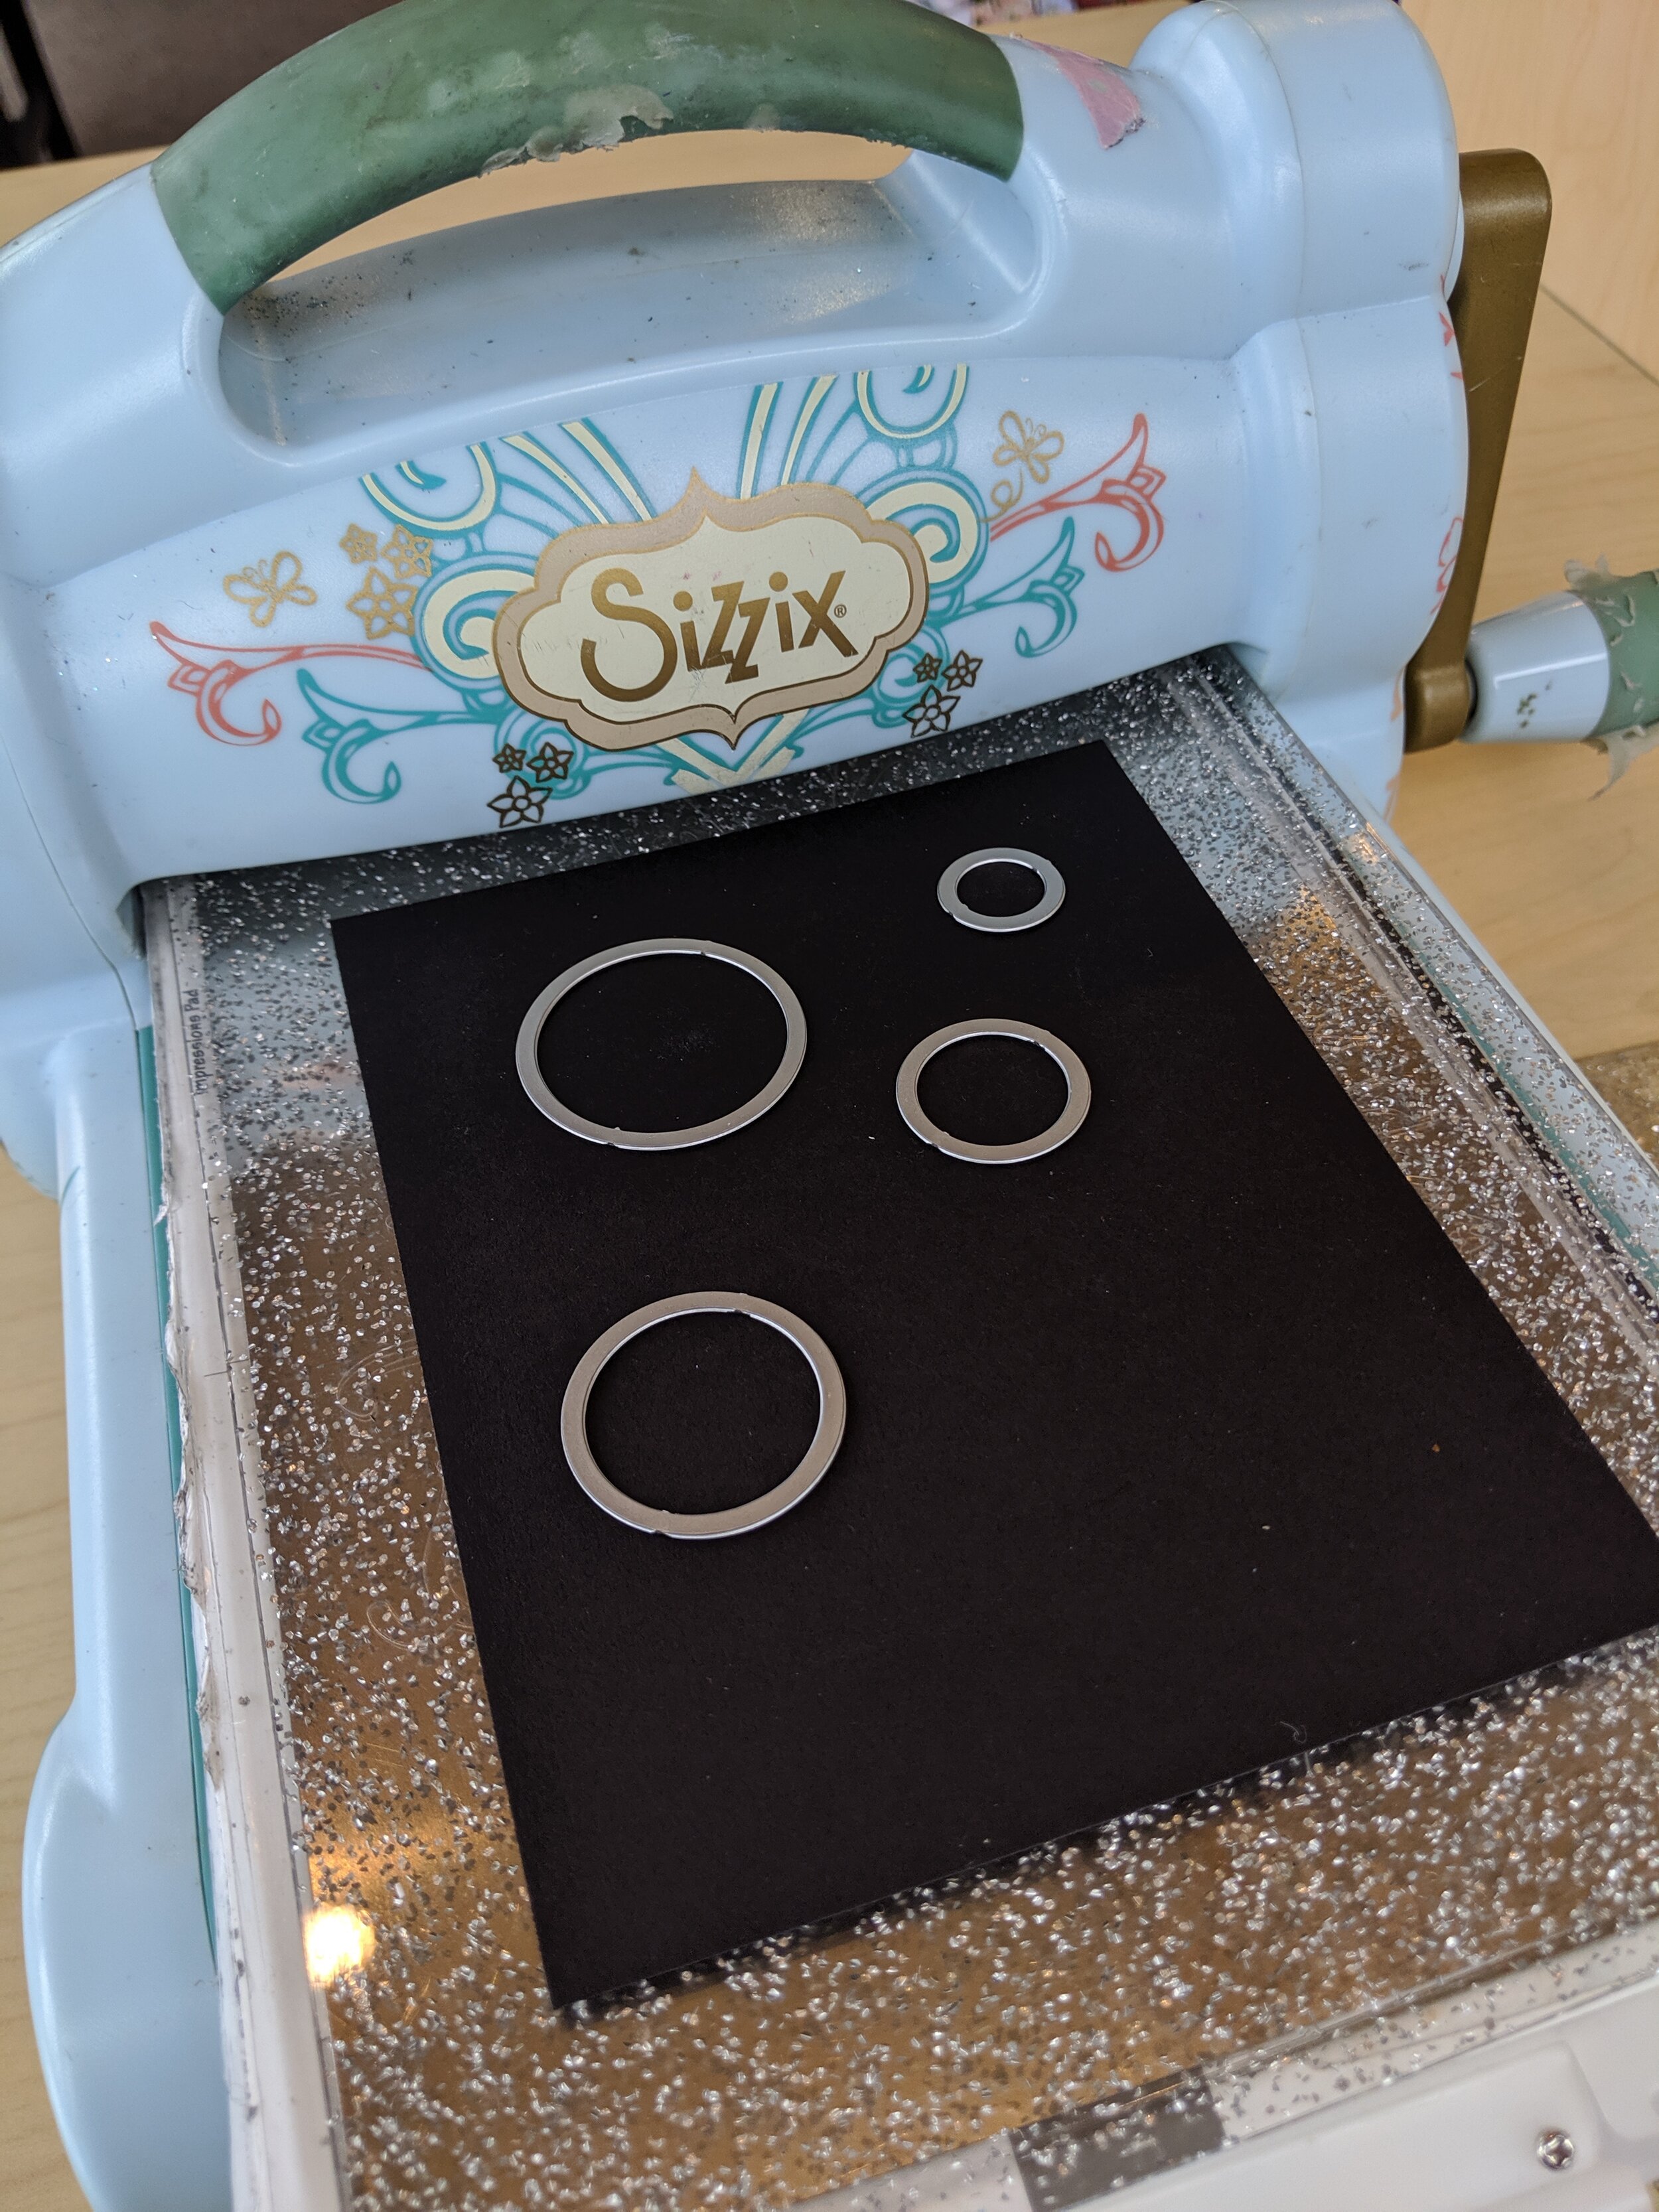
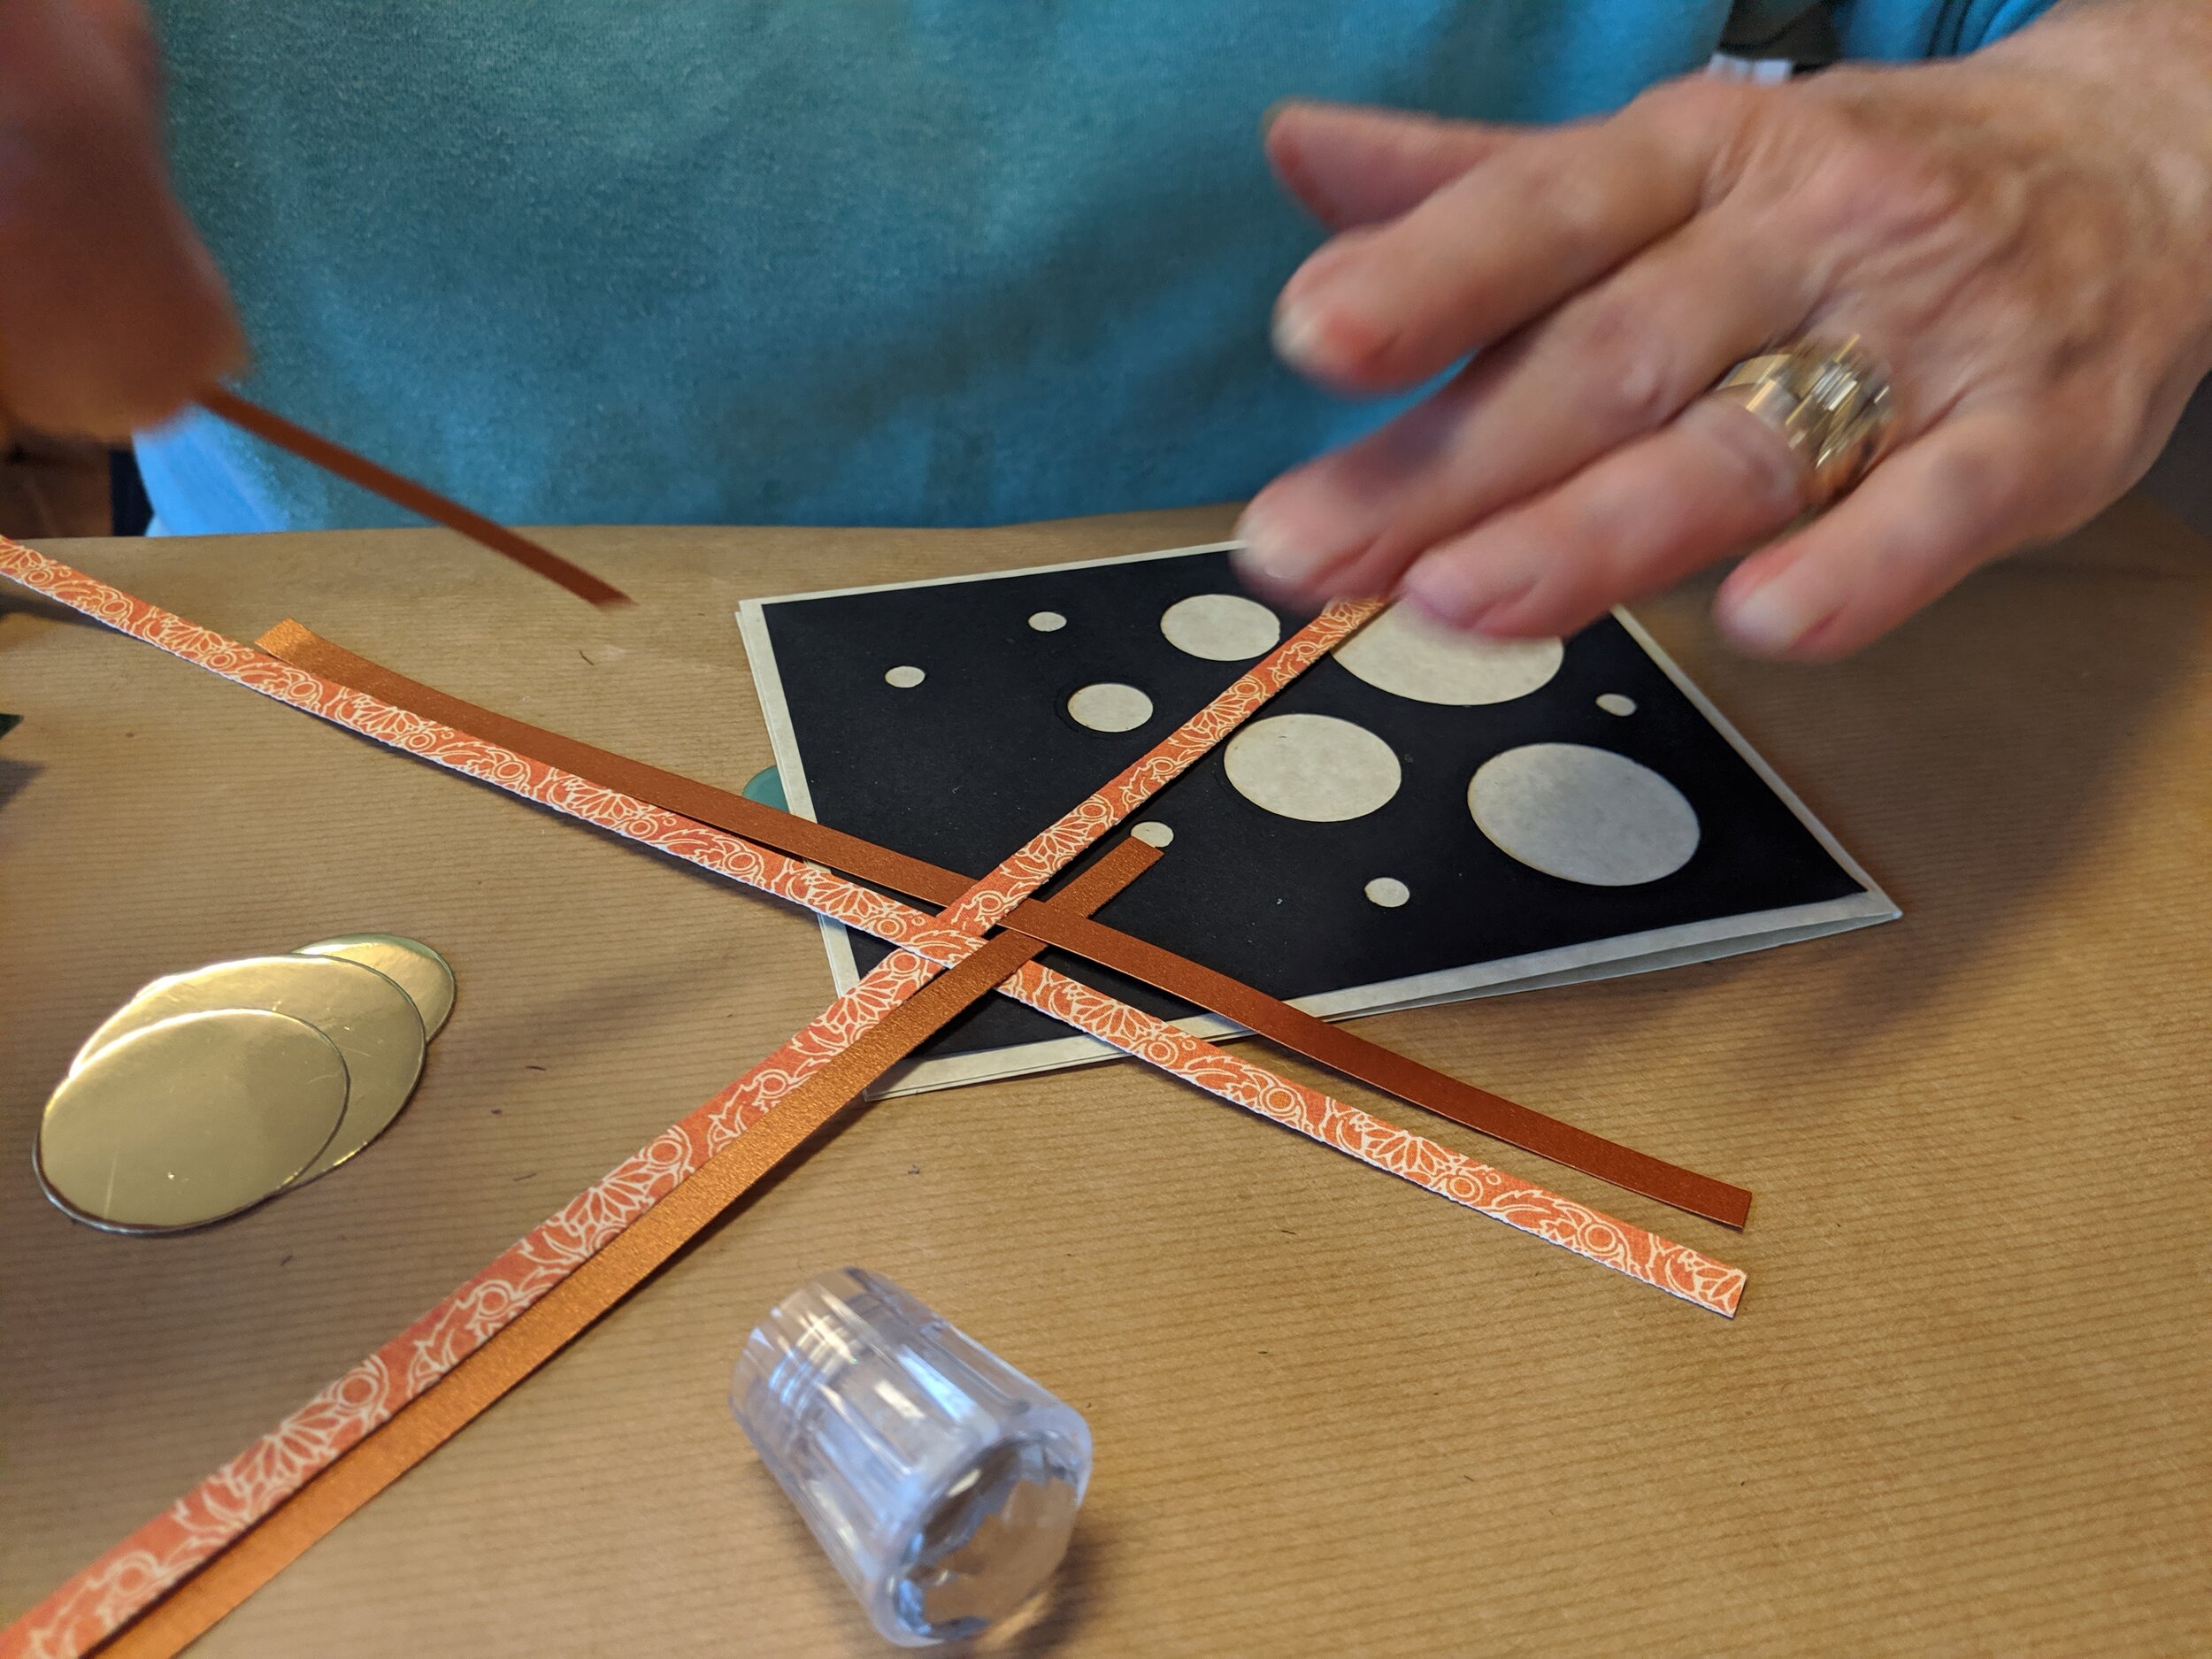
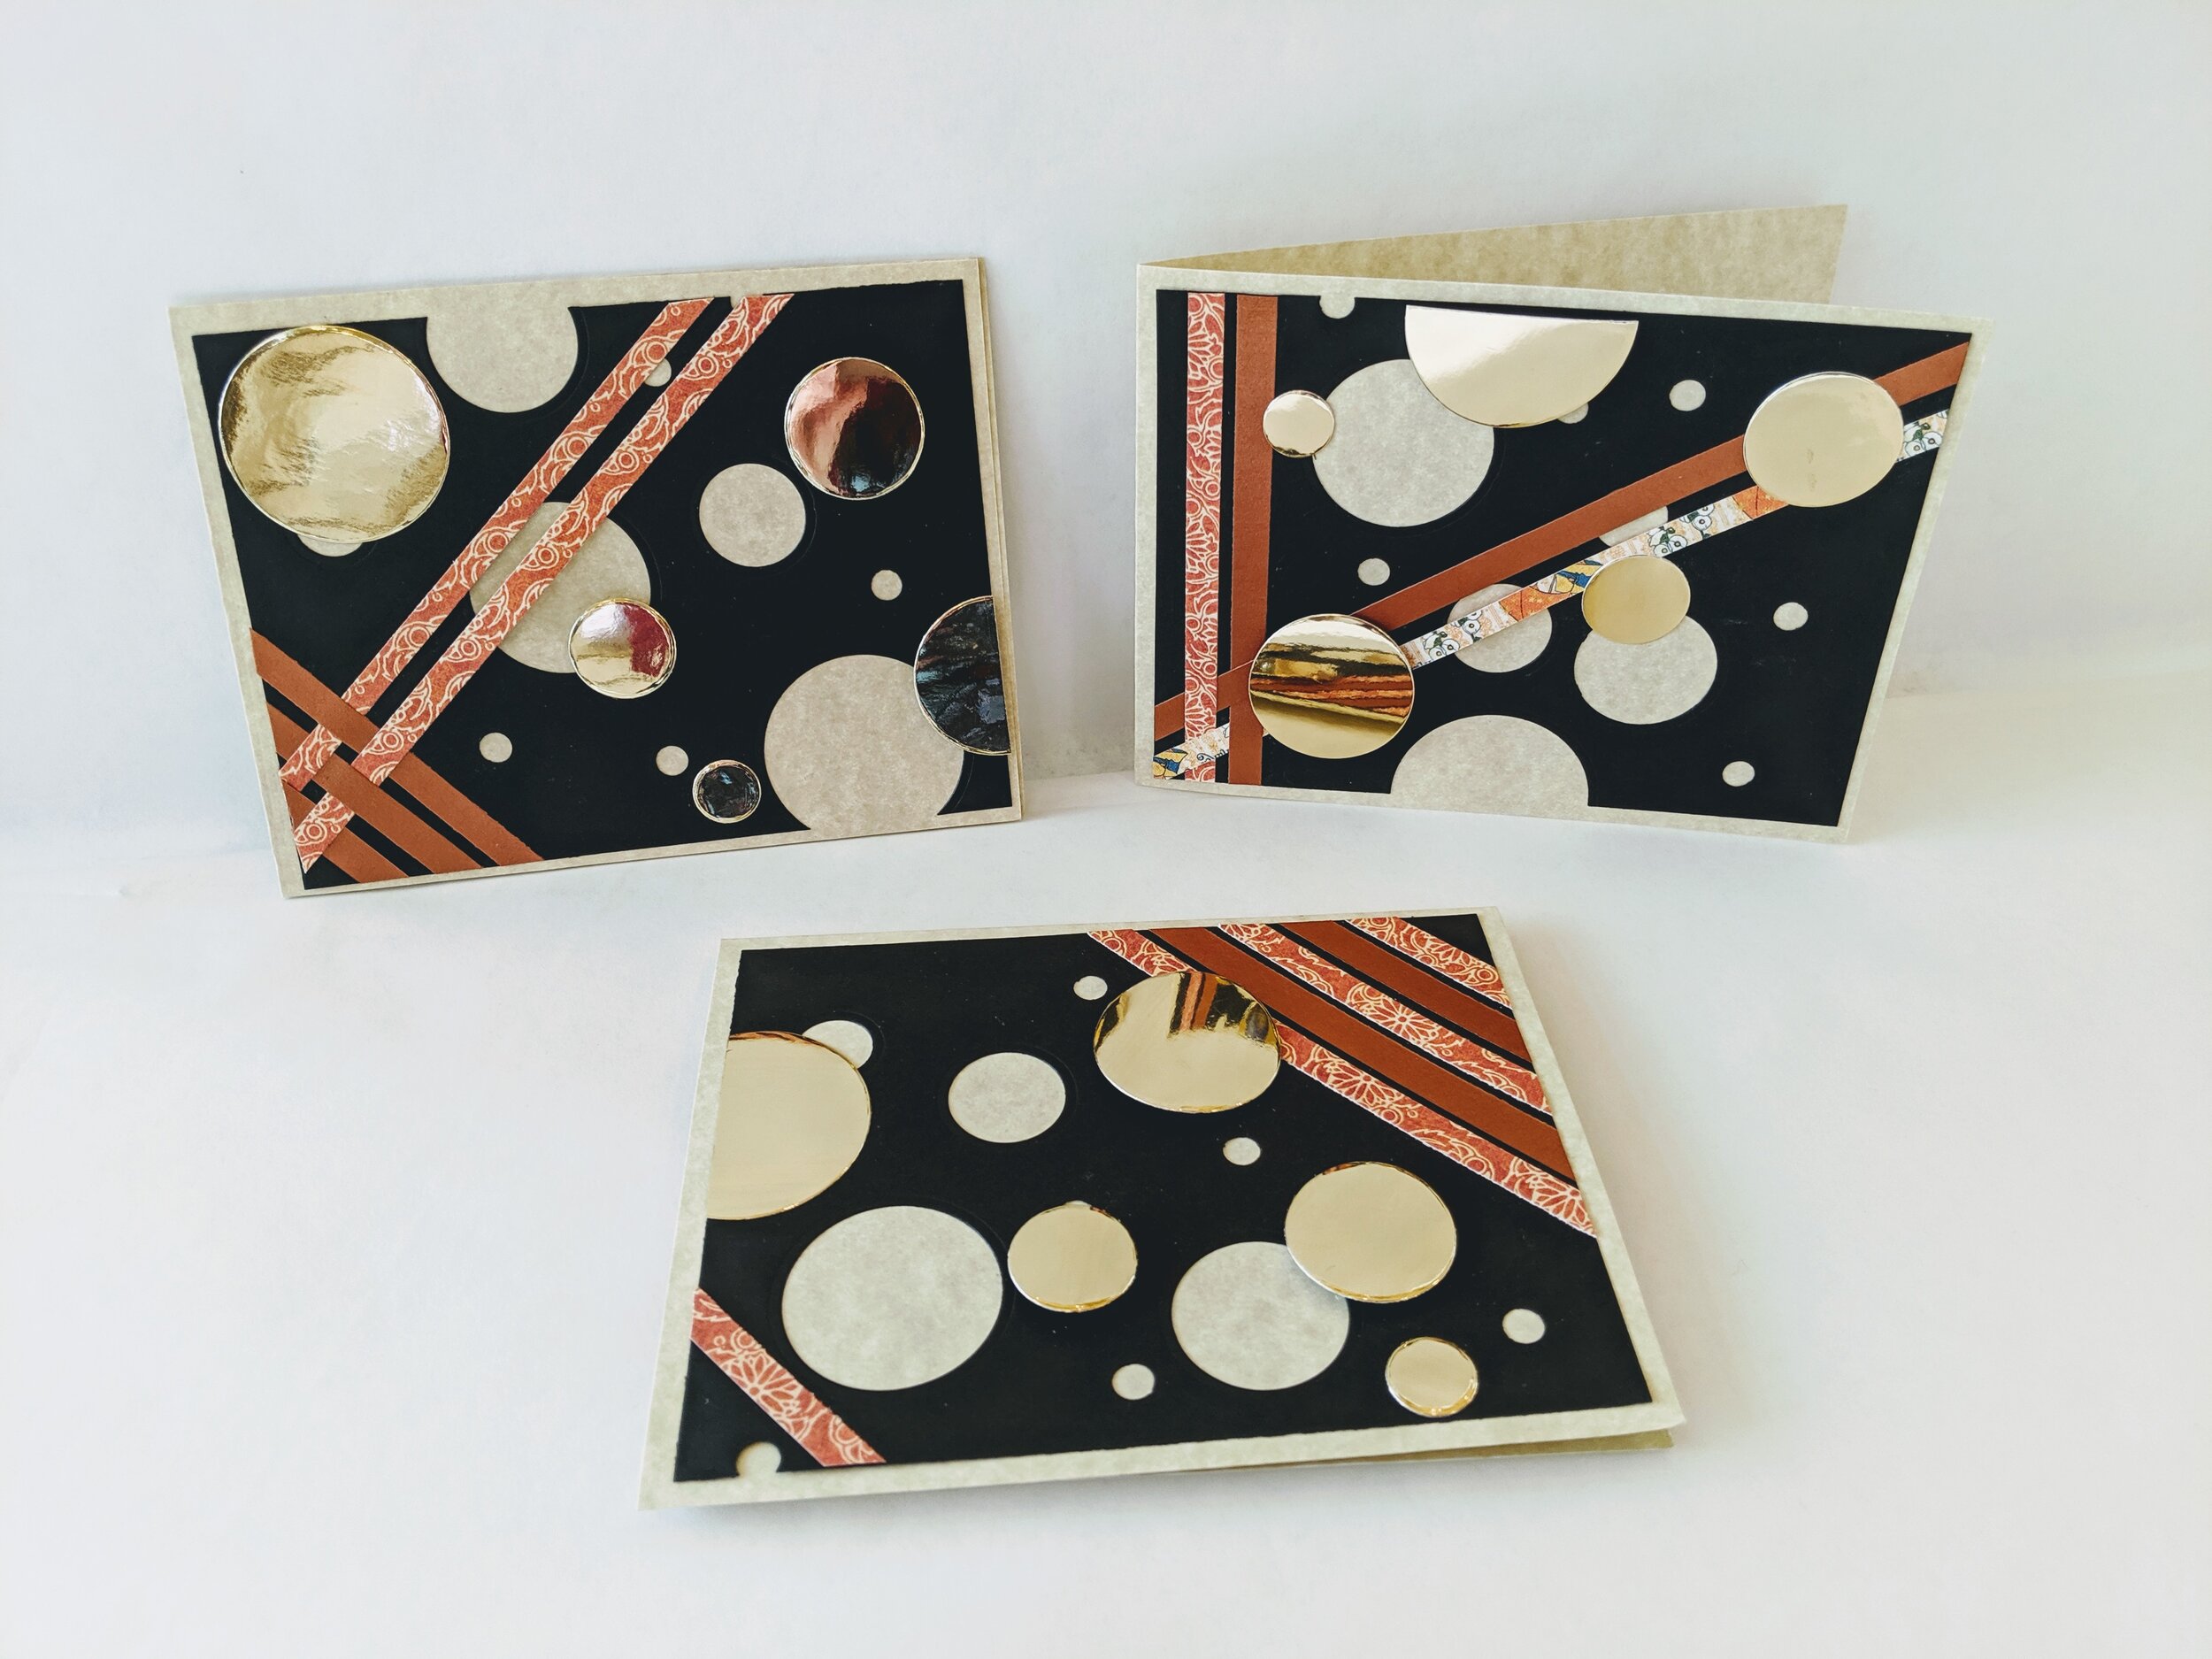
This next card was made using the Hero Arts Nesting Infinity Circles as well as this paper from Graphic 45
To make the card:
Start out by cutting circles out of a piece of black card stock. (I arranged them in a fun way so they are not clustered together
I mounted the black paper (now with circles cut out) on the front of my card base (the card base looks like parchment paper and is card stock) using Nuvo Deluxe Adhesive.
THEN I cut 1/4” strips of copper paper and the Graphic 45 paper. I adhered the strips to the front of my card in an interesting way. You can weave the strips, or lay them next to eachother… there are MANY possibilities
To finish off the card, I cut out some more circles from a piece of Gold Mirri-Card paper and mounted them on the front of my card using pop-dots on some.
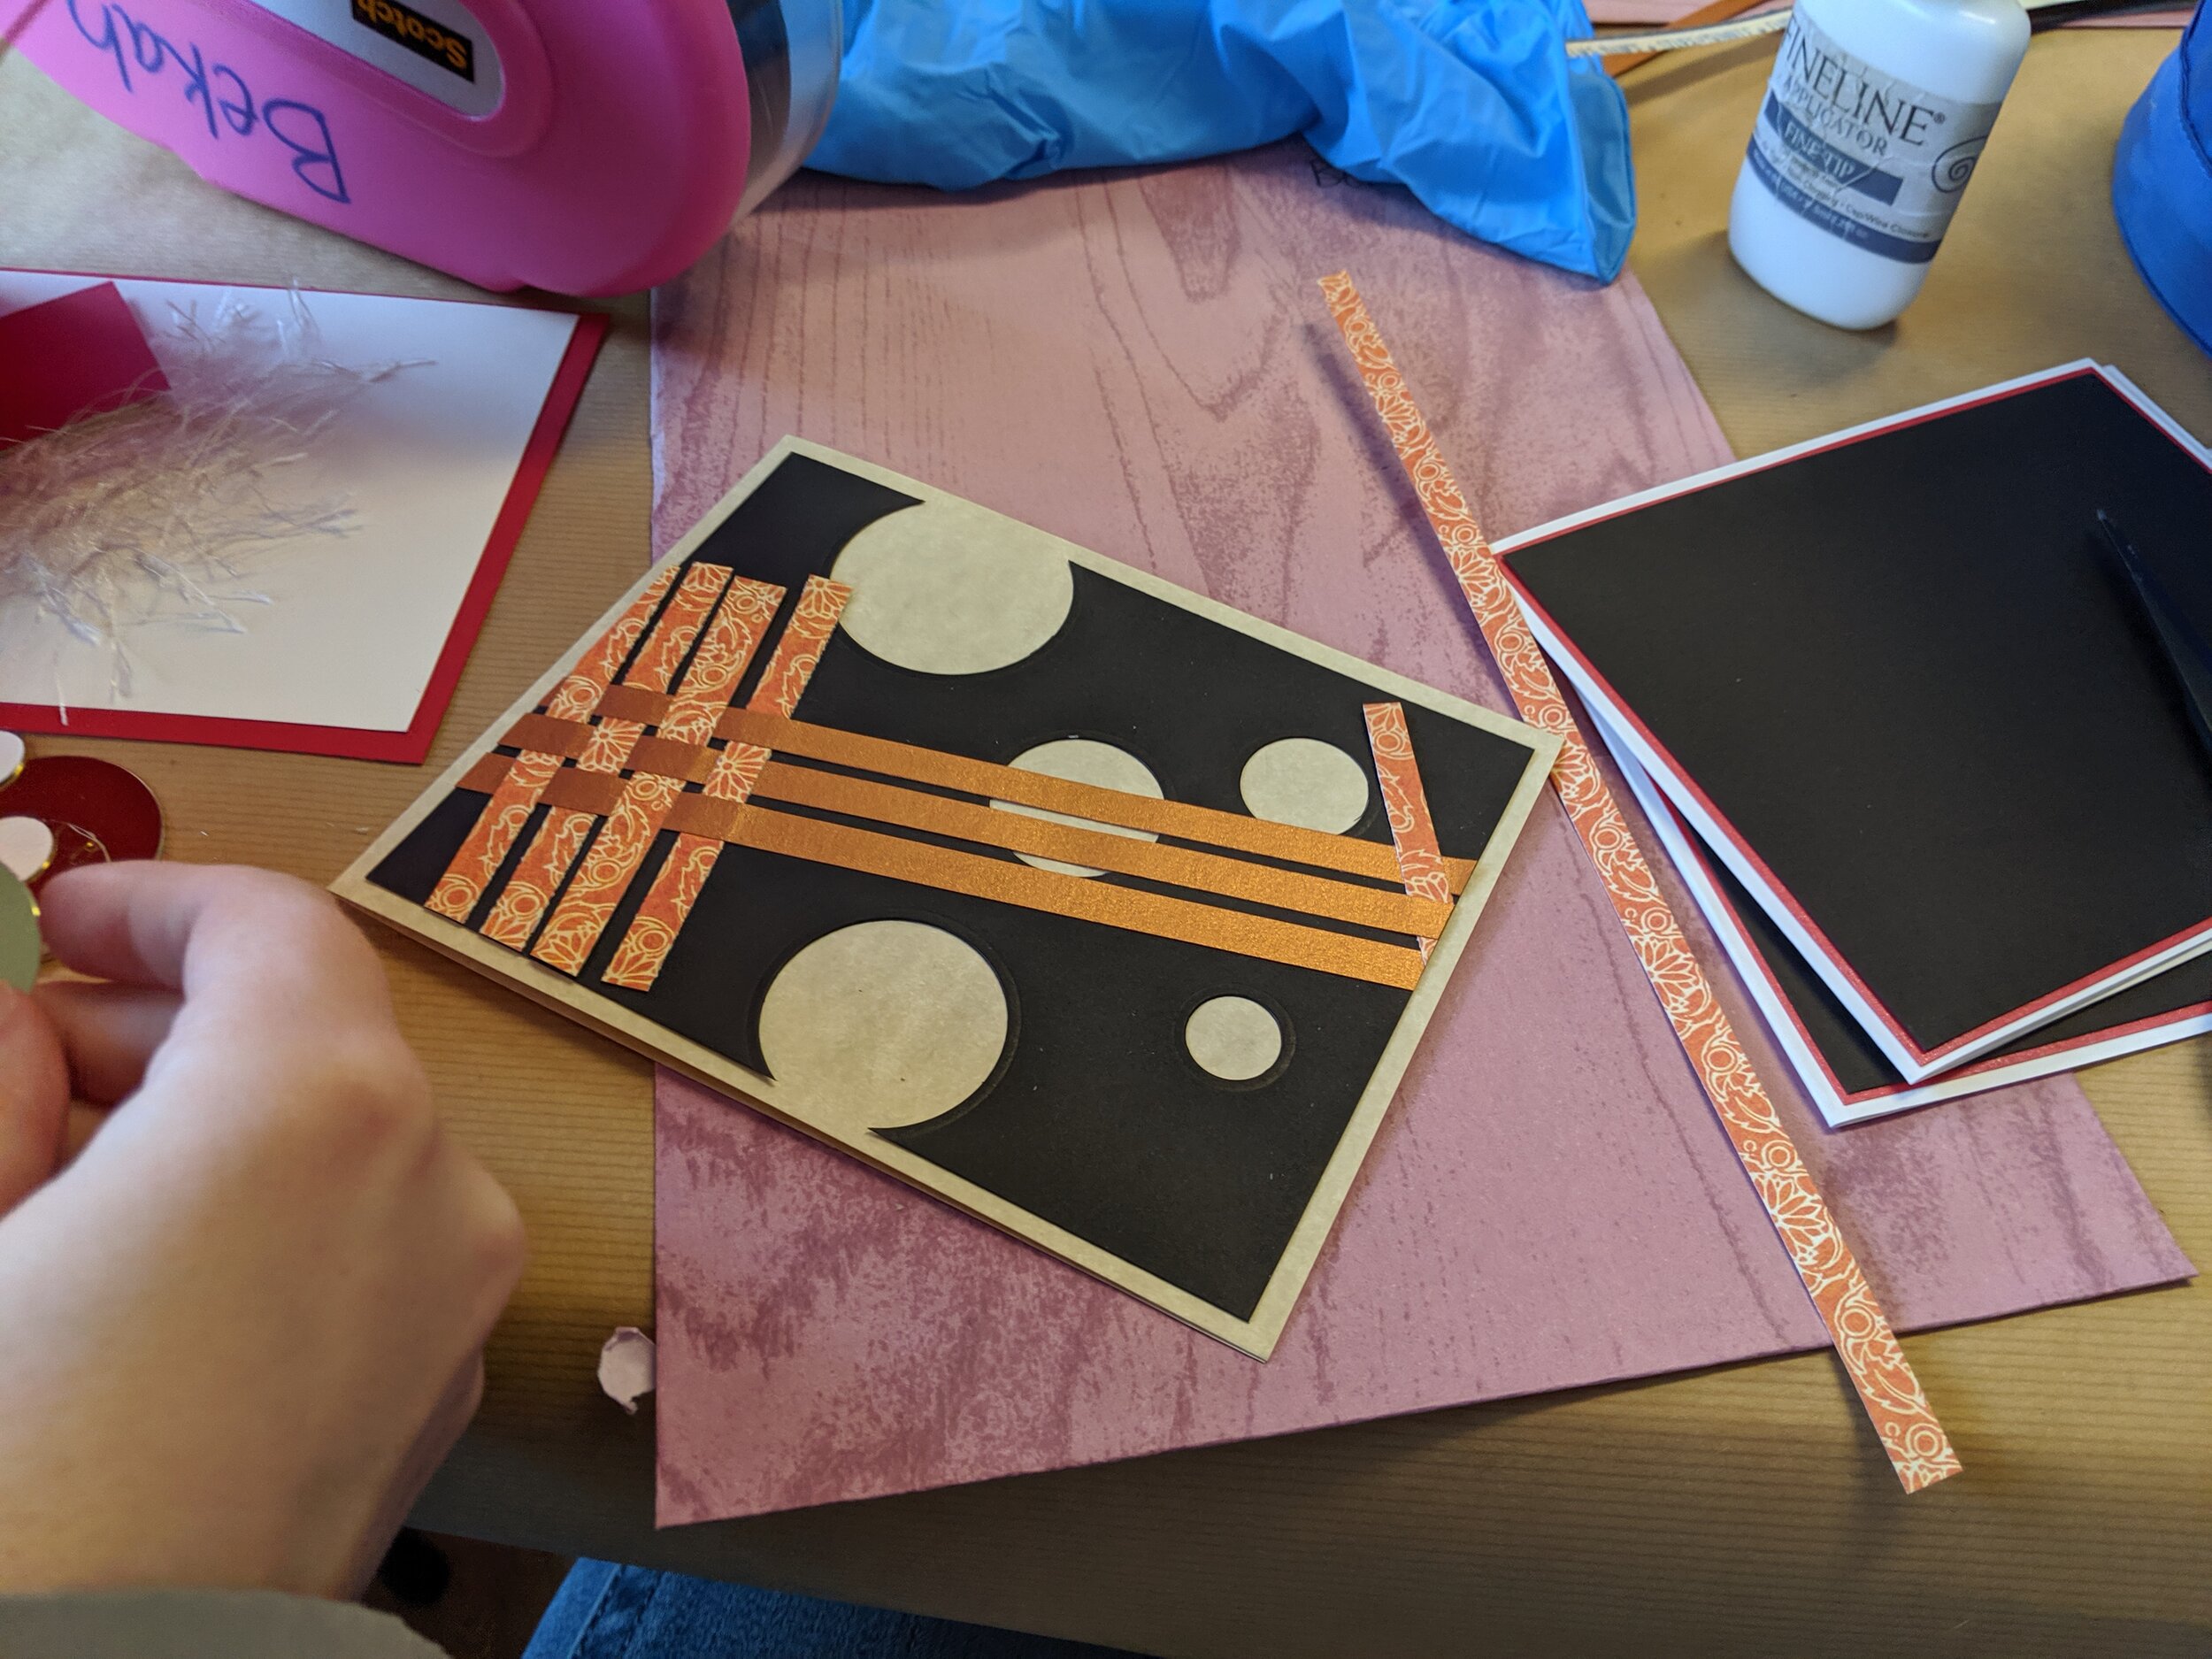
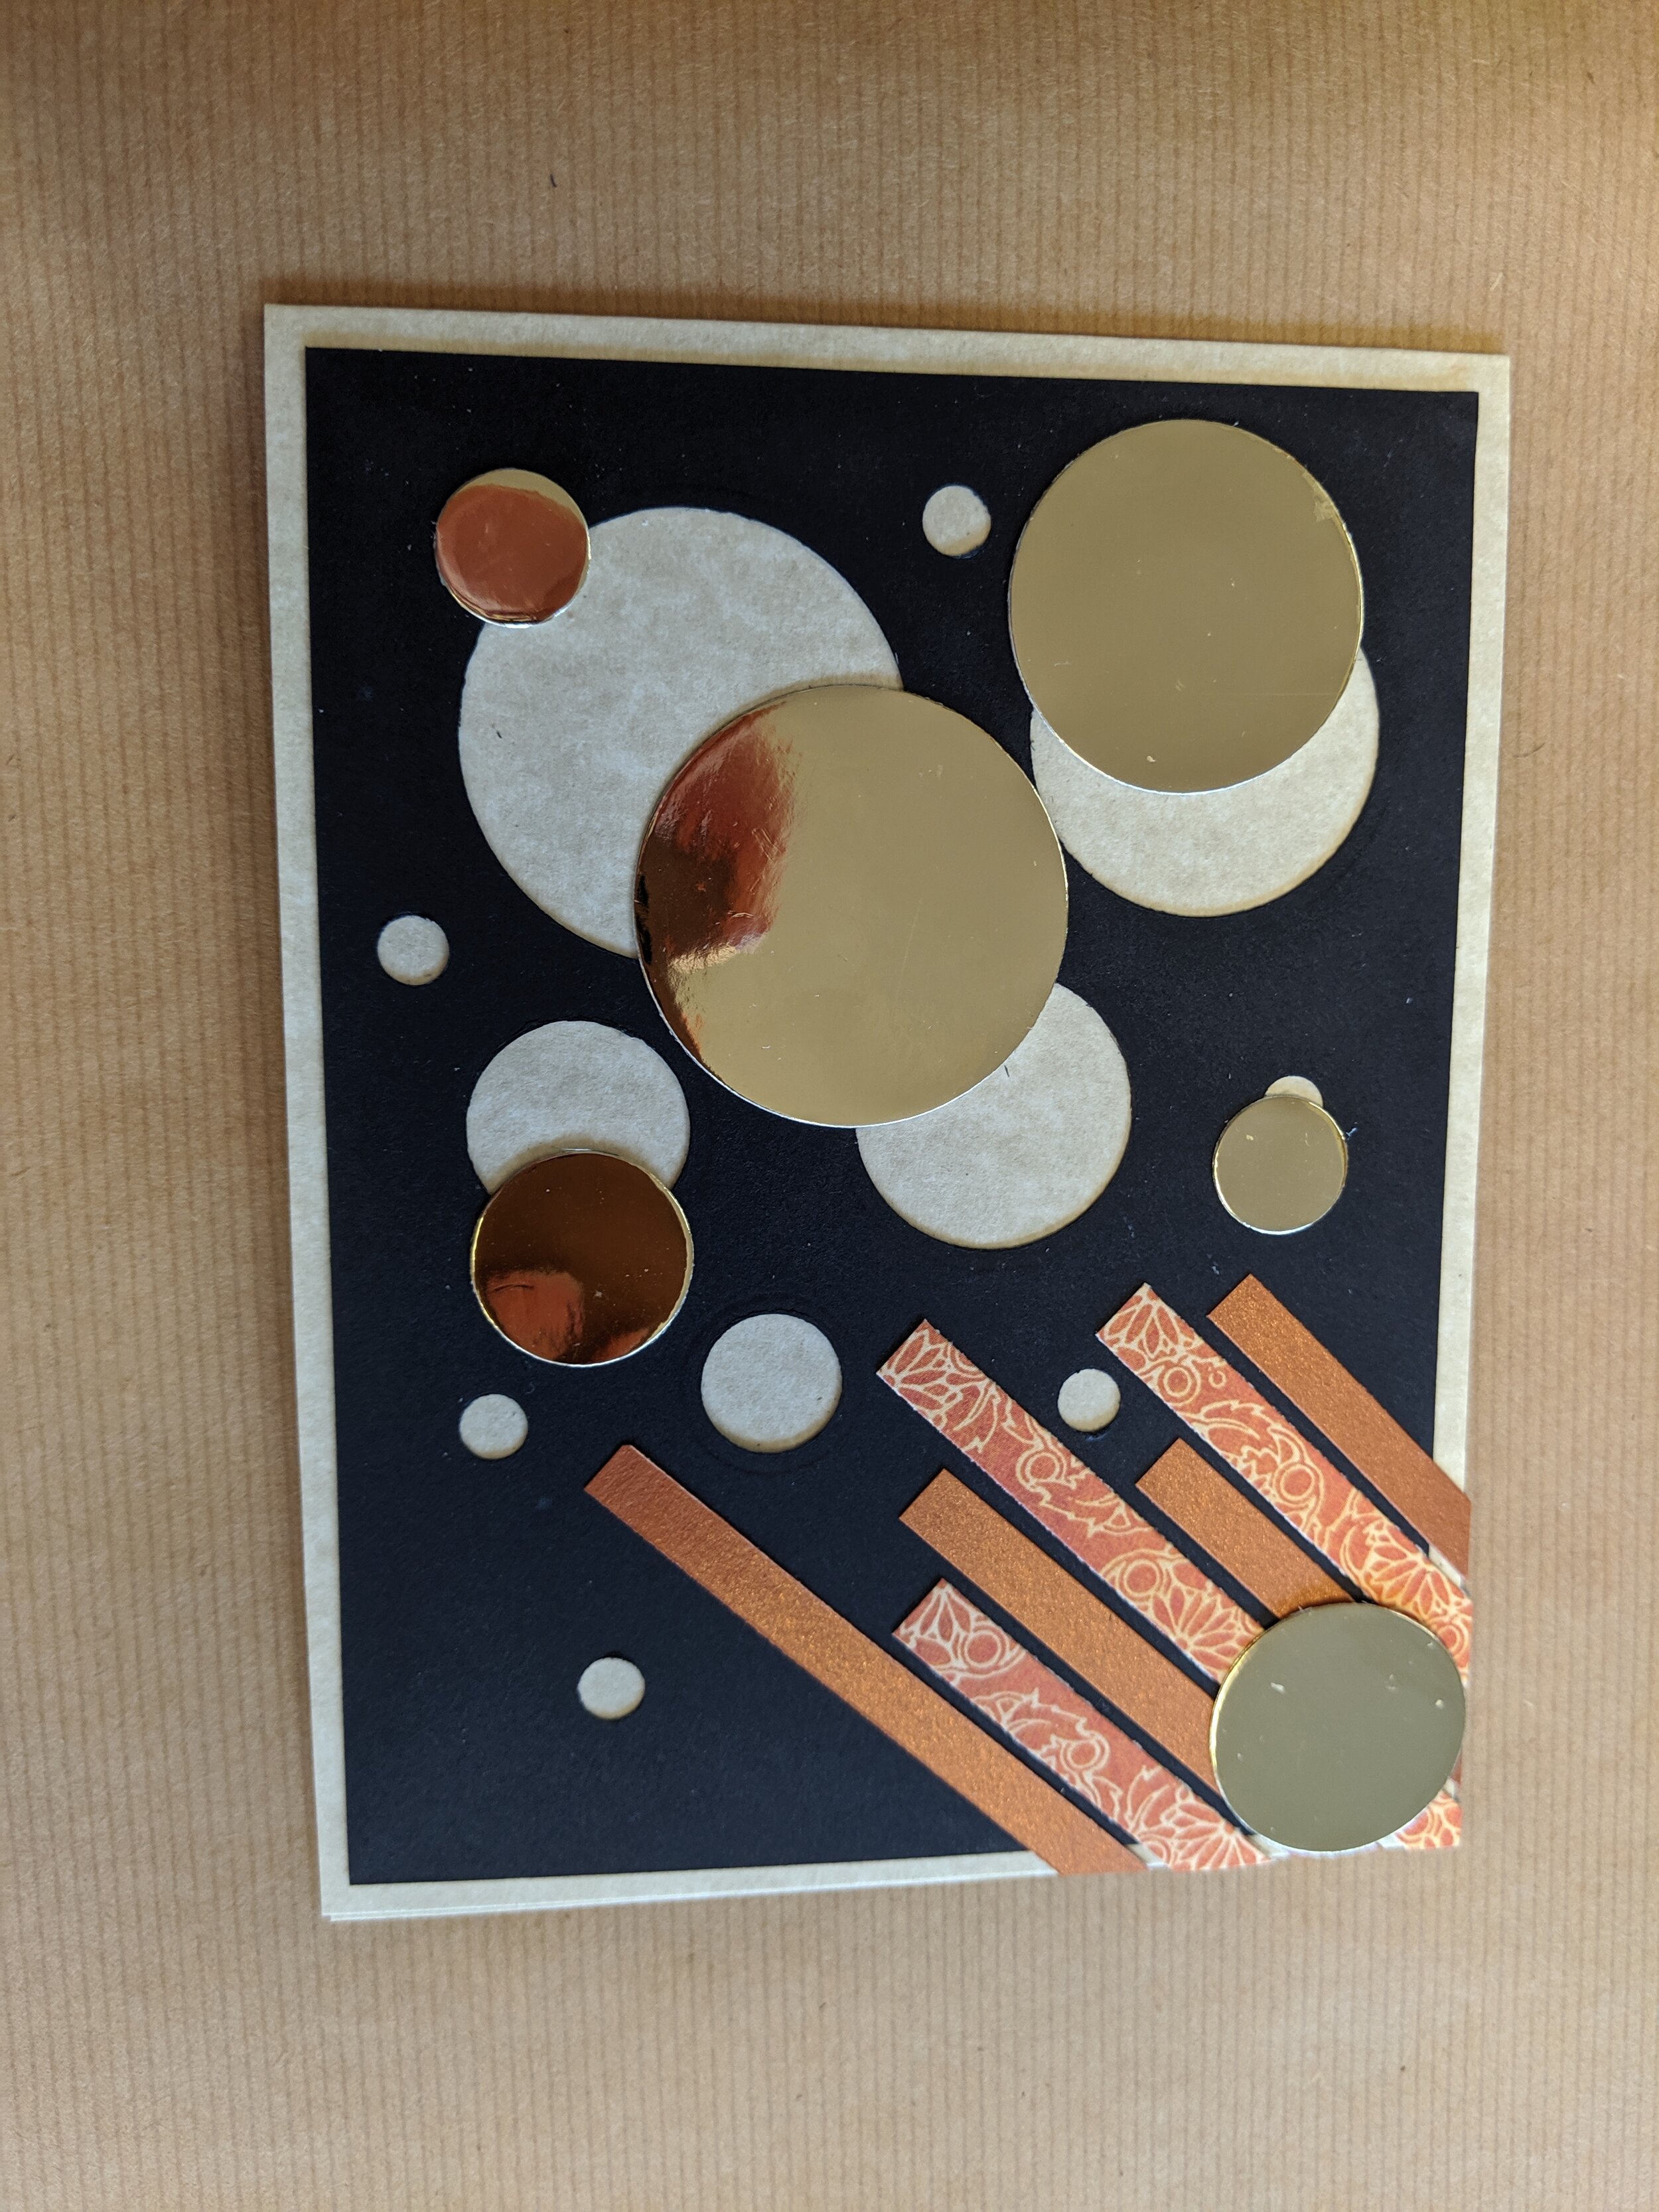
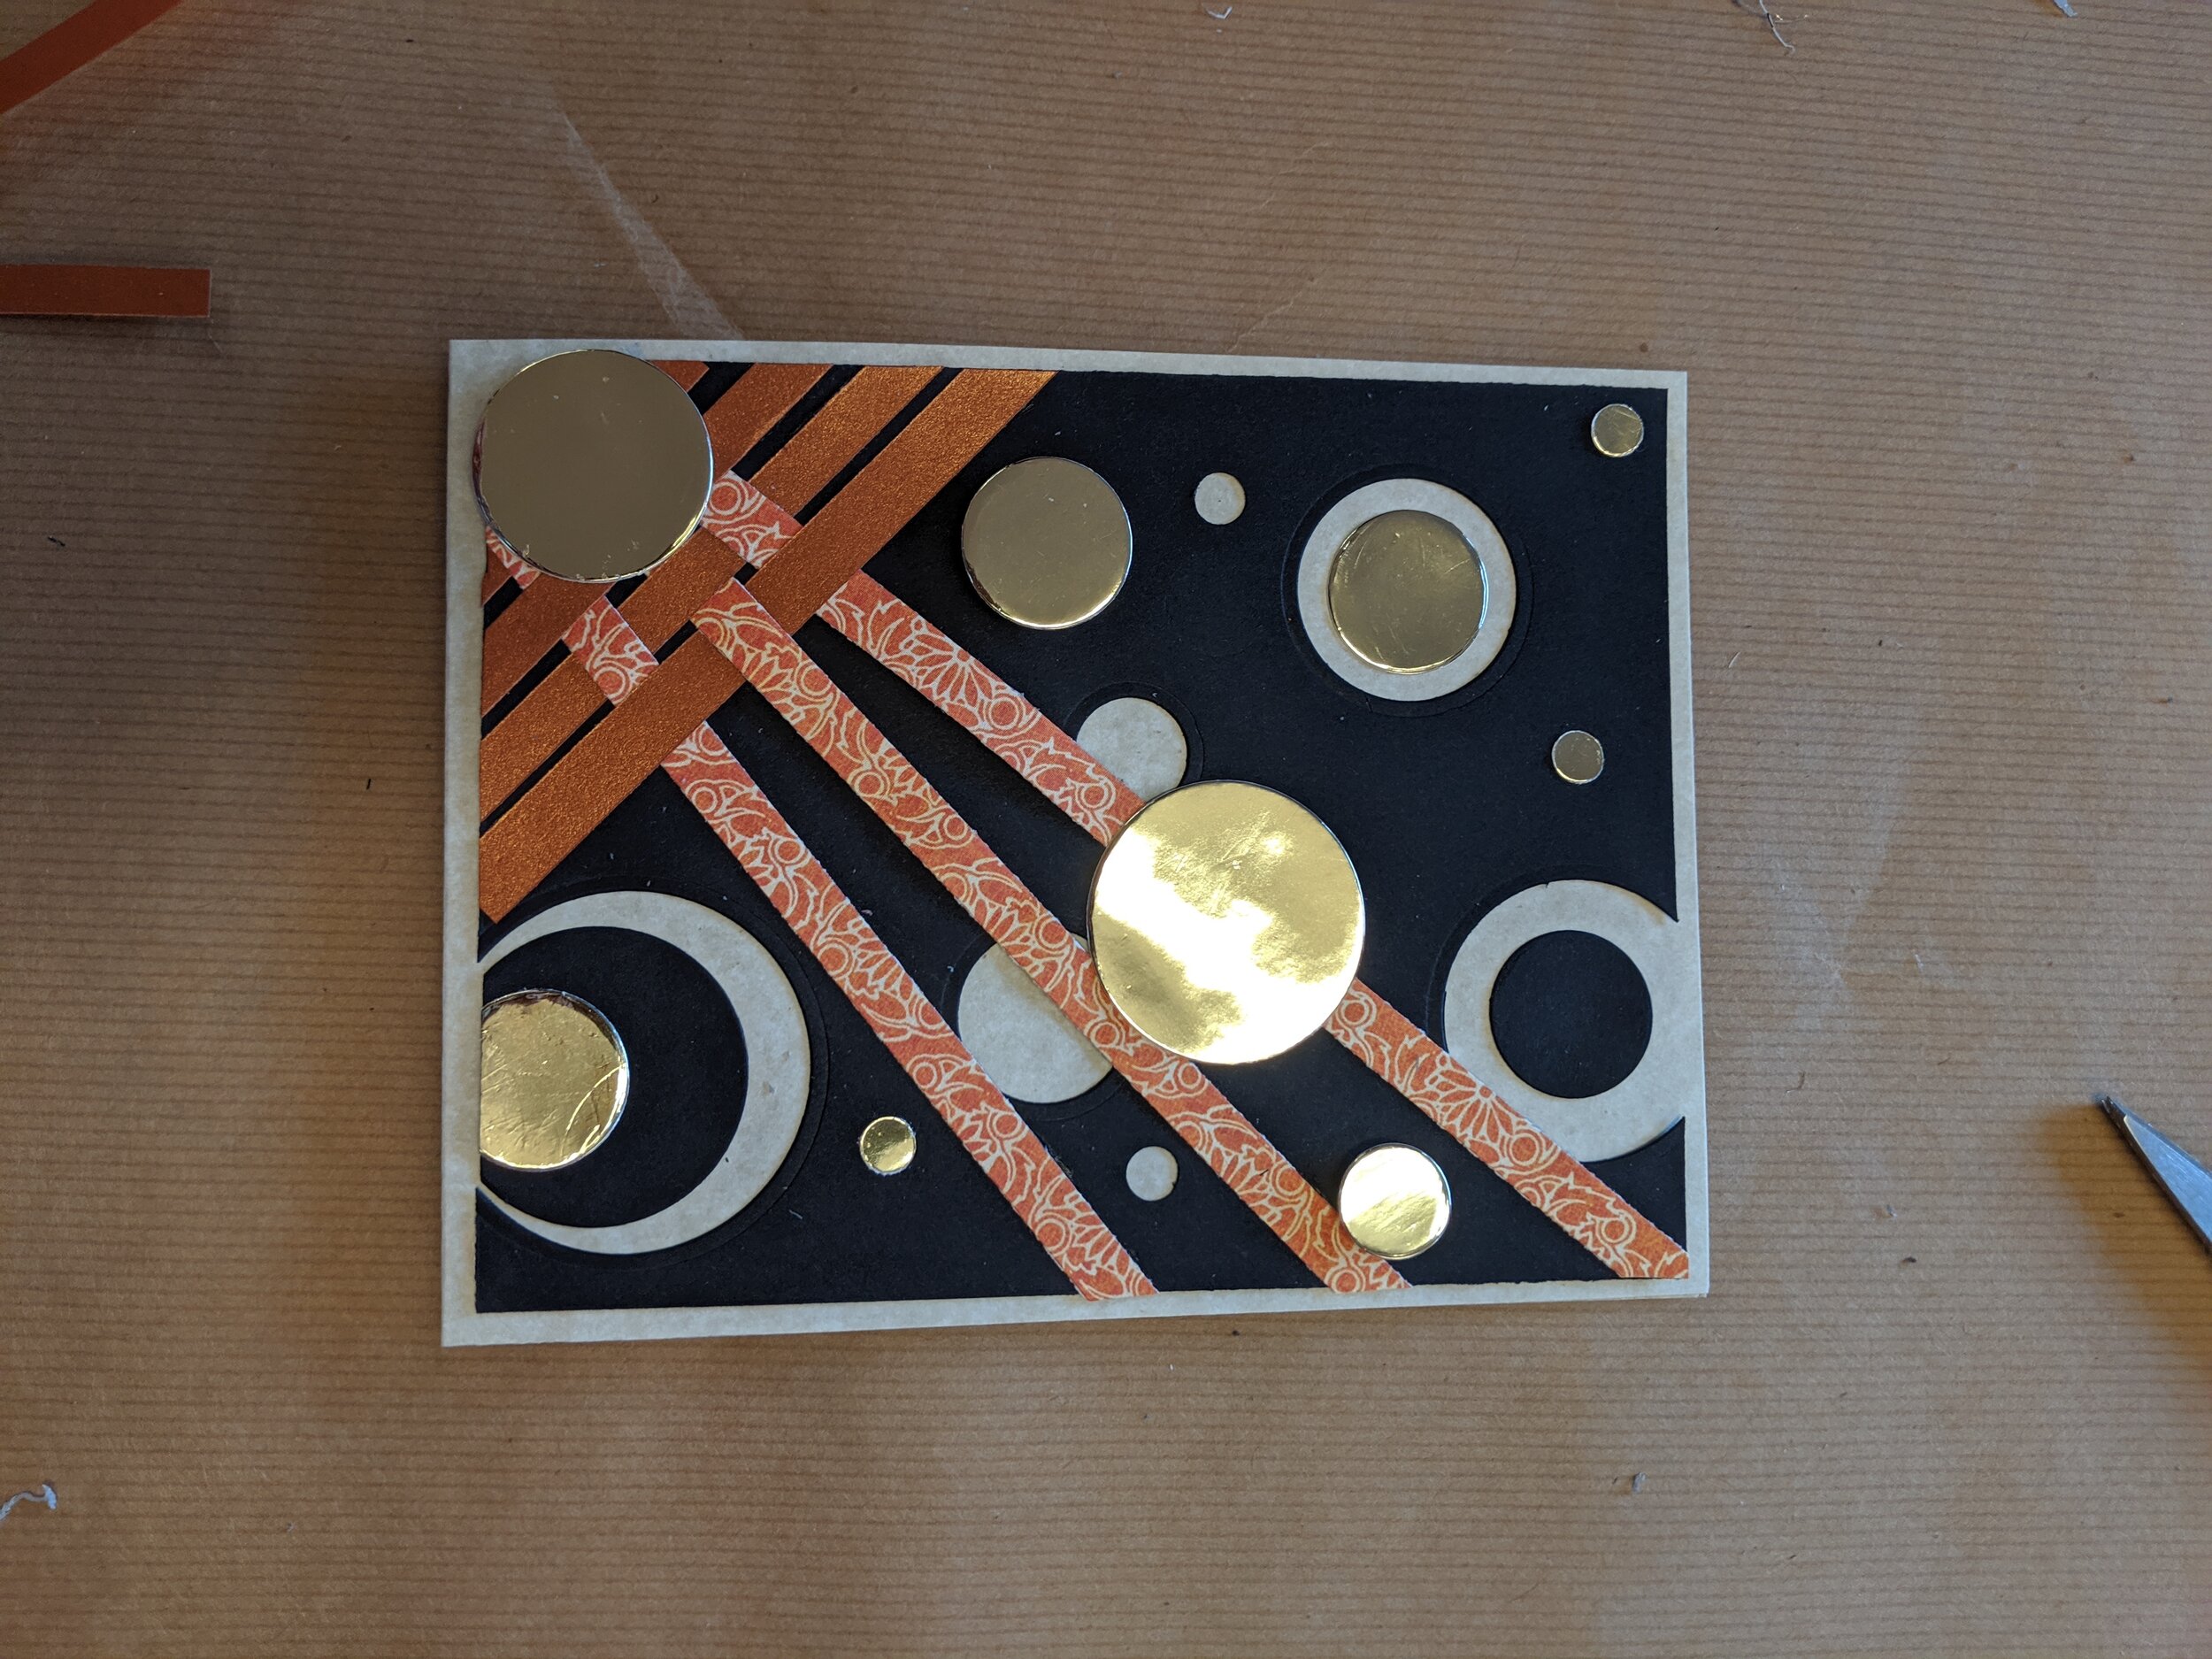
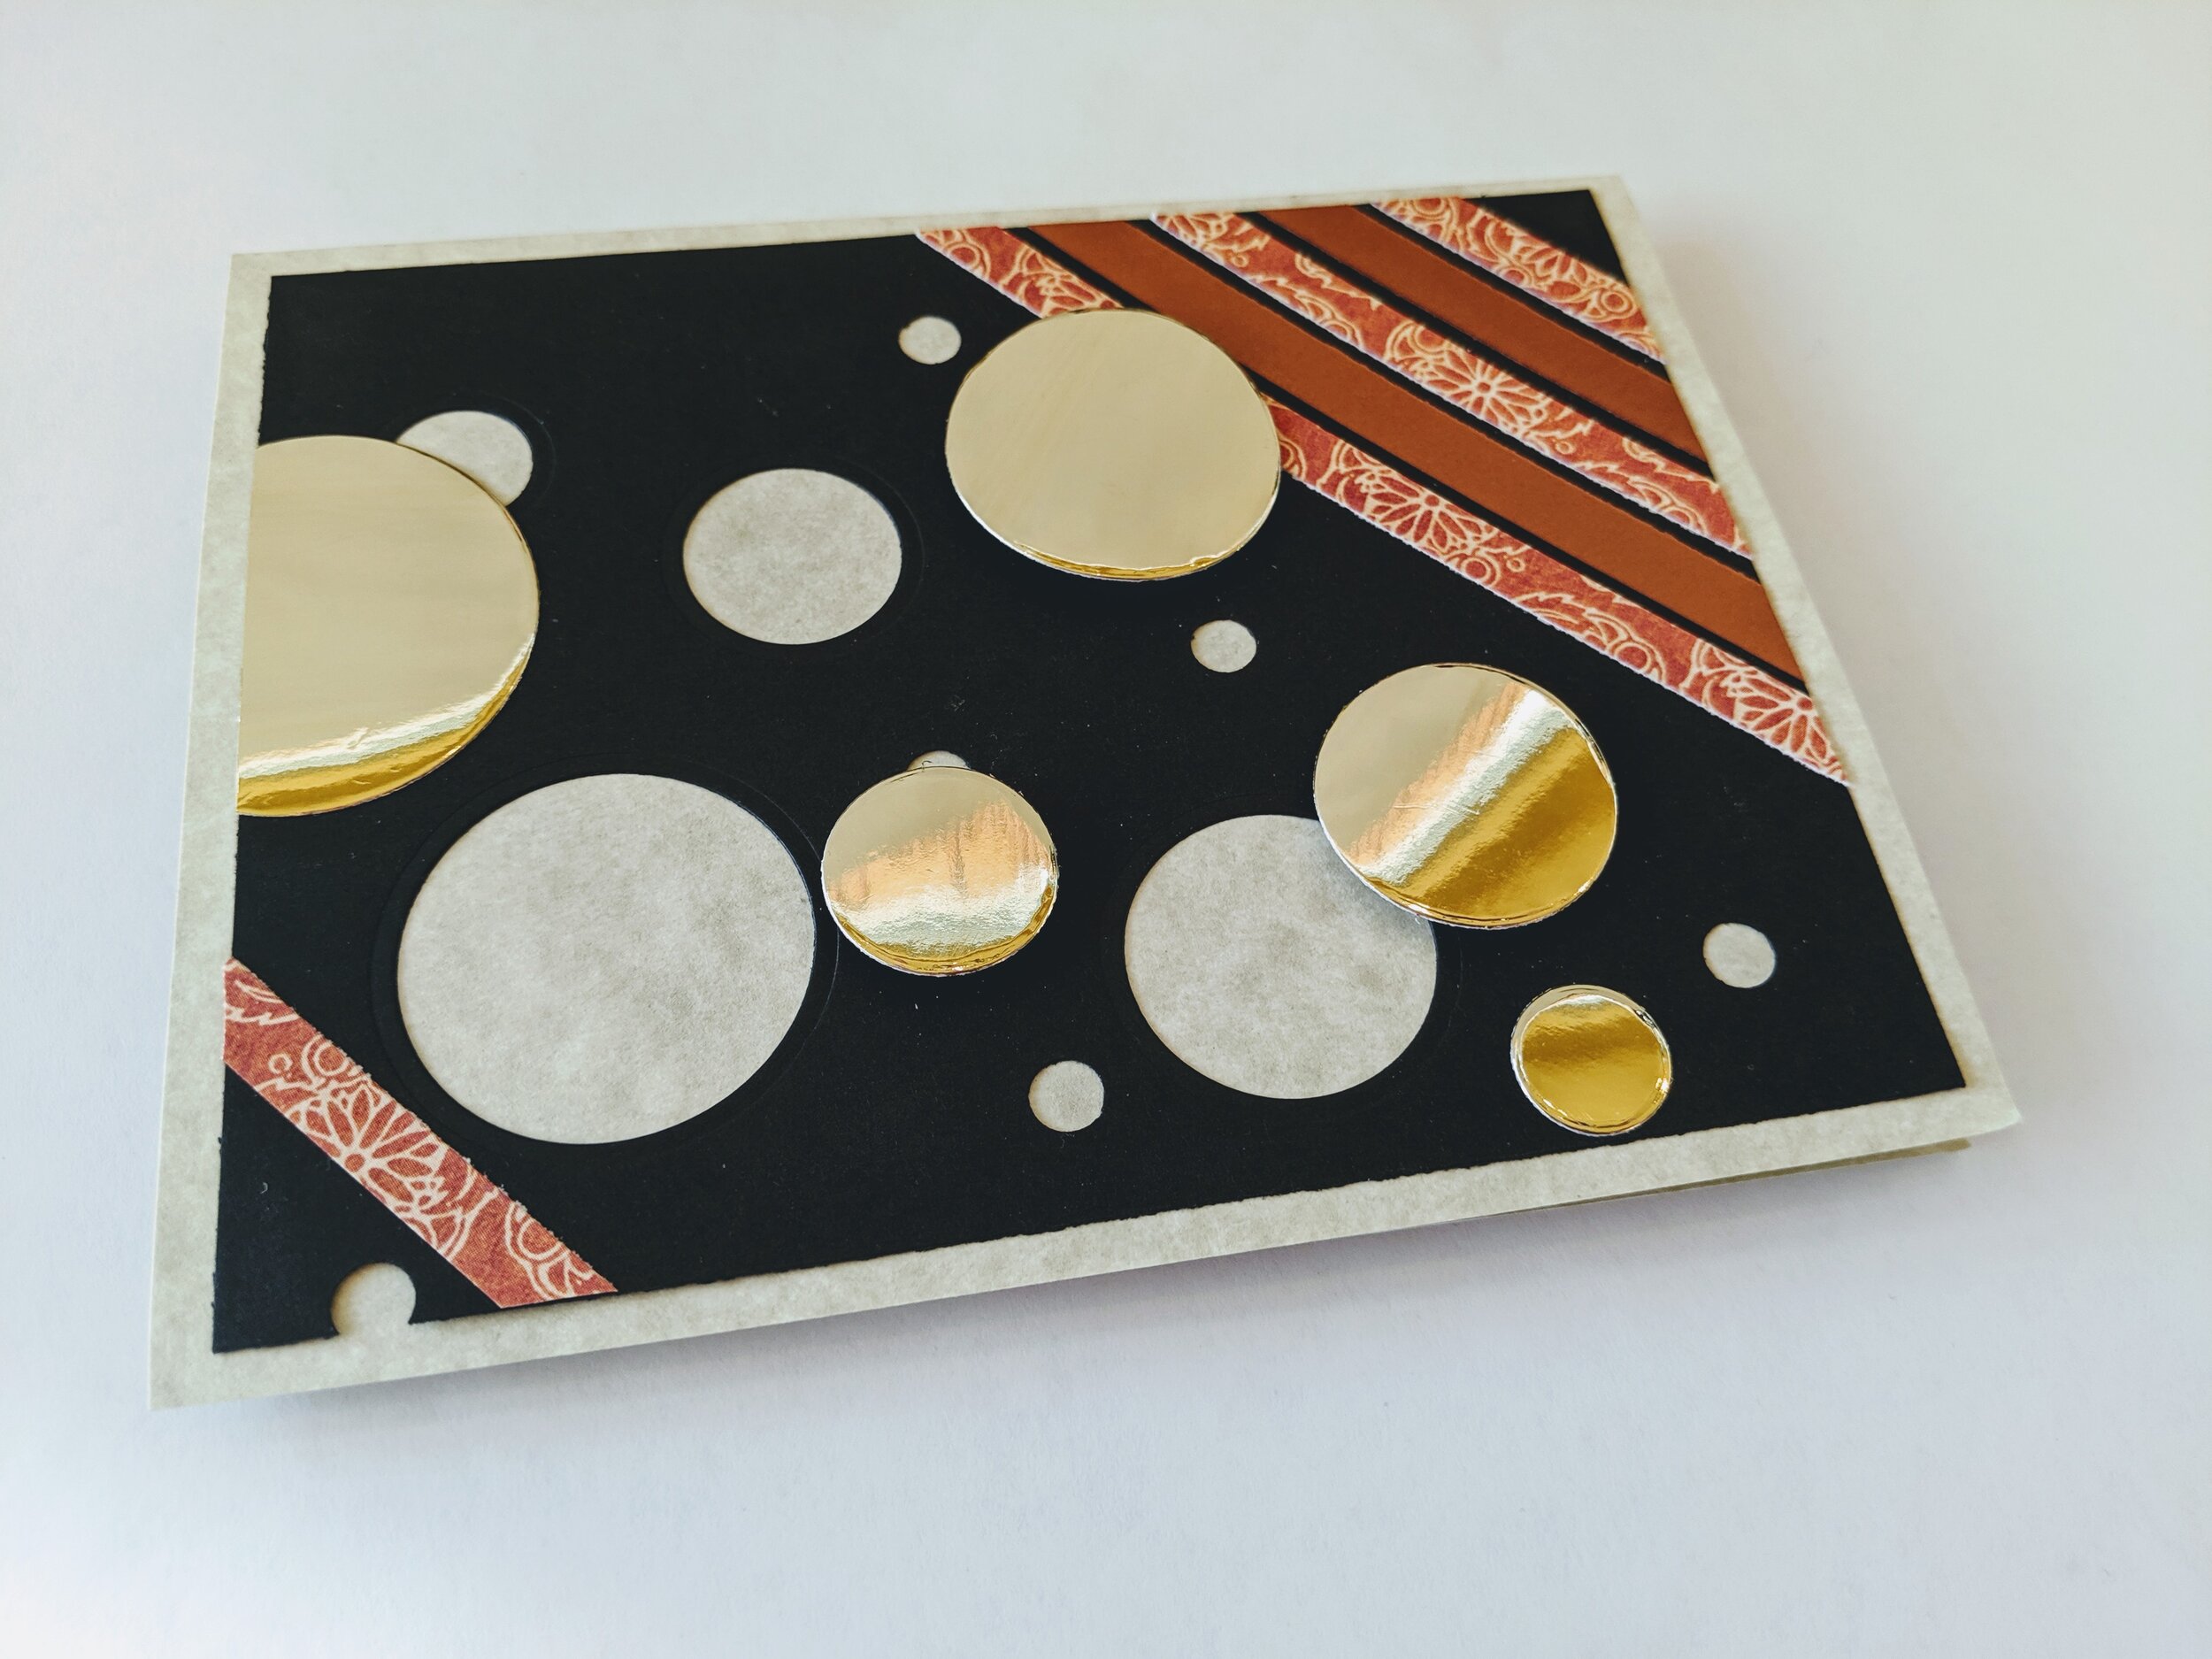
Check out how FUN this card is!!!
It’s a great masculine card and the colors are GREAT with the pop of gold!!
Even better… the cards ALL LOOKED DIFFERENT which always makes me happy!!!
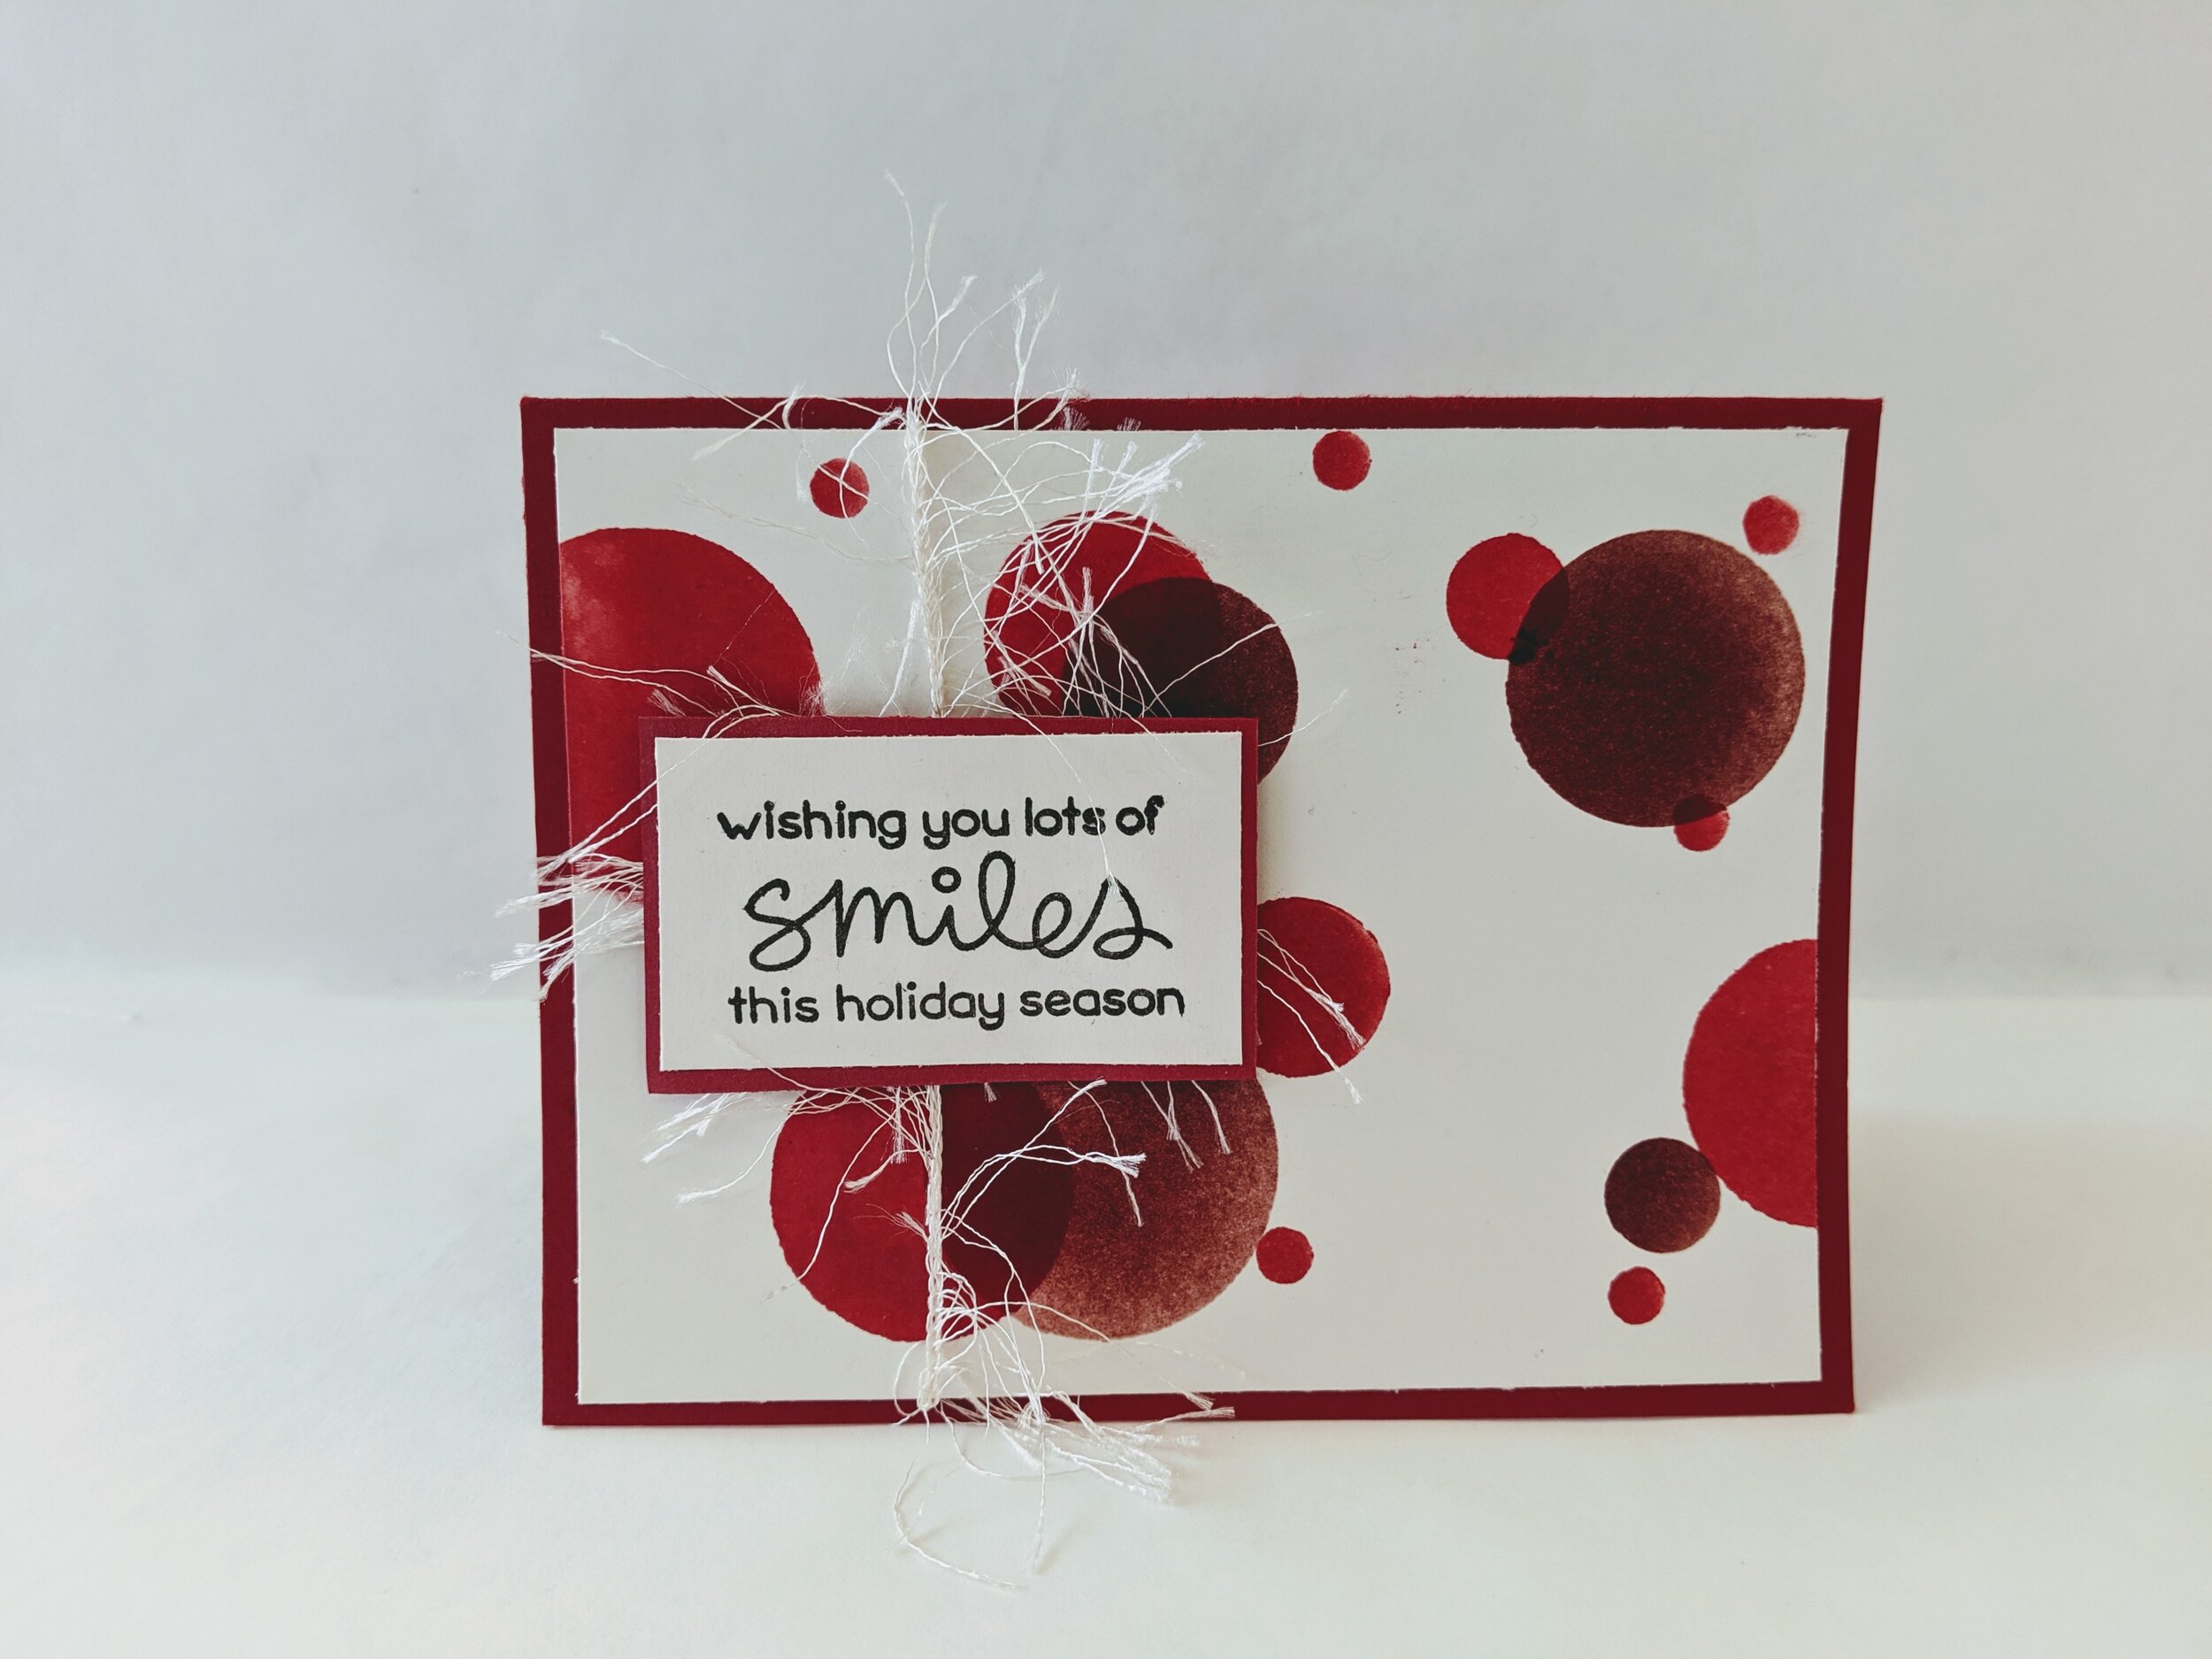
This last card we created was inspired from the Hero Arts Nesting Circle Infinity dies, Lawn Fawn Merry Messages, and the Taylored Expressions stamp set, Under the Toadstool

To make the card:
Start out with an ivory card base.
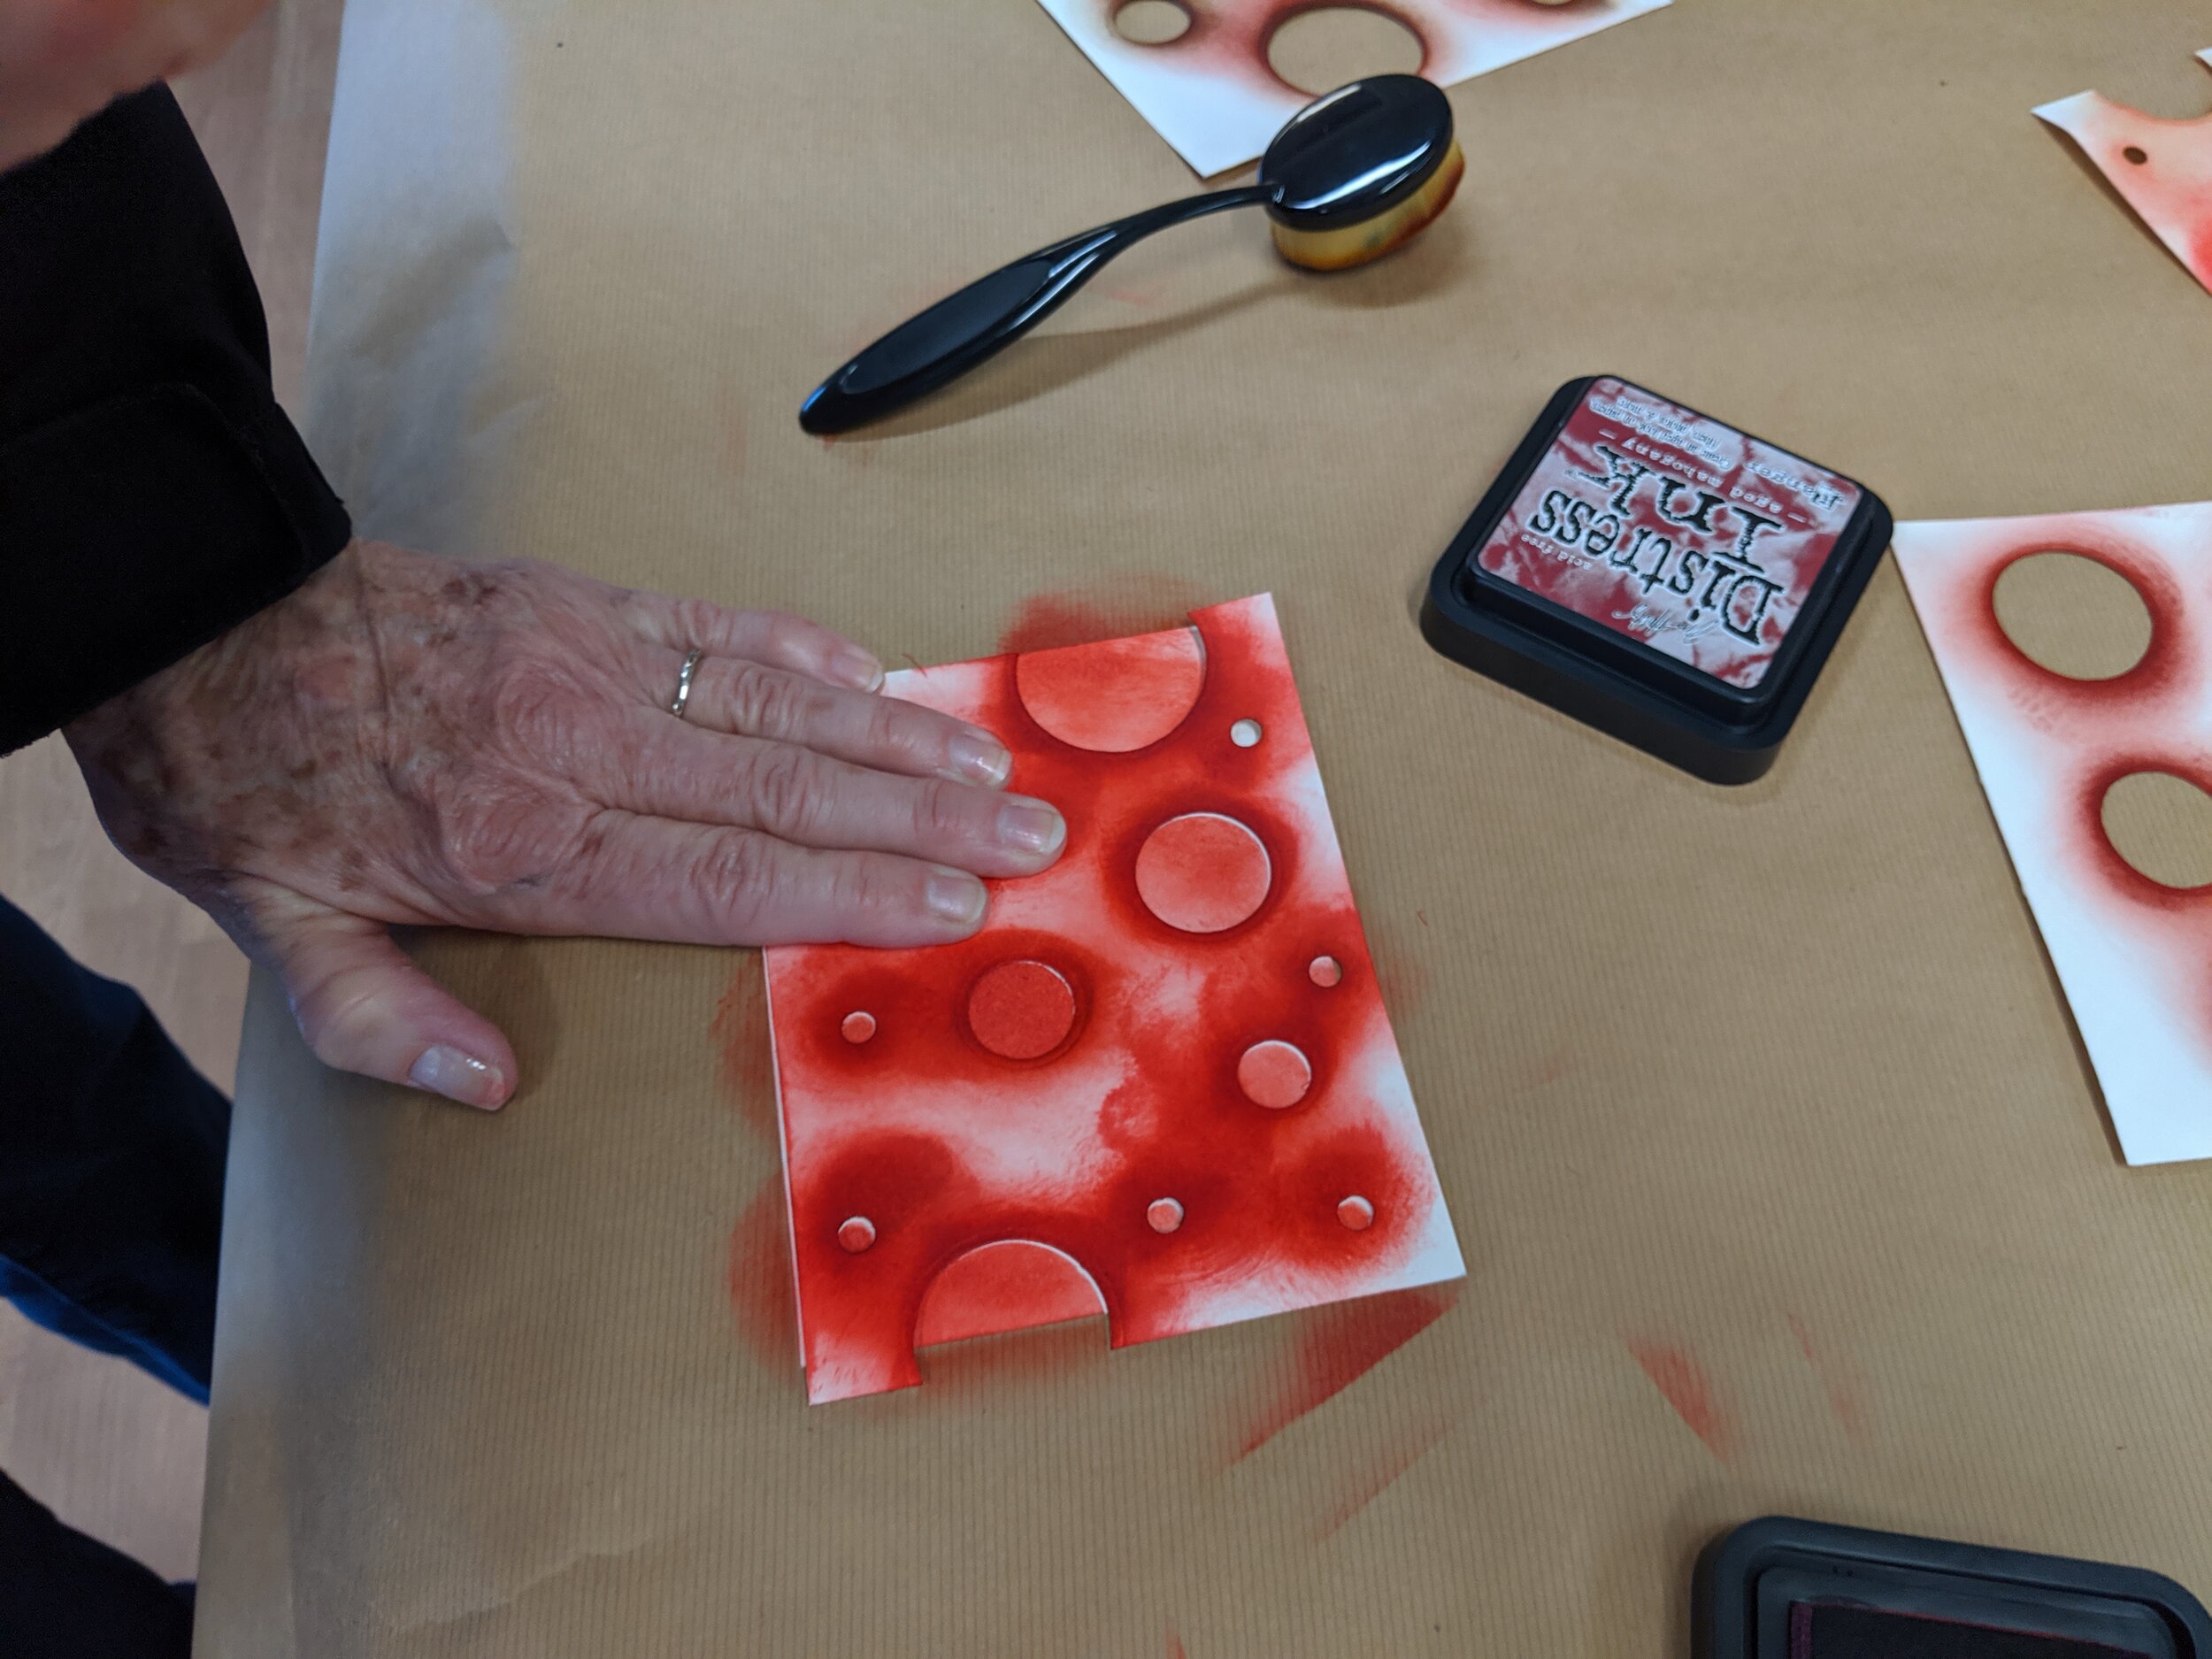
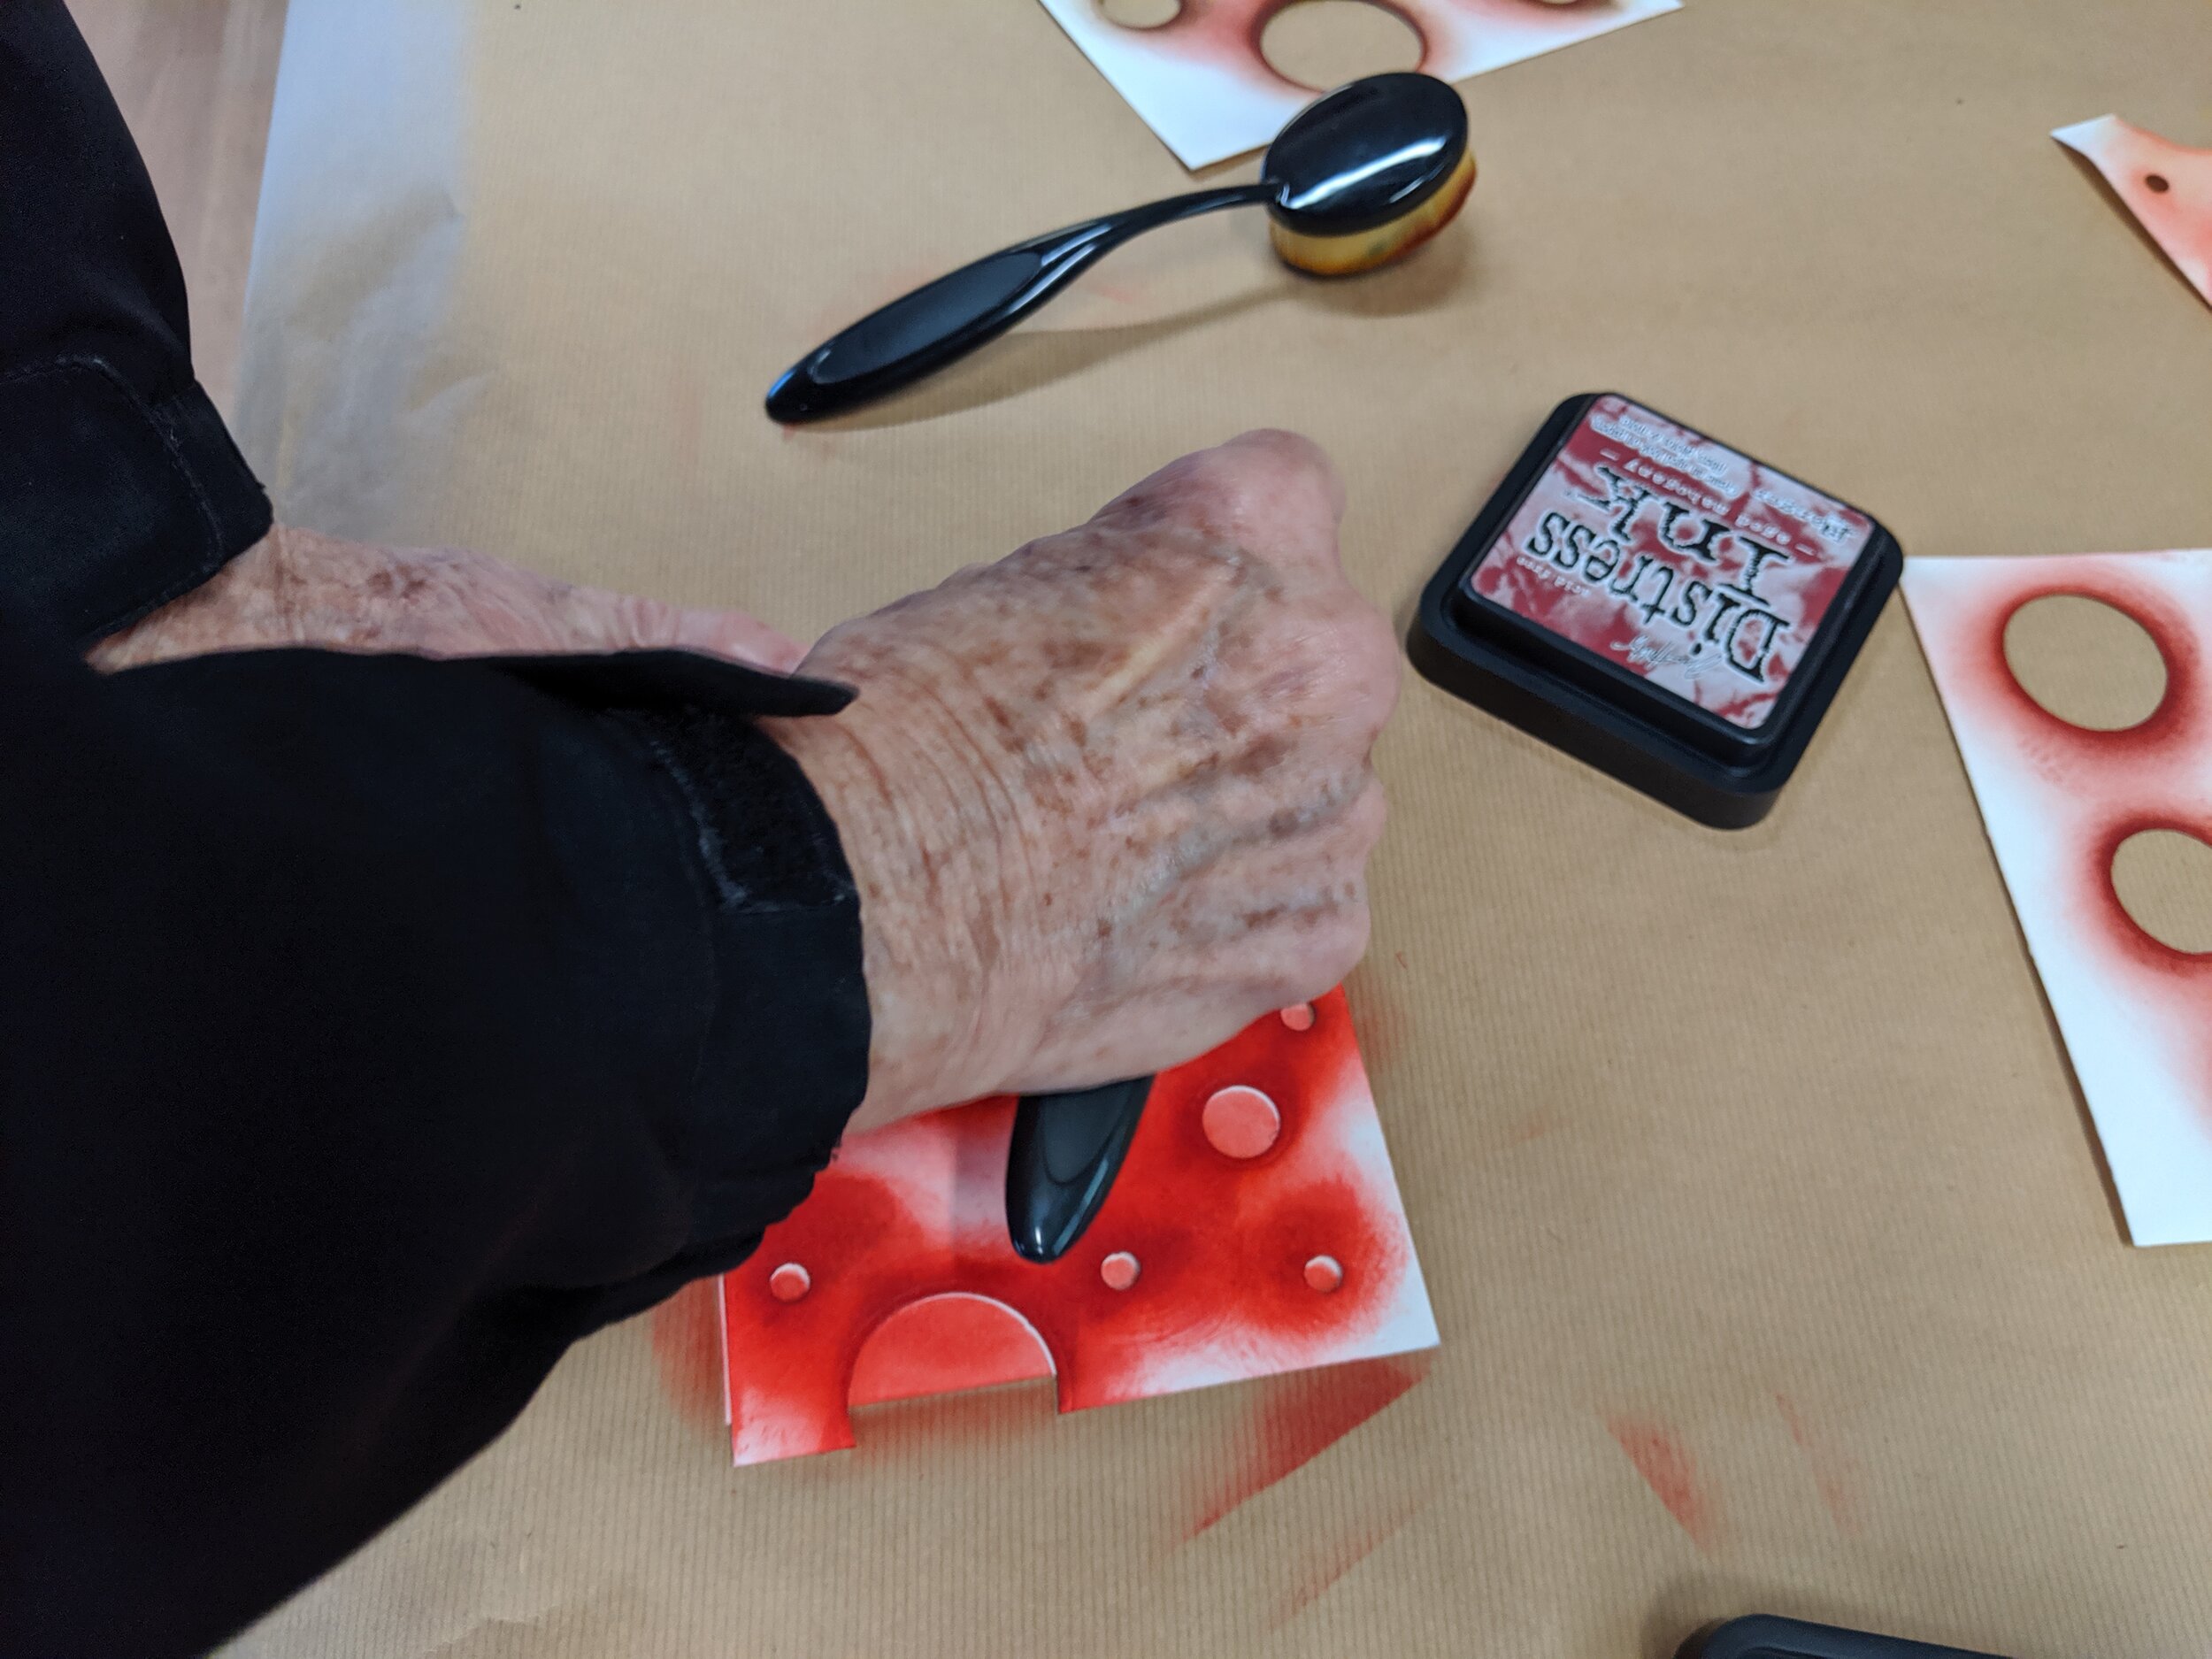
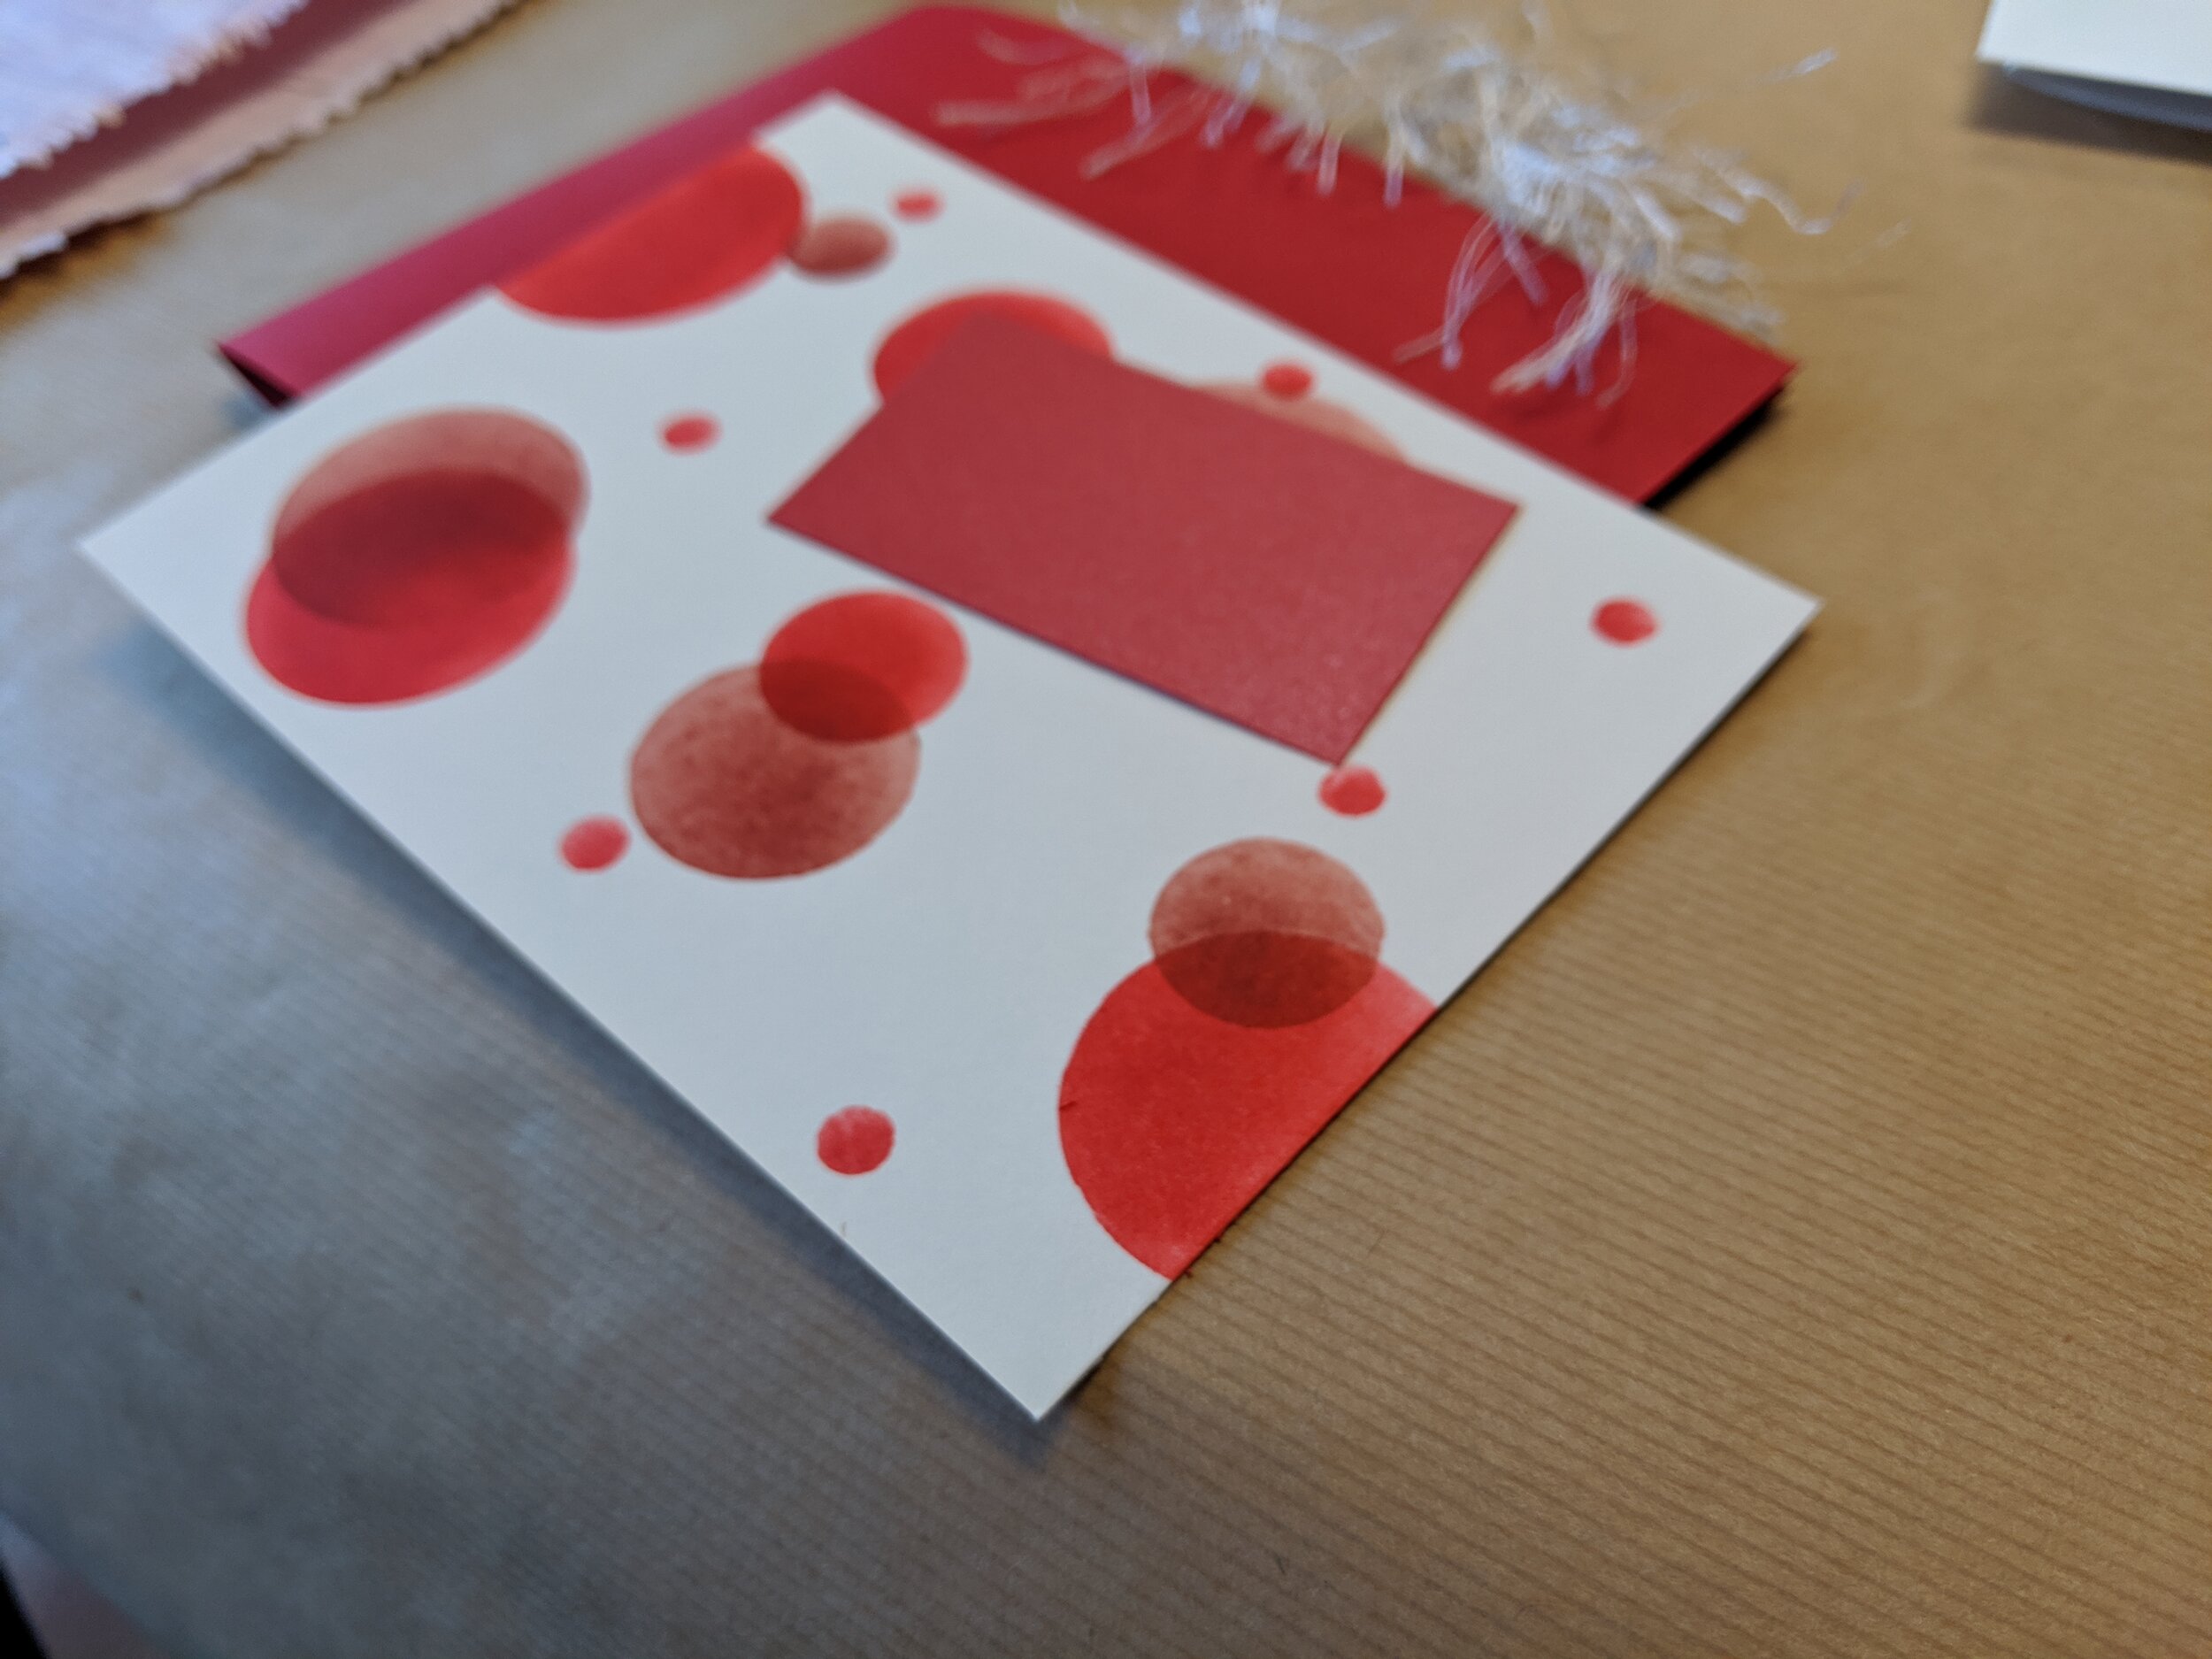
I used the Nesting Circle die-cuts to cut out some circles from a piece of card stock to make my own POLKA DOT STENCIL!
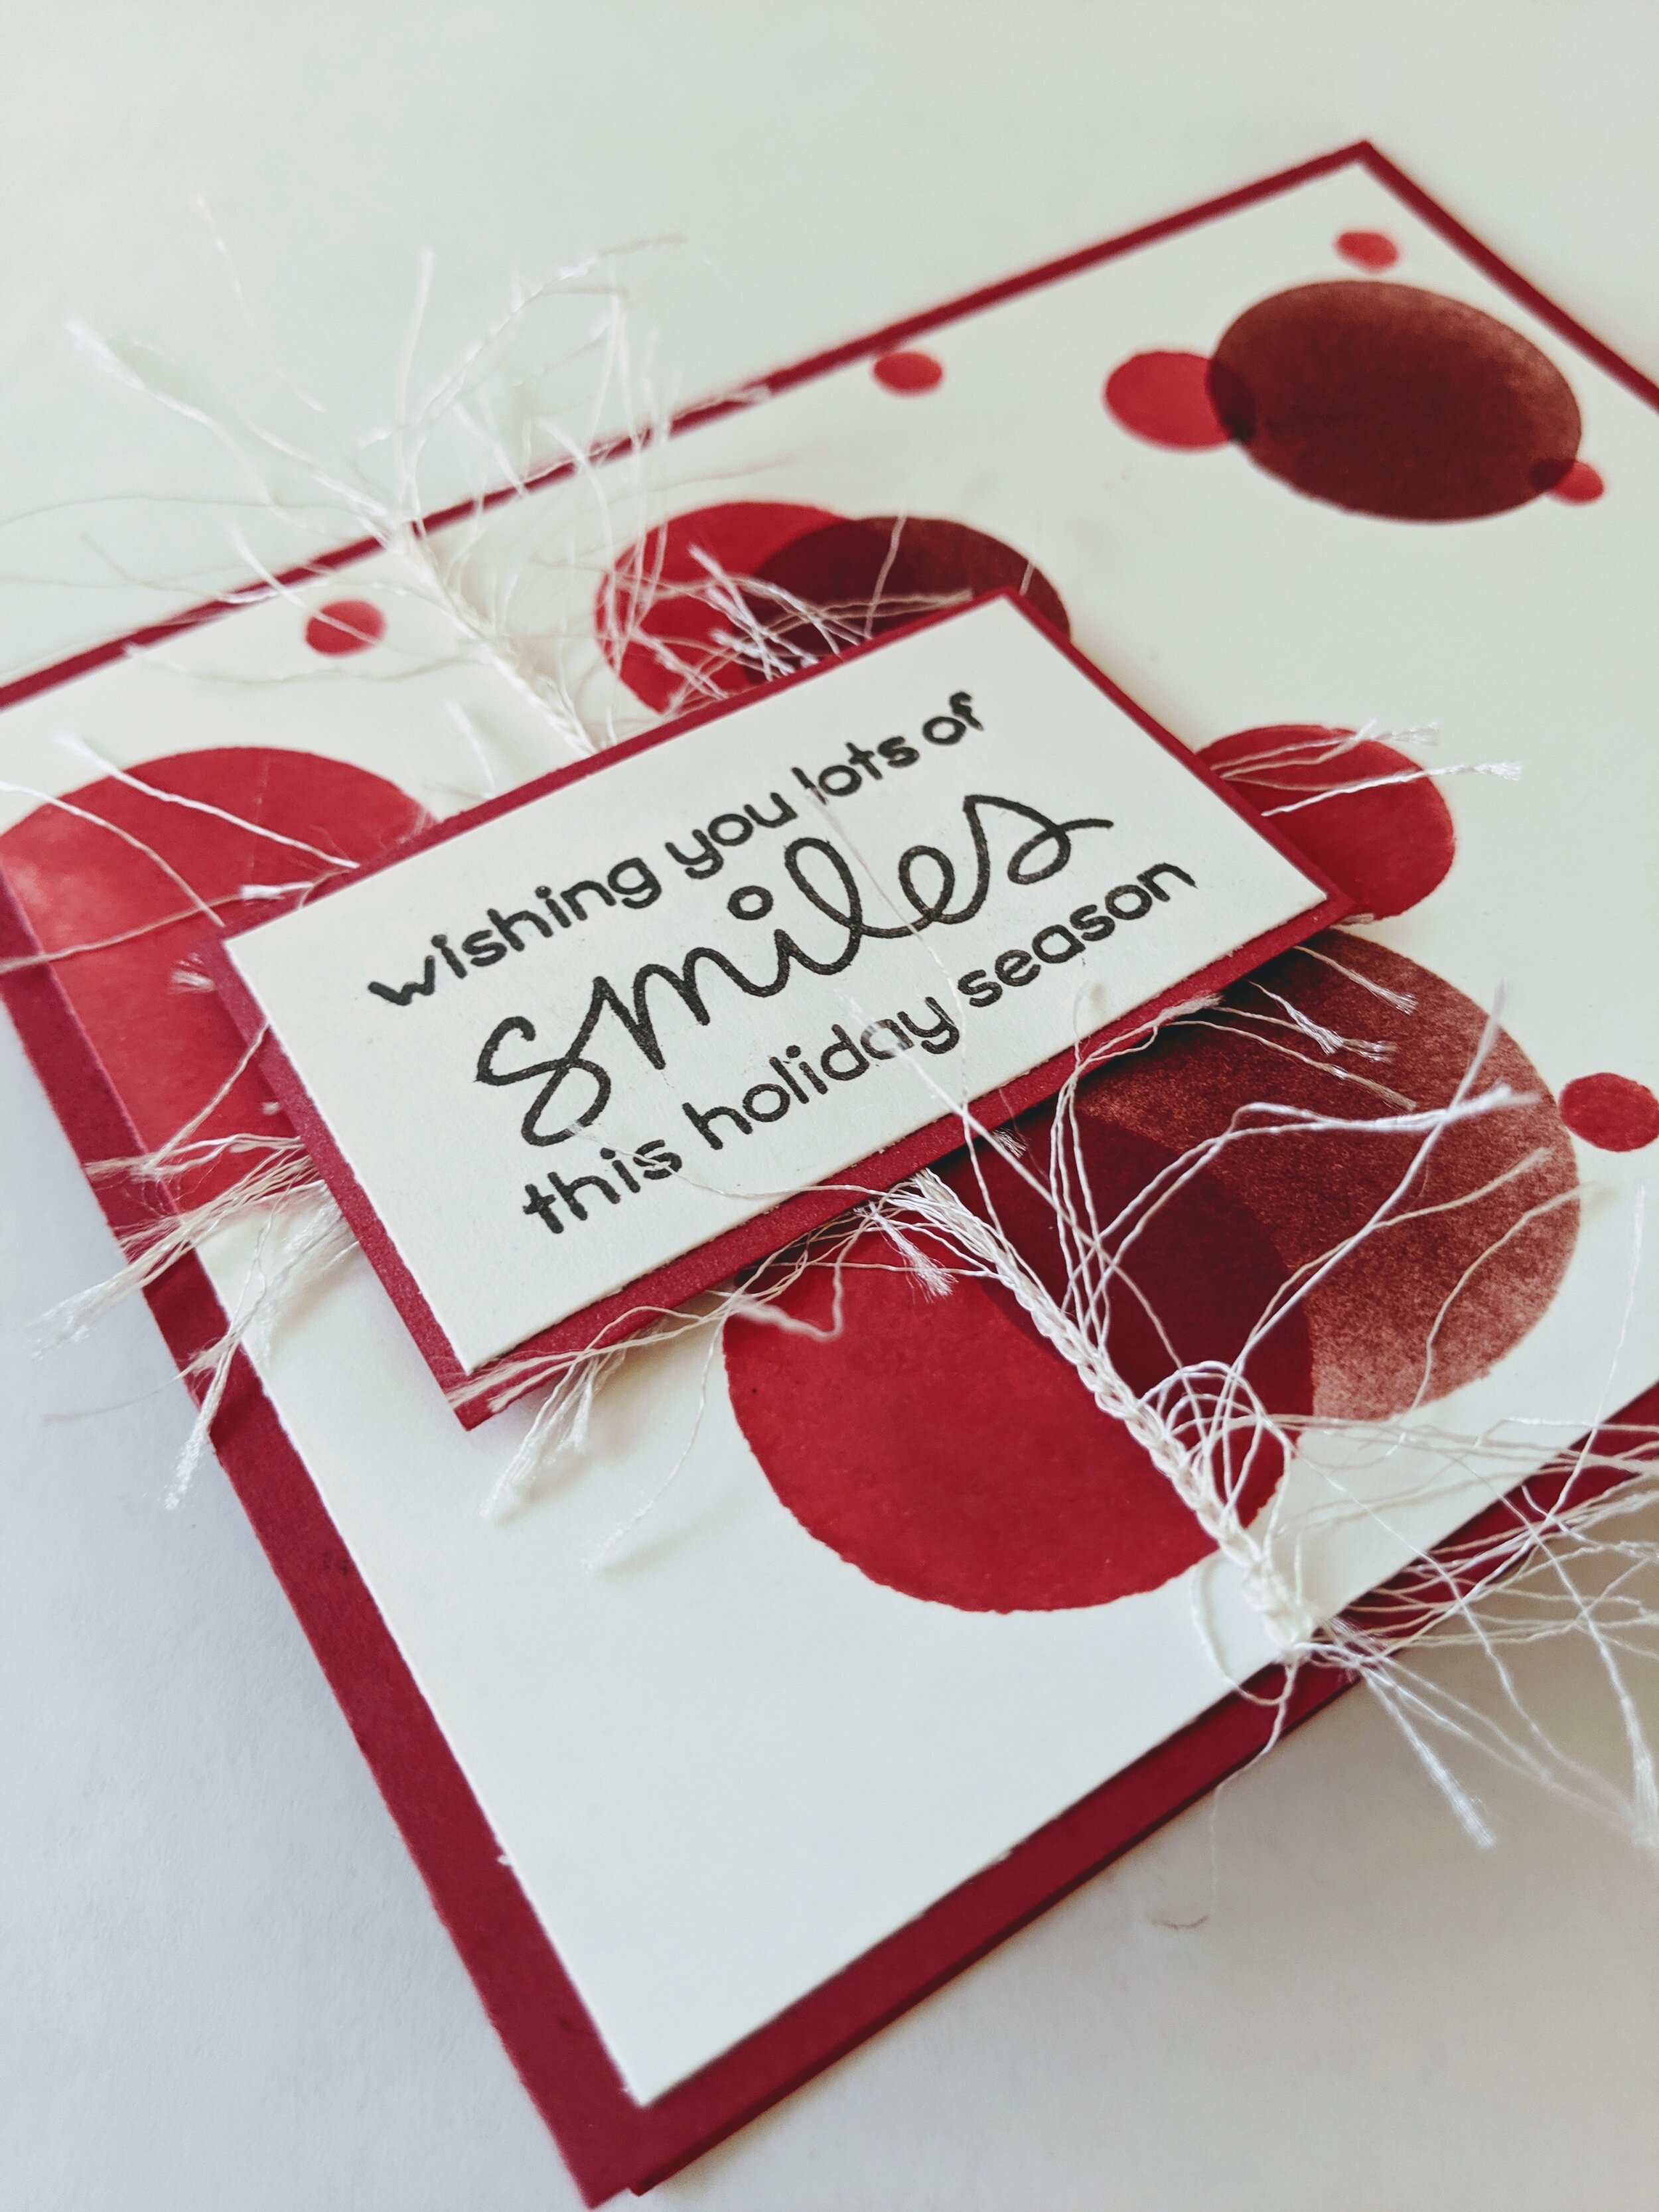
I used the Picket Fence Blending Brushes to apply a layer of ink to make a “Bokah Background” of polka-dots using the stencil I just created. I used one brush for applying the Distress Ink color Festive Berries followed by using a second brush to apply Distress Ink Fired Brick.
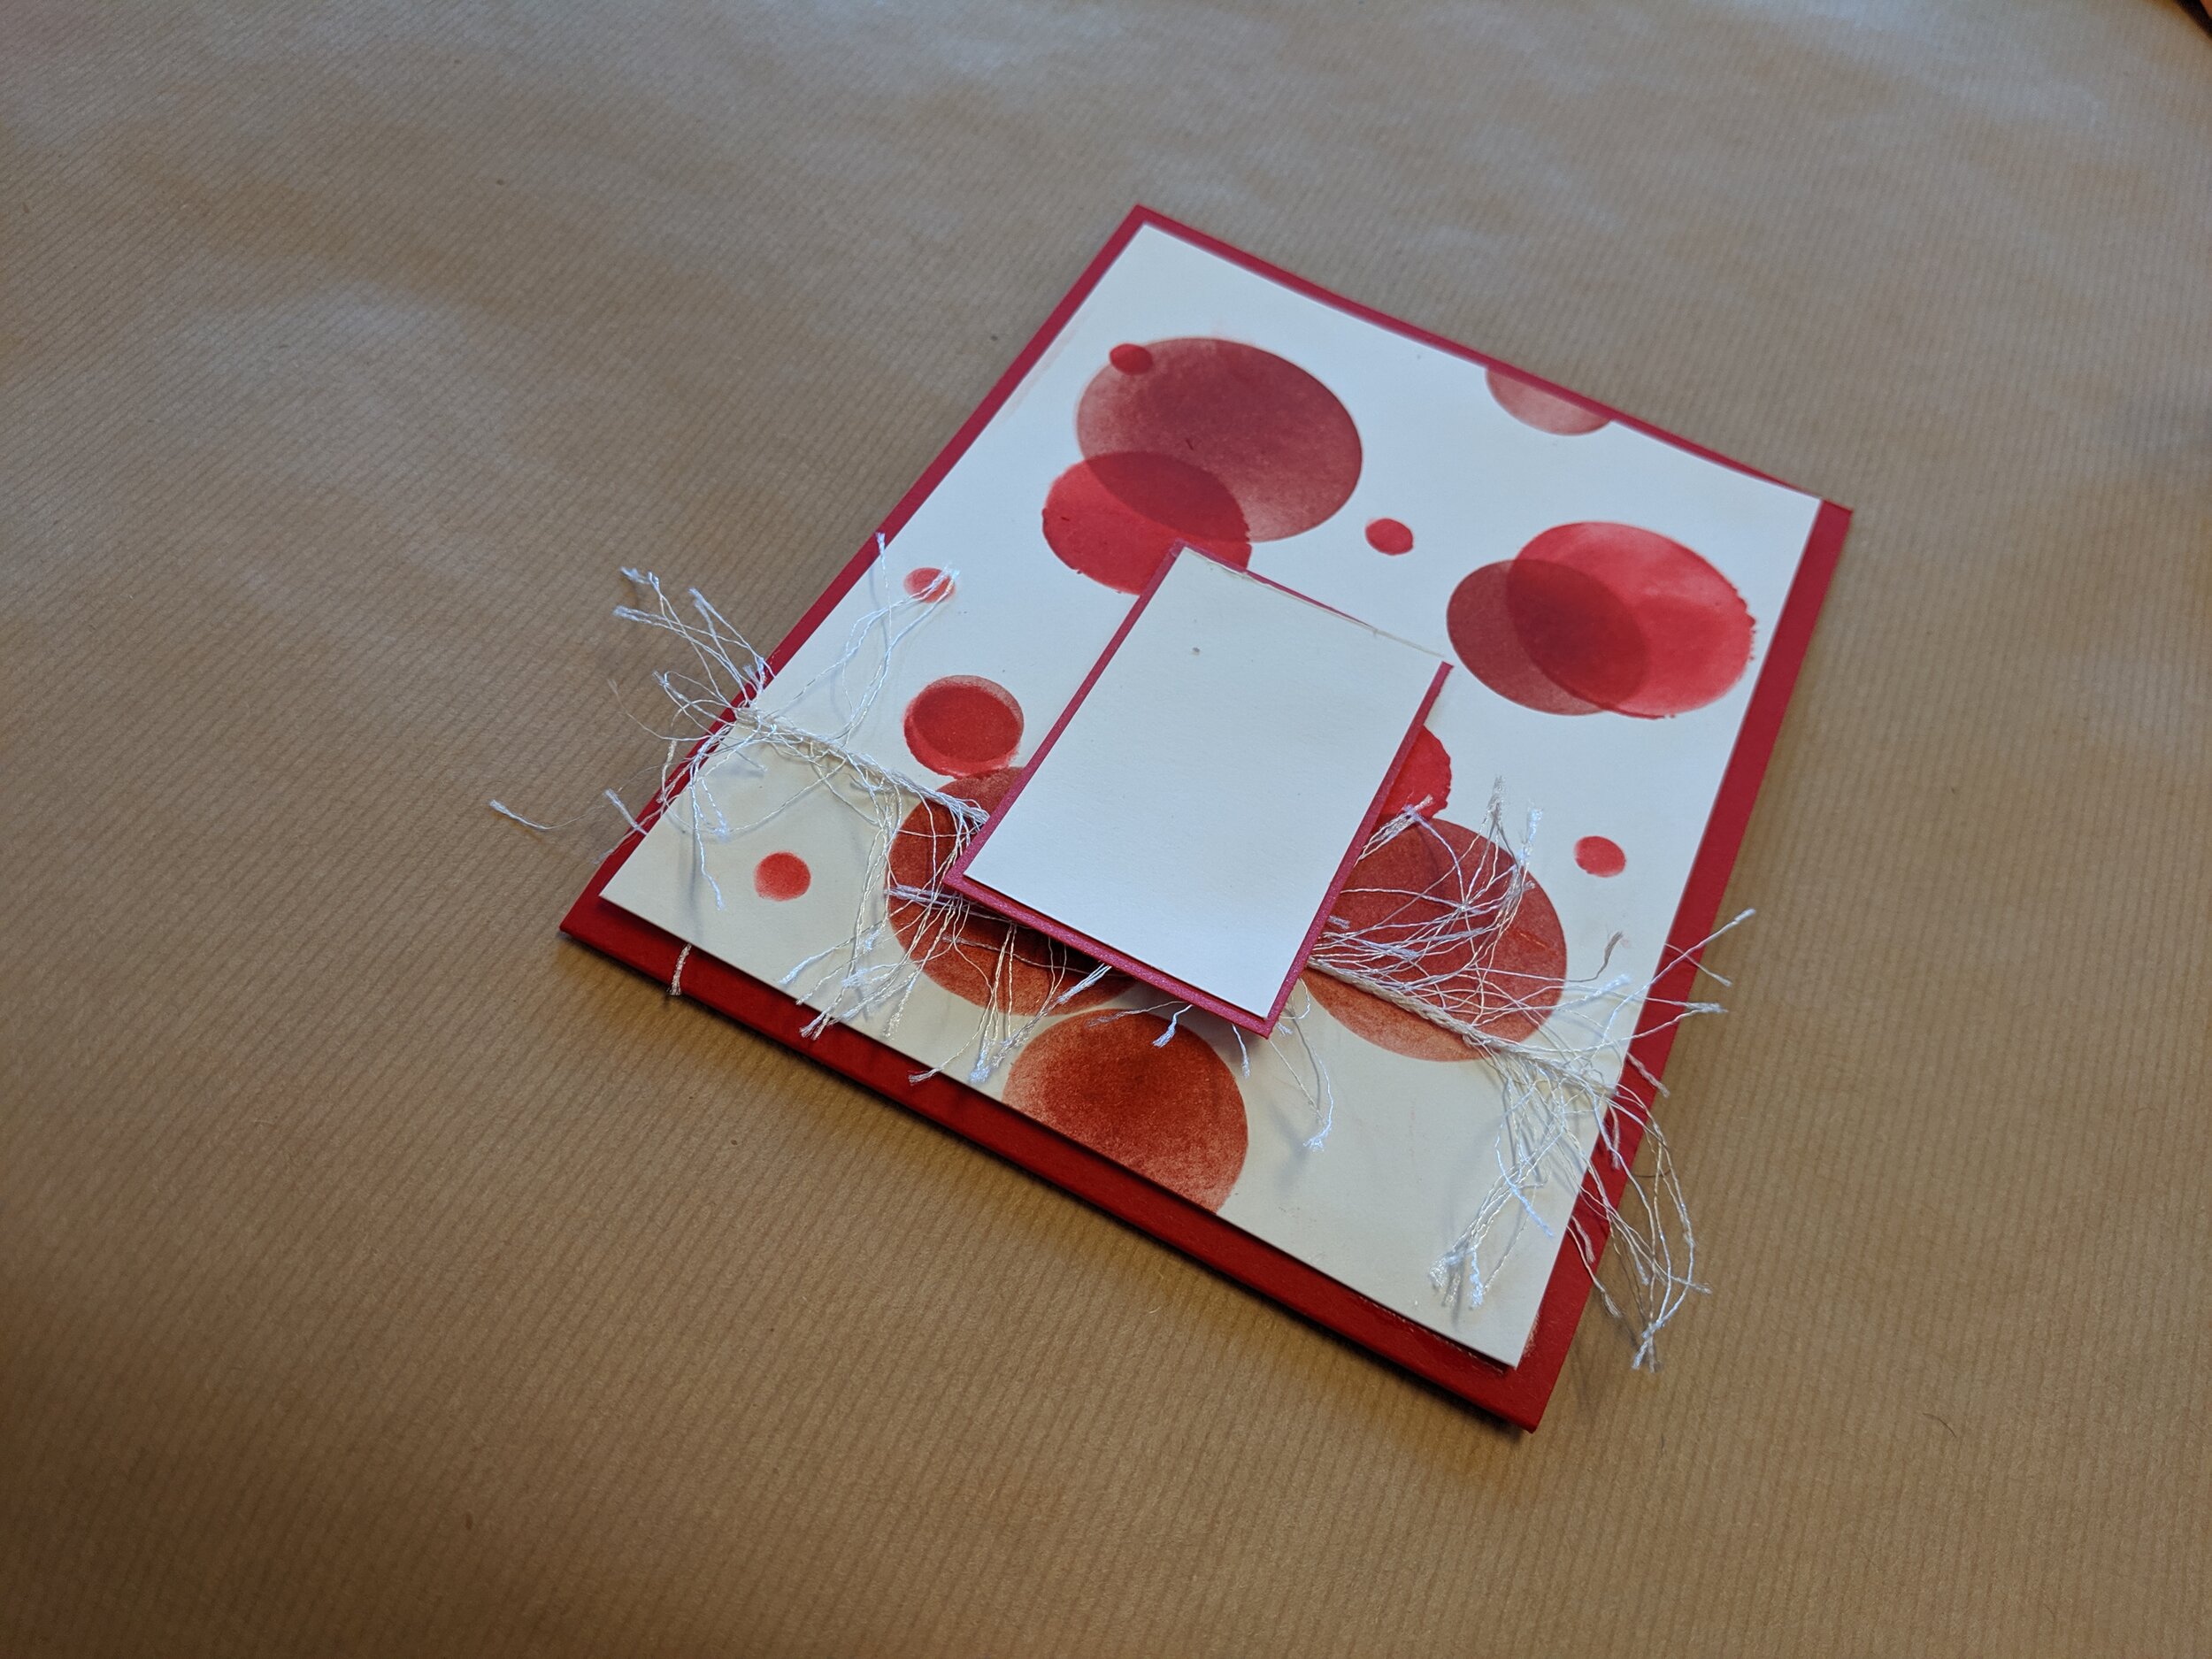
Once your background looks fun, wrap the white eyelash yarn around the front of the card on the left side.
Next, stamp the sentiment “Wishing you lots of smiles this holiday season” with Versafine Clair ink, Fallen Leaves, and layer it with a piece of red paper behind it.
Use pop dots to mount your sentiment on the front of the card. I mounted mine on top of the white eyelash yarn.
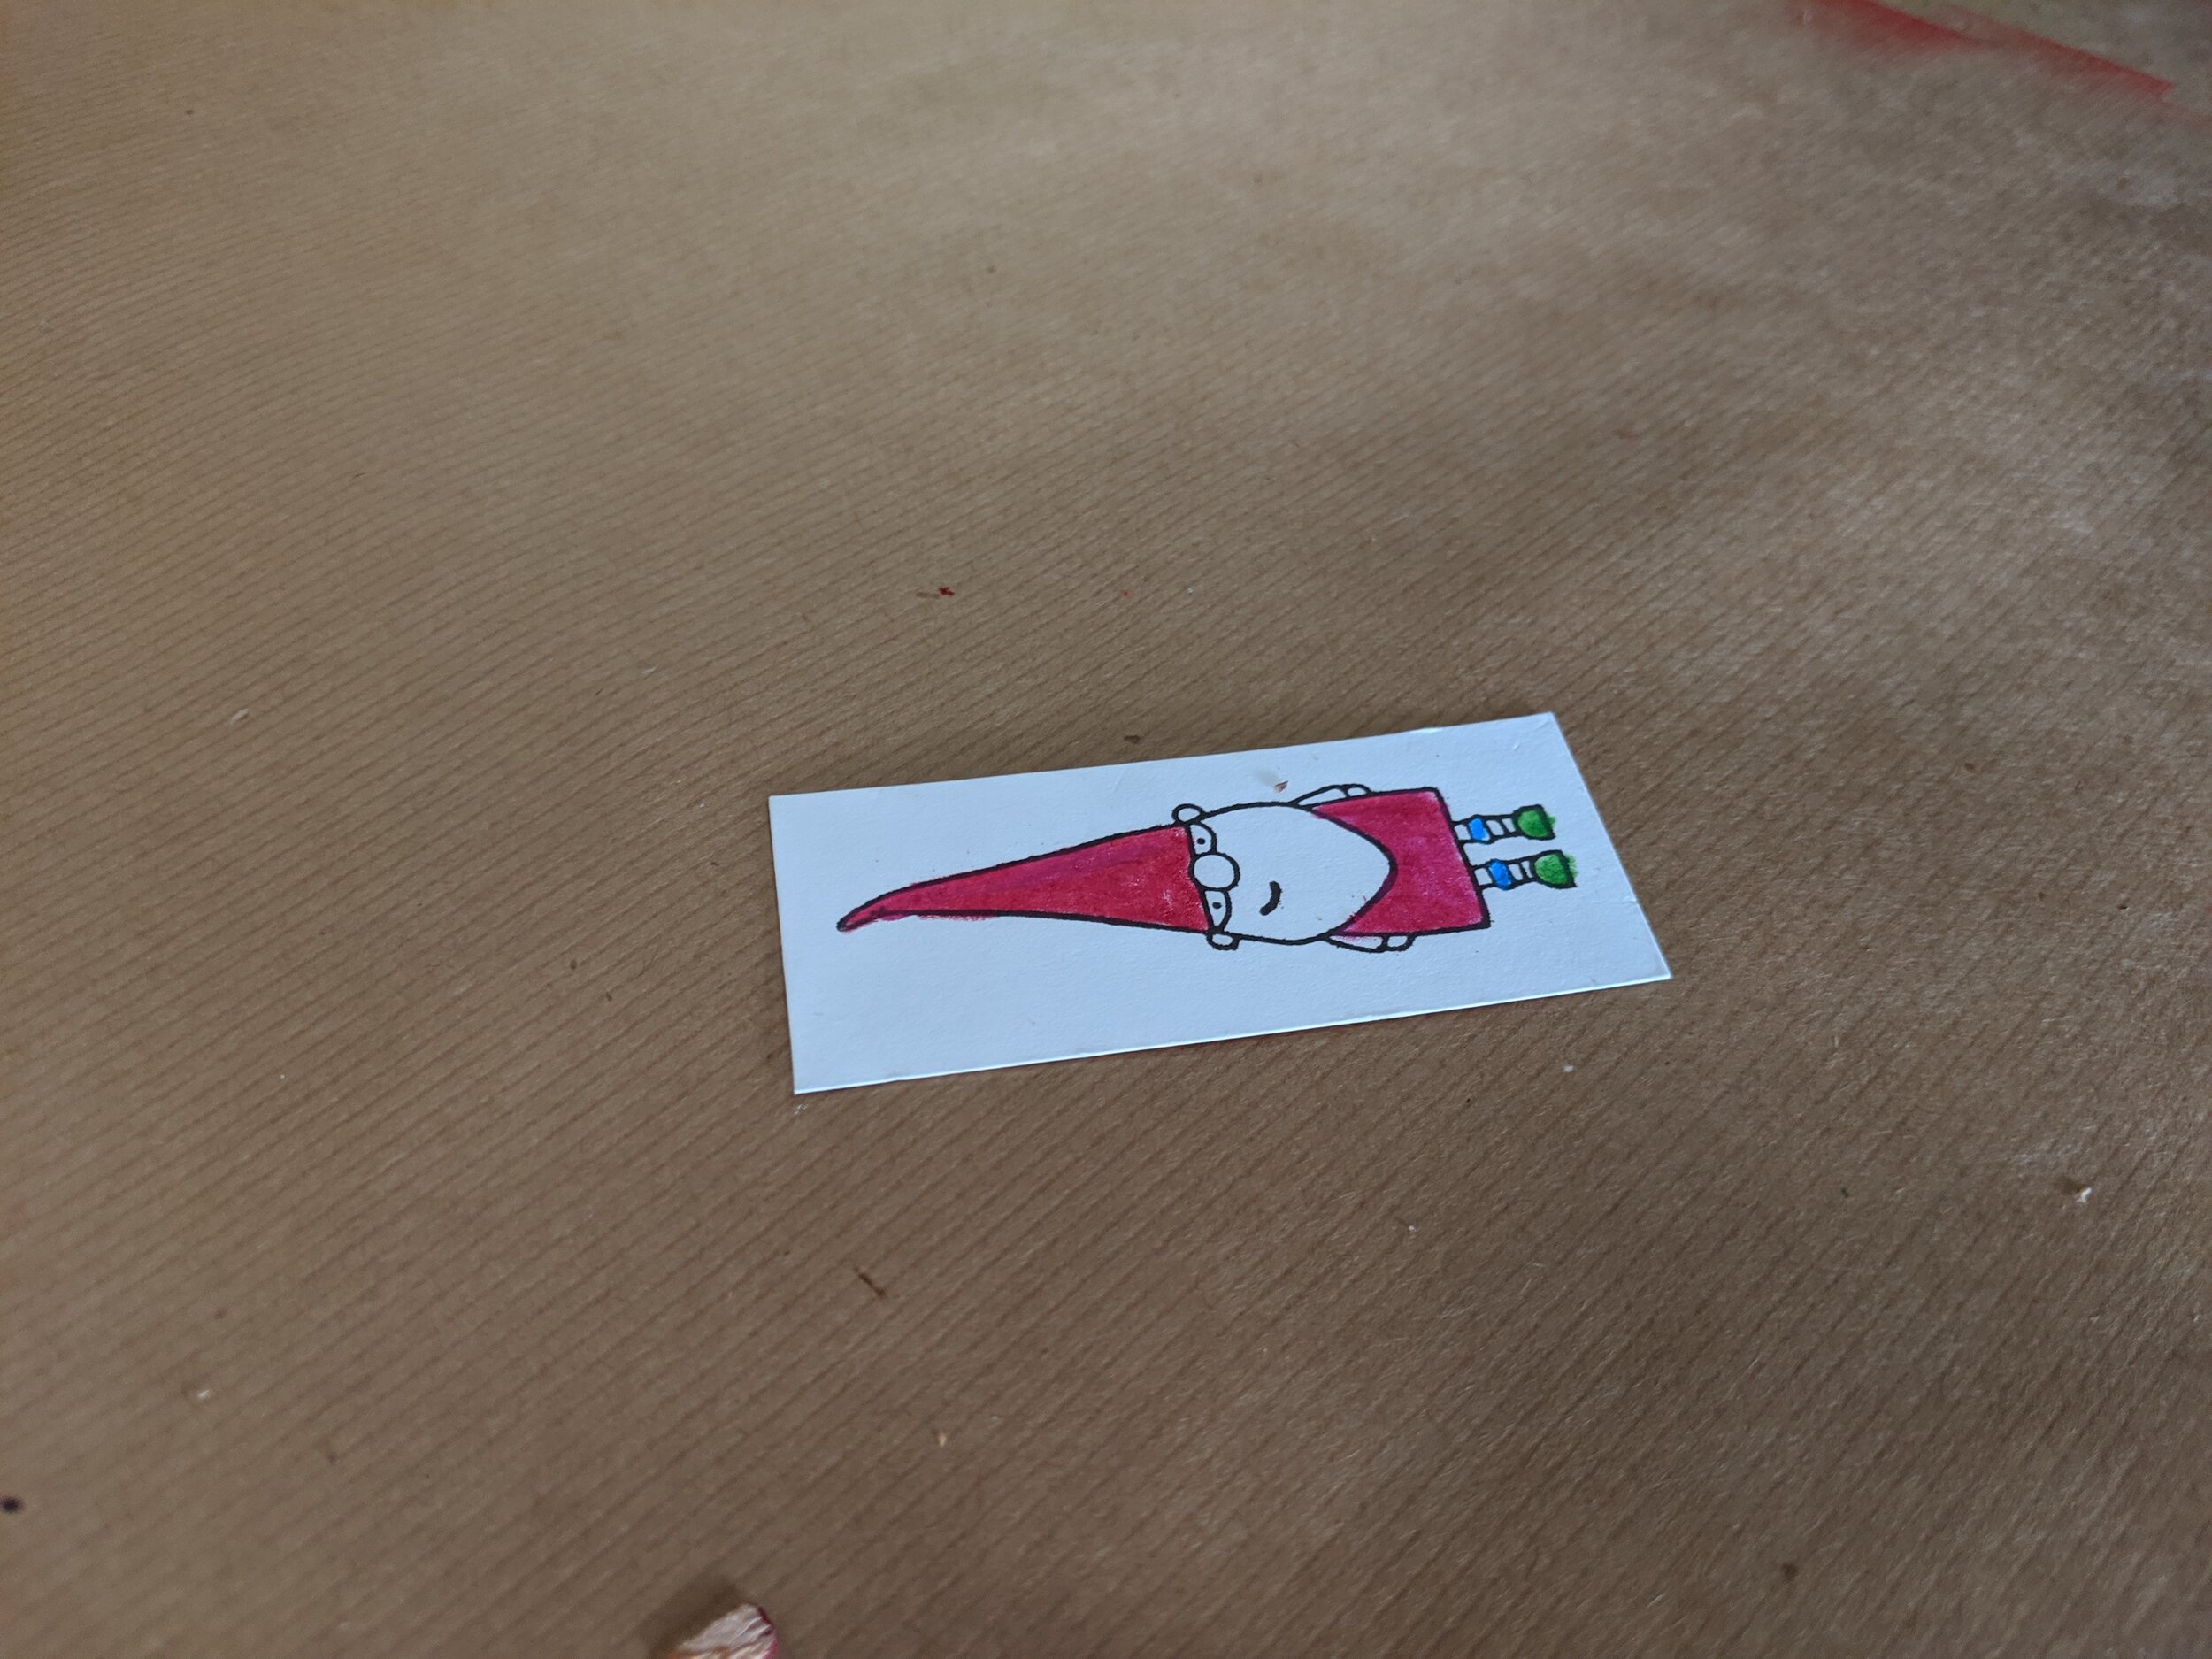
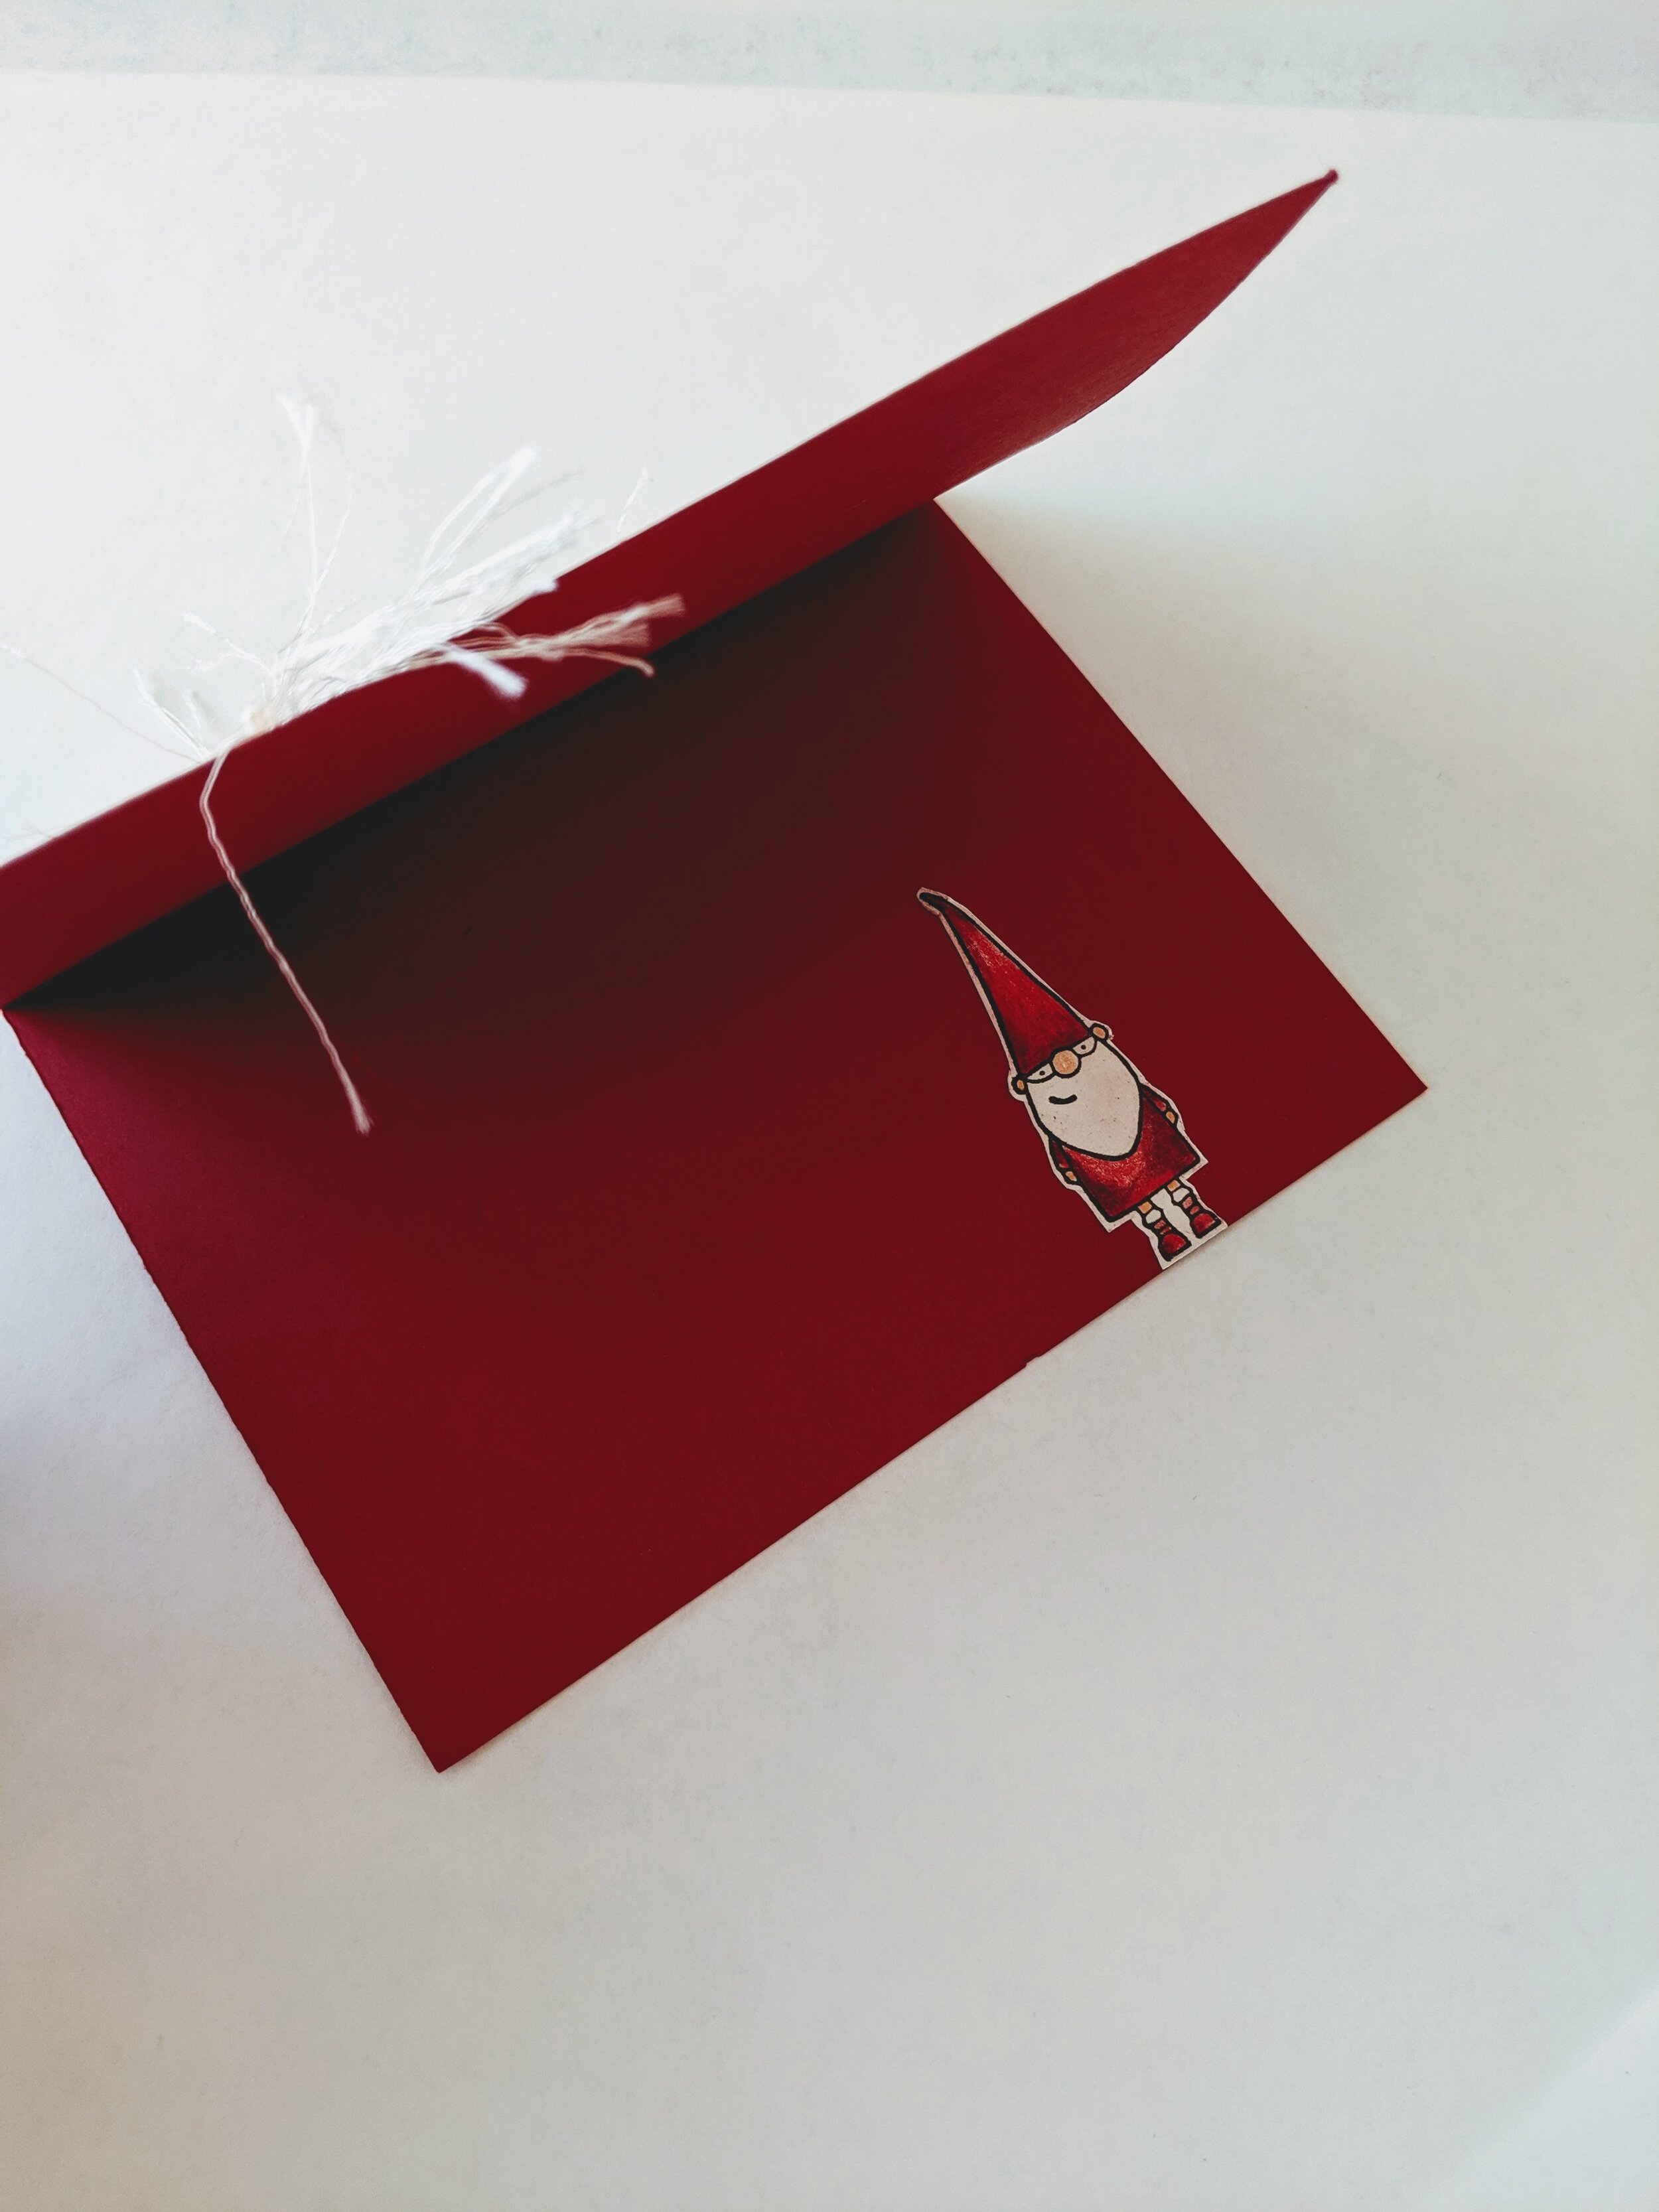
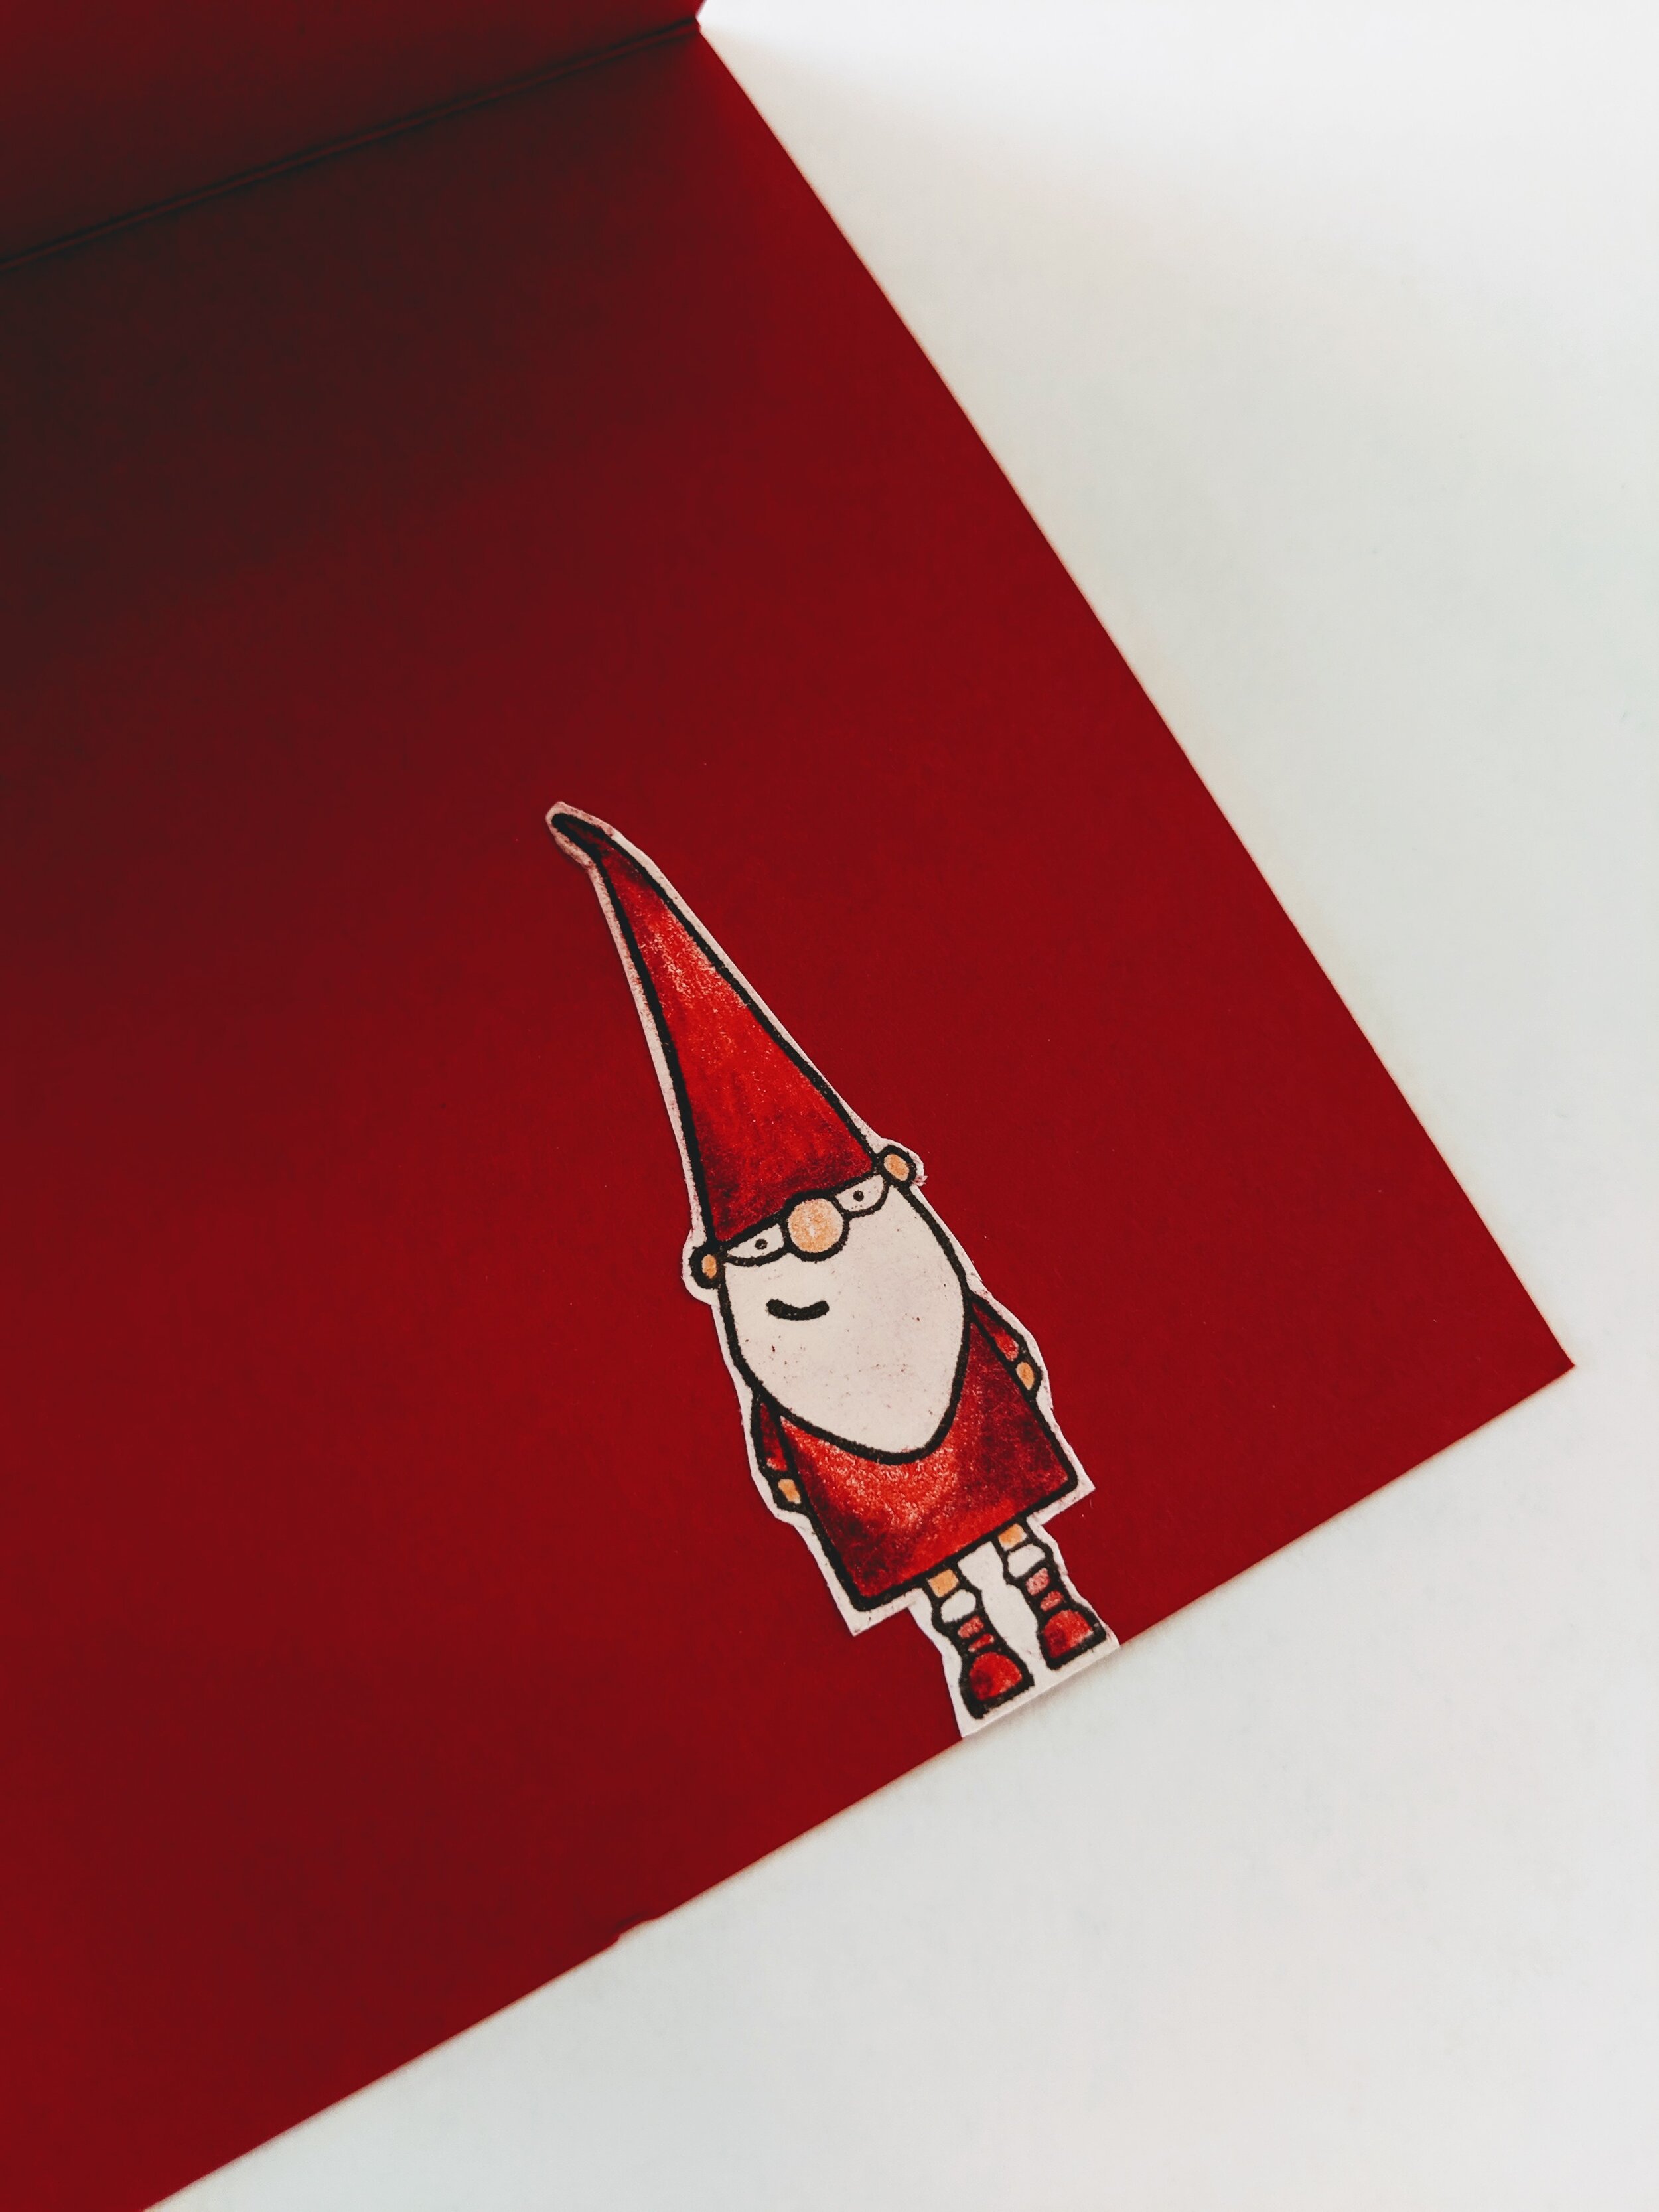
Now stamp the gnome from the Under the Toadstool stamp set onto a piece of ivory card stock using the same color of Versafine Clair ink. Then use colored pencils to color him red (like Santa!!) and fussy-cut the image.
Use Nuvo Deluxe Adhesive to adhere the little guy INSIDE the card.
I loved this card!!! It was so fun and JOYFUL and just made me smile!!
I hope it brings a smile to your face tooooo!!!
Thank you to those that came to my last card making class!!
Card Making Classes are offered every 2 weeks! You can sign up for classes here: www.artandhappiness.shop/classes