
Hi friends! In our house, summertime always means lots of fresh carrots from the garden. What better way to celebrate the end of summer than with the cutest carrot card?!
Inside, it says “I hope you know how much I carrot about you” — making it the perfect gift for a friend or loved one to show you care!

Inside your kit, you’ll find:
A brown envelope
The paper parts needed to construct your carrot
A folded orange paper for the outside of the carrot card
A shimmery orange paper to go inside the card
Brown paper strip for the “dirt” on the envelope
Sentiment insert
Mesh and ribbon for the carrot stem
You’ll want to make sure you also have on hand:
White glue or double sided tape
Scissors
Orange marker
Brown marker
Watch the video above or follow along with these instructions!

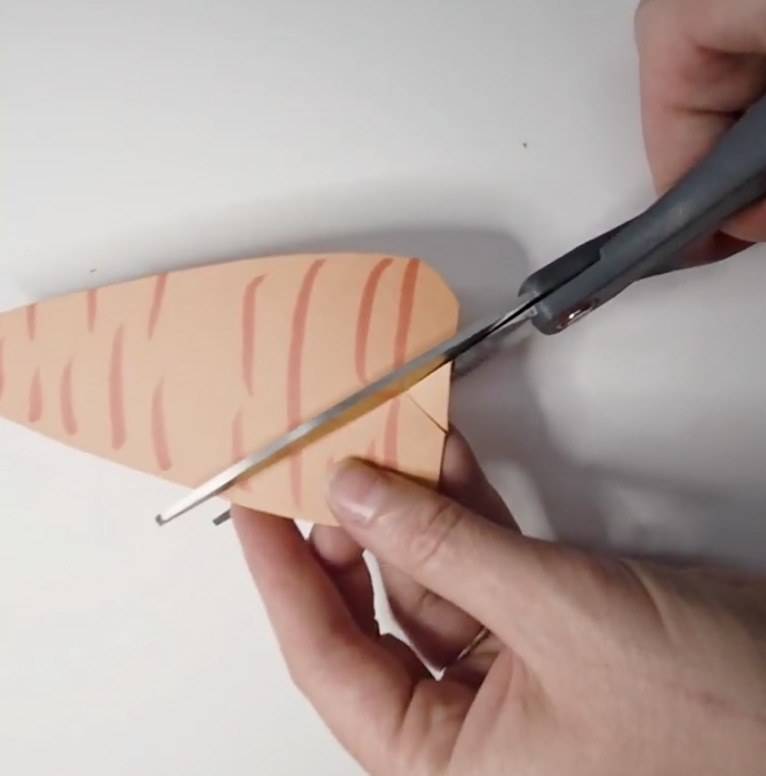
Step 1: Cut out your carrot
Using your scissors, cut out your carrot along the guided outline on the folded orange paper. Make sure to avoid cutting along the fold, or your card won’t fold in half anymore!

Step 2: Cut out the inside of your carrot
Now cut out the carrot shape from the orange shimmery paper. This carrot is a little bit smaller than your other carrot. Set both of these carrot shapes aside for now - don’t glue or tape them together yet.
Make sure to hold onto the scraps from cutting the carrot pieces out! You’ll need them later.

Step 3: Prep the mesh ribbon
Start by folding the mesh in half, and then in half again, and in half one last time. Three folds total. Then, using your scissors, cut up the fold so that you end up with two long strips of mesh. Trim both ends into points.
Save the cut-off points for tiny carrot stems later!
Step 4: Notch your carrot
Fold your carrot card closed. At the very top center of the fold, snip a tiny triangle out. When opened, you’ll see a small diamond-saved hole. This is where the stem of our carrot will thread through!
Step 5: Assemble your carrot
Fold all of your ribbon and mesh in half to find the midway point. Open your carrot card. From behind the card, slide the mid point through to the notch so that the greens poke out. Use your glue or double sided tape to adhere the smaller shimmery carrot piece to the inside of your carrot card, just below the notch you cut out in step 4 and over the midway point of the ribbons, so your stem is held in place by the shimmery orange paper. Press well.


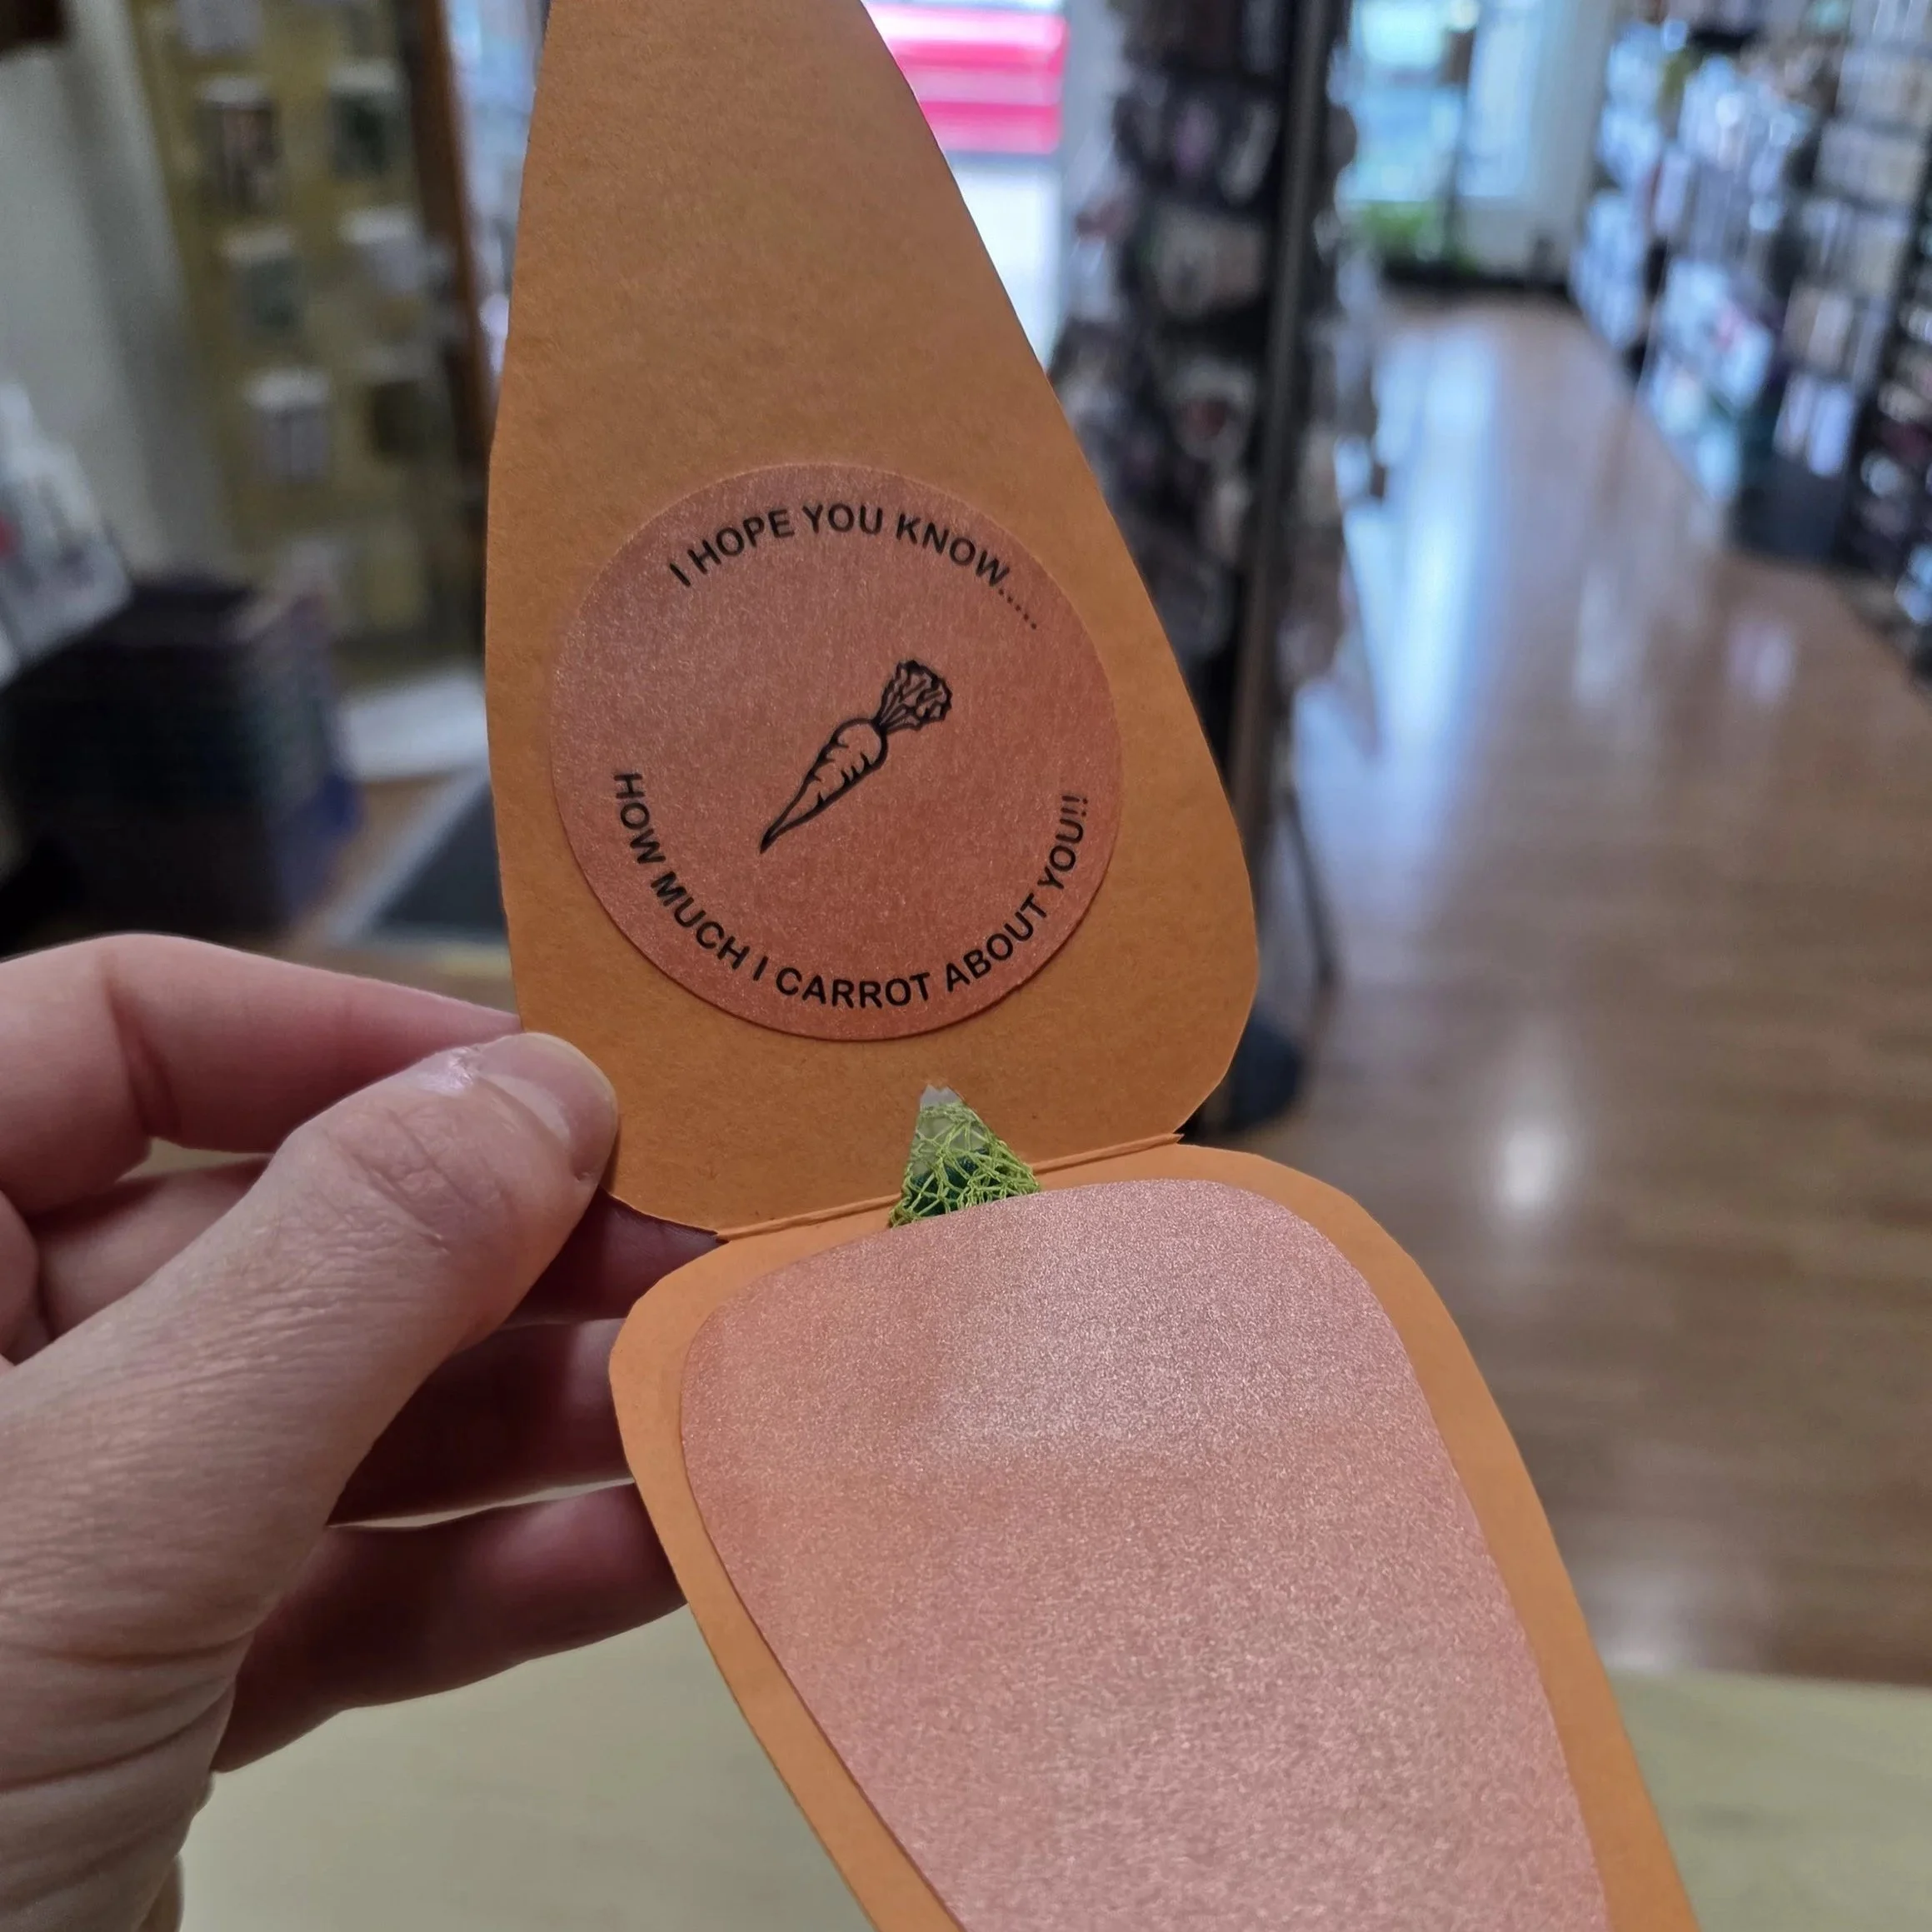
Step 6: Add sentiment
Use a light touch of glue or small piece of tape on the back of the circular sentiment insert. Place it near the top/front of the carrot.
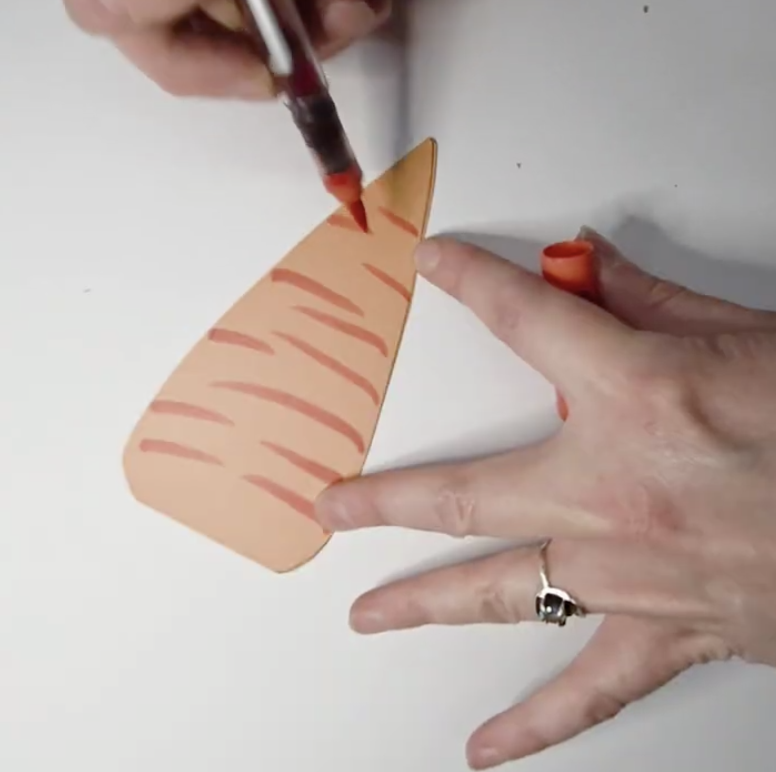
Step 7: Detail the carrot
Close the card. Using the orange marker, add curved, slightly arced lines on both sides of the carrot to suggest rounded edges. Use a combination of long and short lines.


Step 8: Add “dirt” to the envelope
On the brown paper strip, draw a wavy squiggle with the brown marker and add a few short hatch marks for texture. Cut along your wavy line. On the front of your envelope, glue your brown “dirt” panel along the bottom edge. Leave the wavy top edge unglued to form a shallow pocket.
Step 9: Make mini carrots from scraps
Using the scraps from cutting out the carrot, cut out small triangles. Round the tops slightly to make them feel more carrot-y. Make a few! Tip: if your orange marker doesn’t dry on the orange shimmer paper, only add texture lines to the matte mini carrots.
Step 10: Add stems to mini carrots
Using the mesh scraps, glue or tape stems onto your mini carrots.
Step 11: “Plant” your mini carrots!
Tuck your mini carrots into your dirt pocket so the stems peak out — and now you’ve got an instant garden!
Optional finishing touch: Once your carrot card is tucked in its envelope and ready to give to your recipient, add one more tiny carrot on the back to seal the envelope.

That’s it! Your carrot pops out of its envelope just like a real carrot in the garden pops out of the dirt!
Cute, tactile, and totally giftable!
Thanks for creating with us today!!
We can’t wait to make another craft with you!
See you soon, my creative friends!
Art and Happiness
2004 James St
Bellingham WA 98225
Mon-Sat
10am-6pm
Sunday
Noon-5pm
(360)206-0389