
If you like miniatures, you’ll love this week’s Make-and-Take craft!
Make your very own Mini Charcuterie Board! Complete with crackers, meats, cheese, fruit, olives, bread, butter, and the cutest tiny butter knife.


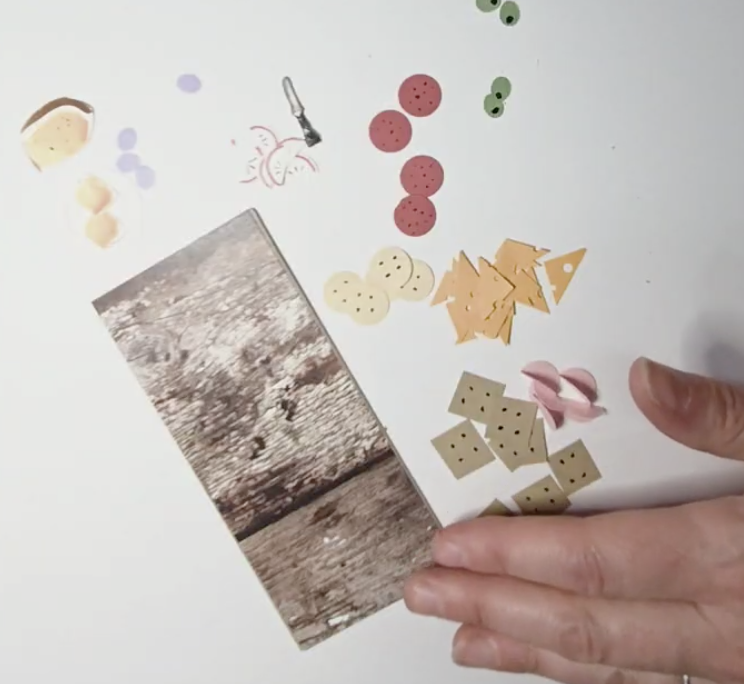
Inside your Make-and-Take kit, you’ll find:
Wood grain “board” piece and backing
Big white circle (plate)
Yellow Swiss cheese paper strip
Brown paper for crackers
Pink circles (ham)
Red/orange circles (pepperoni and salami)
Purple circles (grapes)
Green ovals (olives)
Small white circles (apples)
Rectangular white paper (for bread and butter)
Metal butter knife charm
Keep the plastic sleeve the supplies came in — you’ll need that, too!
You’ll want to make sure you also have on hand:
White glue
Scissors
Paintbrush or water brush
Markers: yellow, orange, brown
Pens: black and red
Optional: small pliers/wire cutters
Watch the video below or follow along with the instructions!

Step 1: Prep your charcuterie board
Glue the wood grain paper to the backing.
Step 2: Paint your bREAD AND BUTTER
Remember how we said you’d need the plastic sleeve your craft kit came in? We weren’t kidding! You’ll need it for this very first step.
Don’t worry — if you threw it away, you can use any piece of clear scrap paper.

Start by using your orange and yellow markers to color on the plastic. Wet your paintbrush, or activate your water brush, and dip it into where the yellow marker ink has collected on the plastic.
On the white rectangle, draw two yellow blobs and two tiny squares — these are the bread and butter!
Dip your brush into the orange marker ink, and add a tiny bit of orange to the edge of each yellow shape.
Set the rectangle paper aside and let dry!
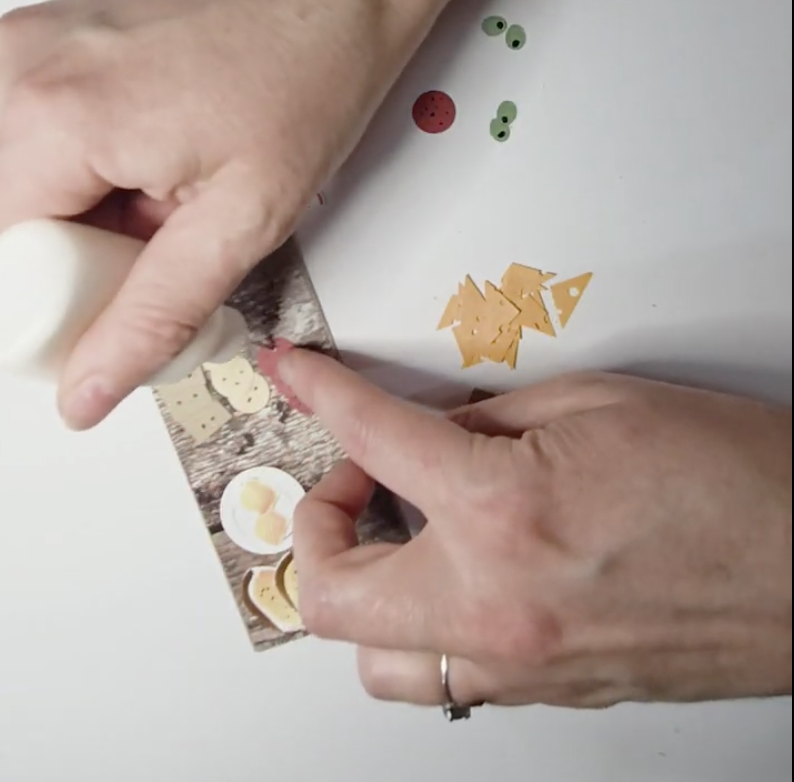
Step 3: Detail your ingredients
Cheese: Cut the yellow Swiss paper into tiny squares. Cut each square in half to turn it into triangles!
Crackers: Cut the brown paper into tiny squares and/or circles. Add four black dots to make them look like crackers!
Ham: Fold each pink circle in half (they’ll stack like nested spoons)
Pepperoni/salami: Add tiny black dots
Olives: Add one black dot on an end for the pitted look
Apple slices: Cut the white circles in half. On the flat edge, add three black dots (seeds). On the curved edge, draw a red curve (apple peel)
Bread: Once dry, cut out the bread blobs. Use your brown marker to draw crust around the edges
Butter pats: Once dry, trim your tiny painted squares to neat little pads
Plate: Draw a couple curved lines with a pen to create a plate texture
Butter knife: If you’d like, you can break off the circle loop at the end of the butter knife using pliers.

Step 4: Dry-fit your layout
Don’t glue yet!
Arrange everything on your board to make sure it fits and looks how you like it.
Start with crackers.
Then meats, cheeses, fruit, and olives.
And finally the bread and butter plate, with the butter knife to boot.
Overlap a little for a natural look and to save space.
Step 5: Glue it all down
In the same order you put it all down in step 4, glue it all down! Finish with the metal butter knife.
Let everything dry flat.
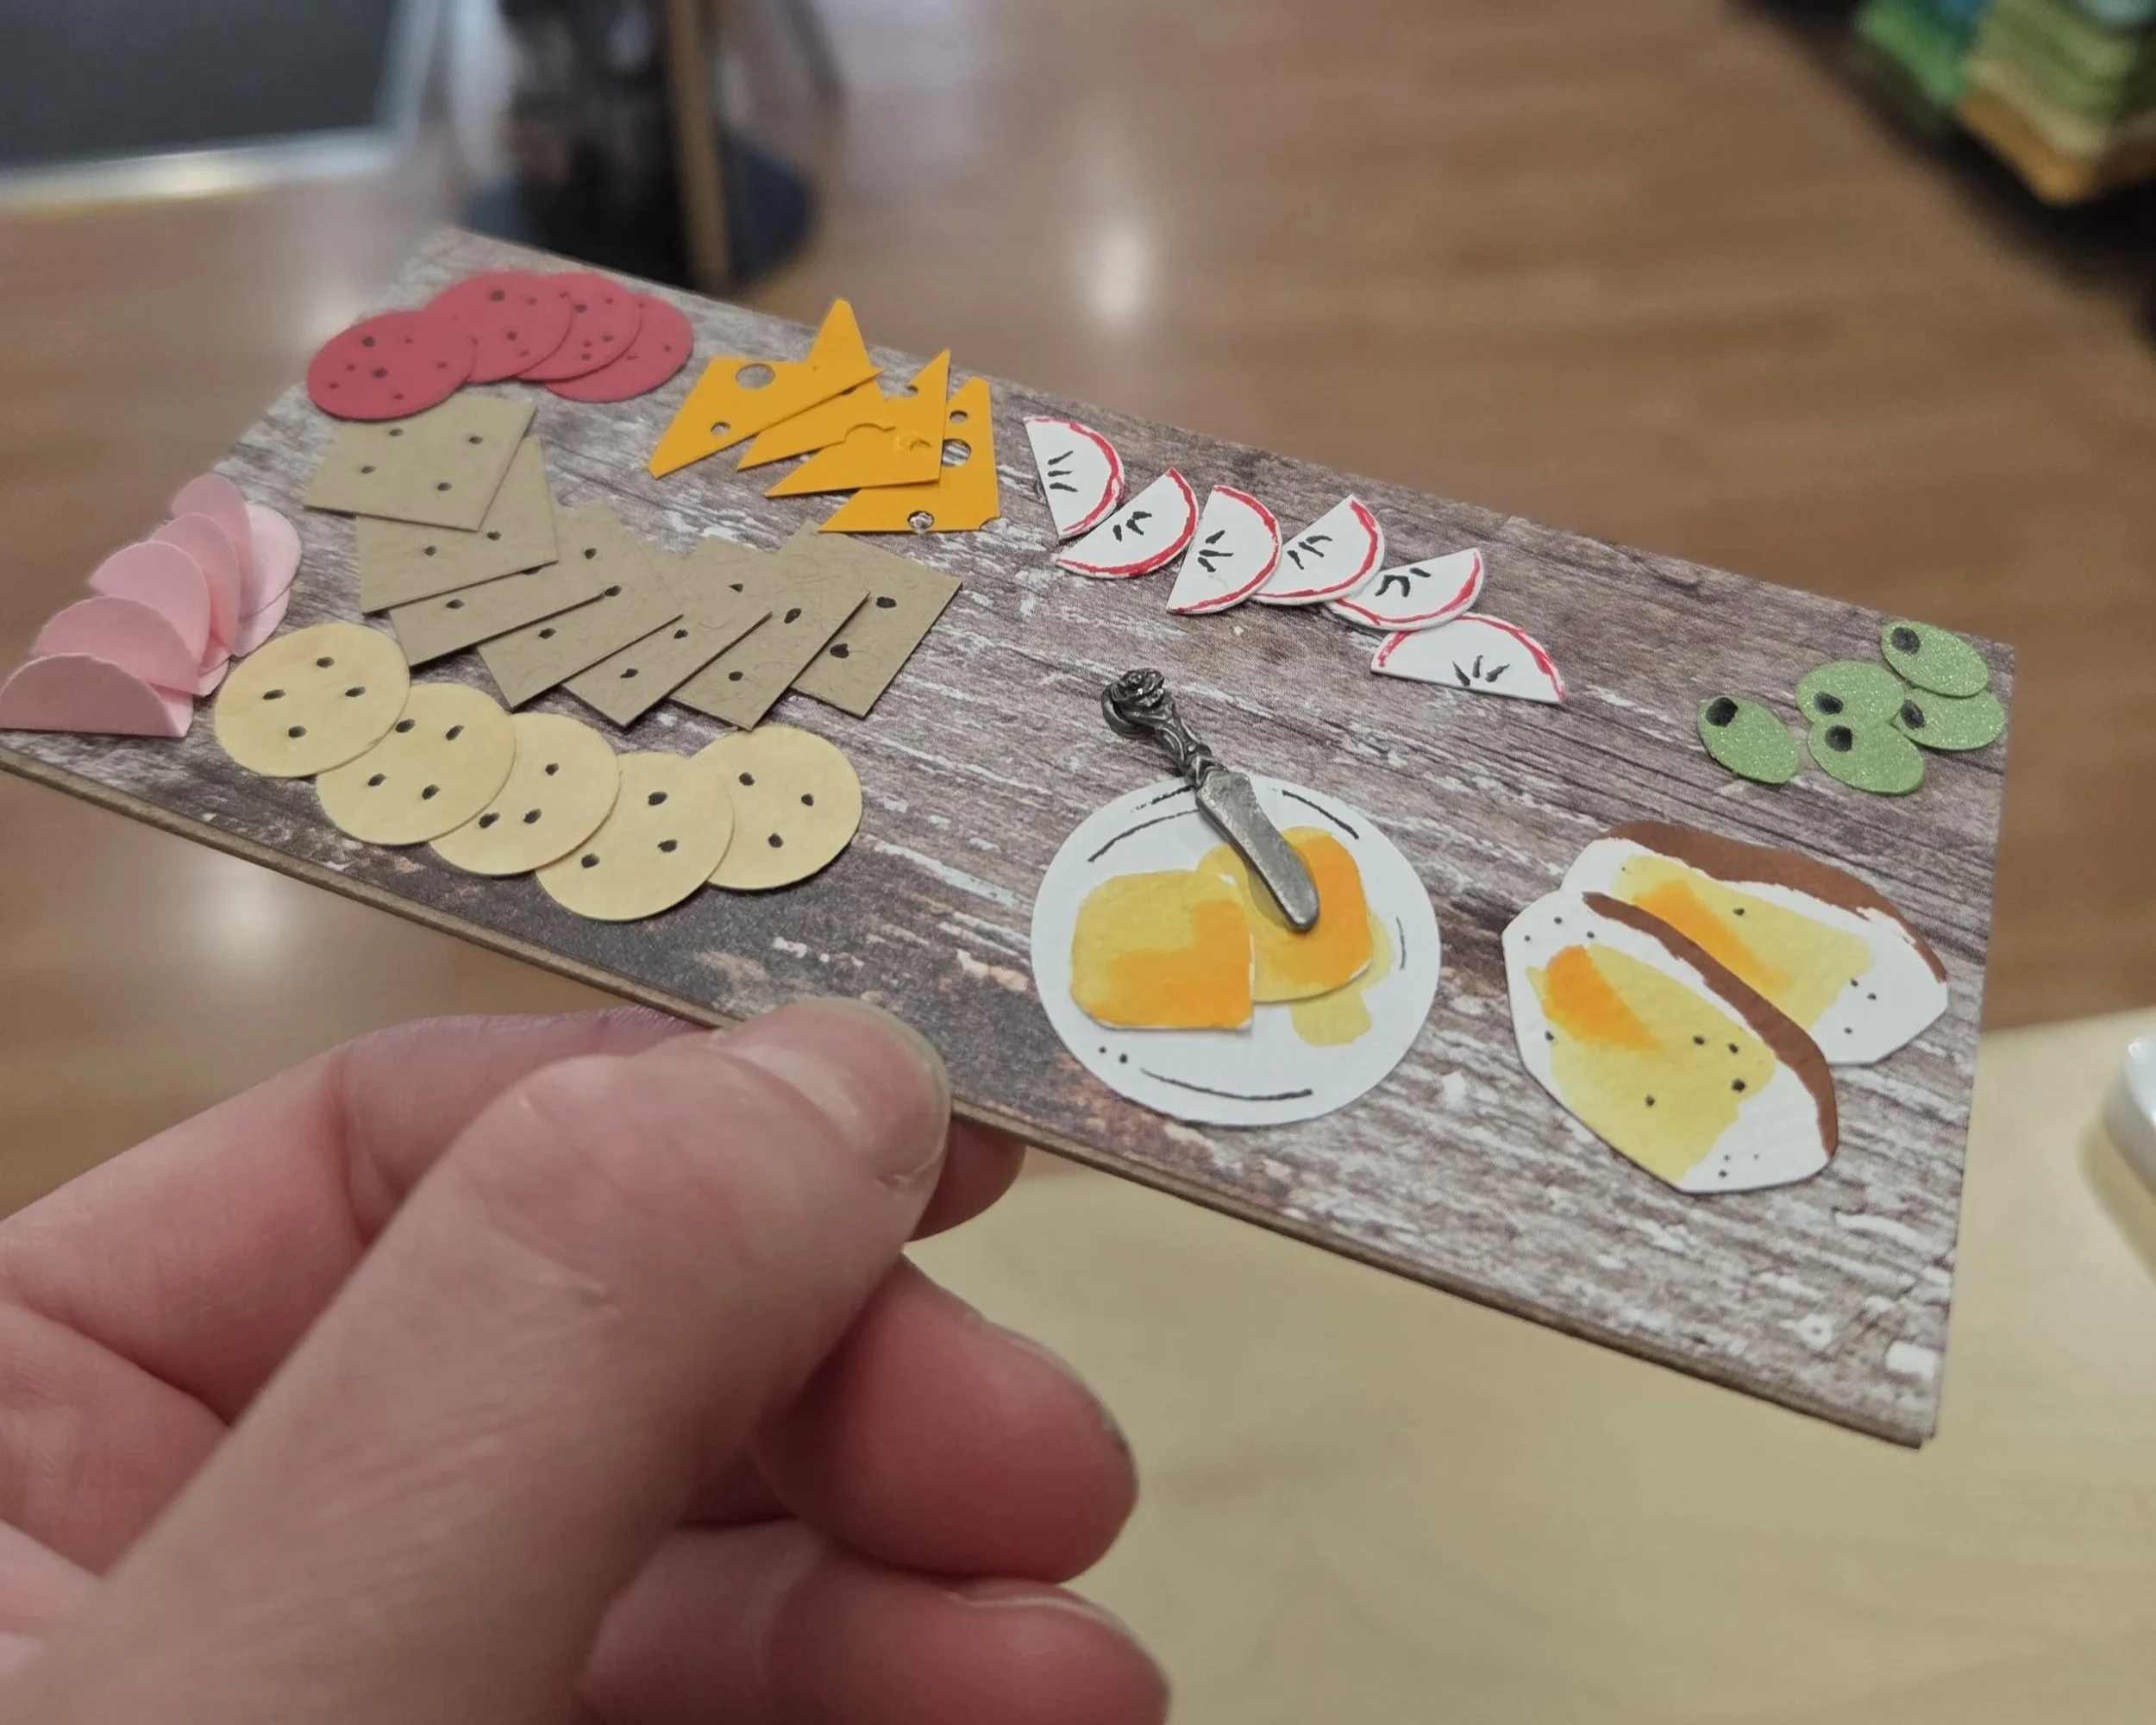
That’s it! Display on a mini easel, turn it into a card, or pop it into a shadow box!
Tips and tricks
Tweezers make the tiny bits easier to handle
Use minimal glue to avoid warping the paper
No markers? Watercolor works great!
Swap out any foods to match your favorite veggies, cheeses, fruits, etc!
Thanks for creating with us today!!
We can’t wait to make another craft with you!
See you soon, friends!
Art and Happiness
2004 James St
Bellingham WA 98225
Mon-Sat
10am-6pm
Sunday
Noon-5pm
(360)206-0389