
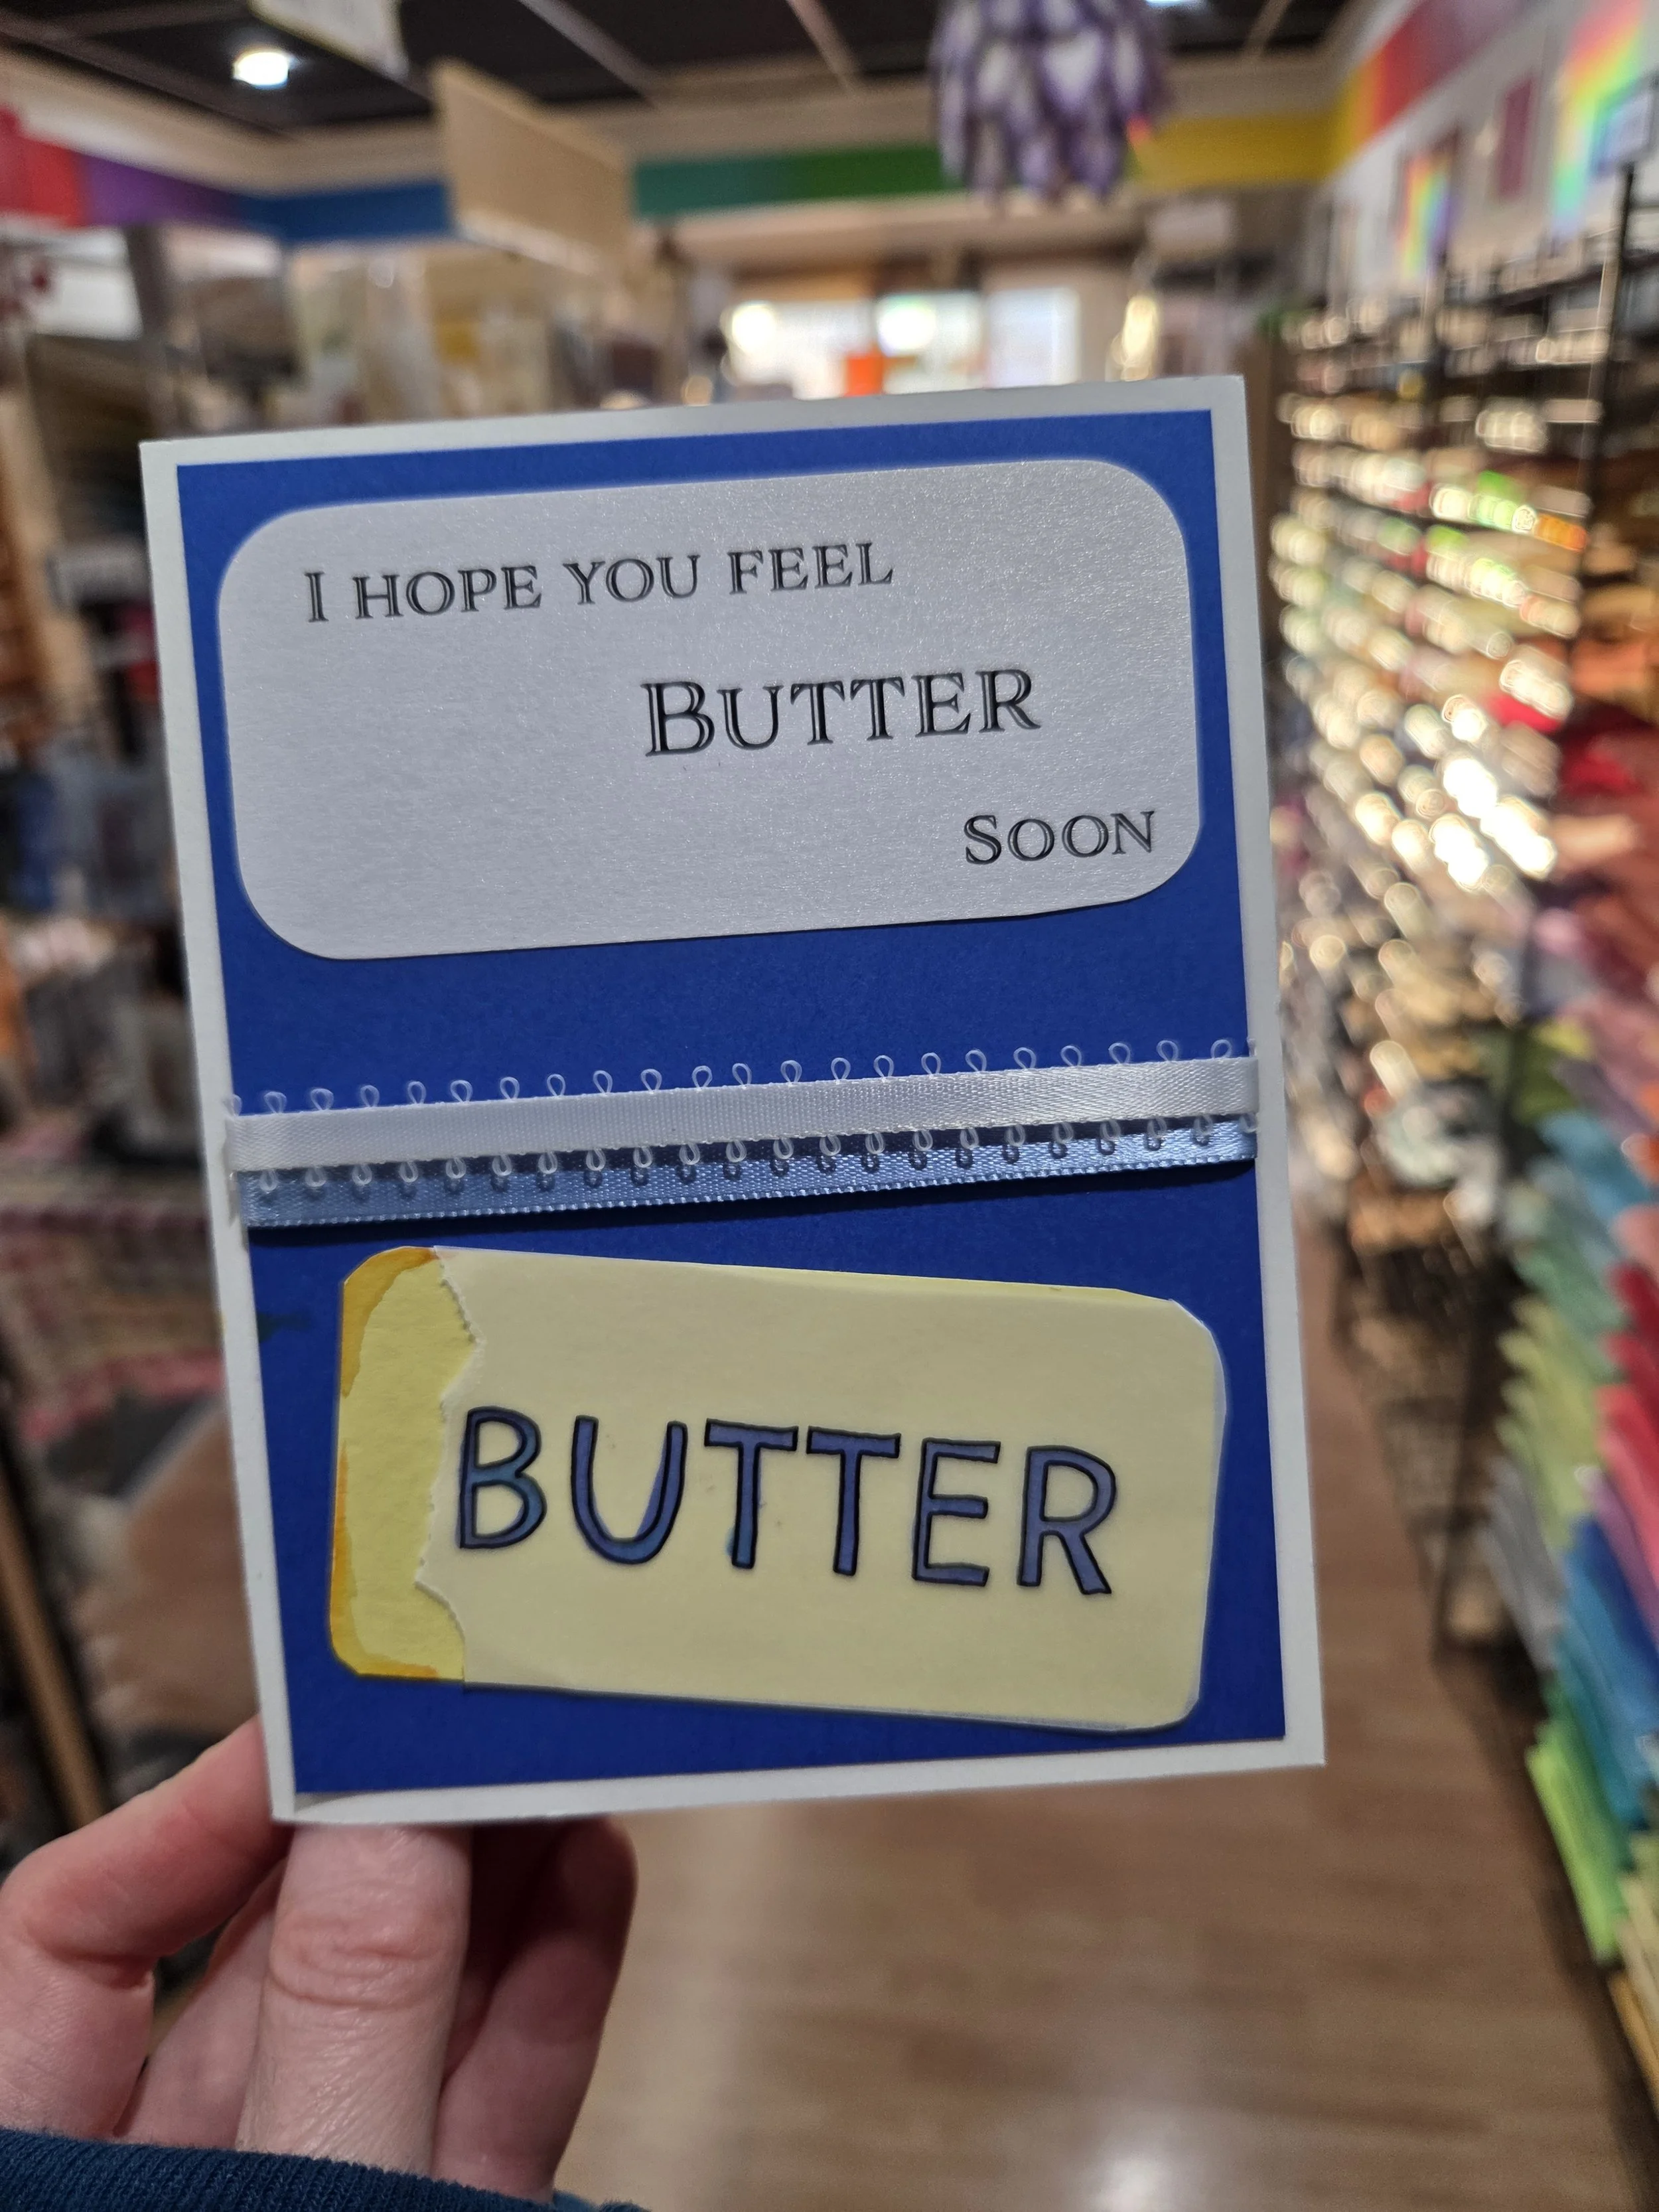
Spring is just around the corner! But some of your loved ones may still have a case of the winter blues. Give them a laugh with a punny card wishing them to feel BUTTER soon!!
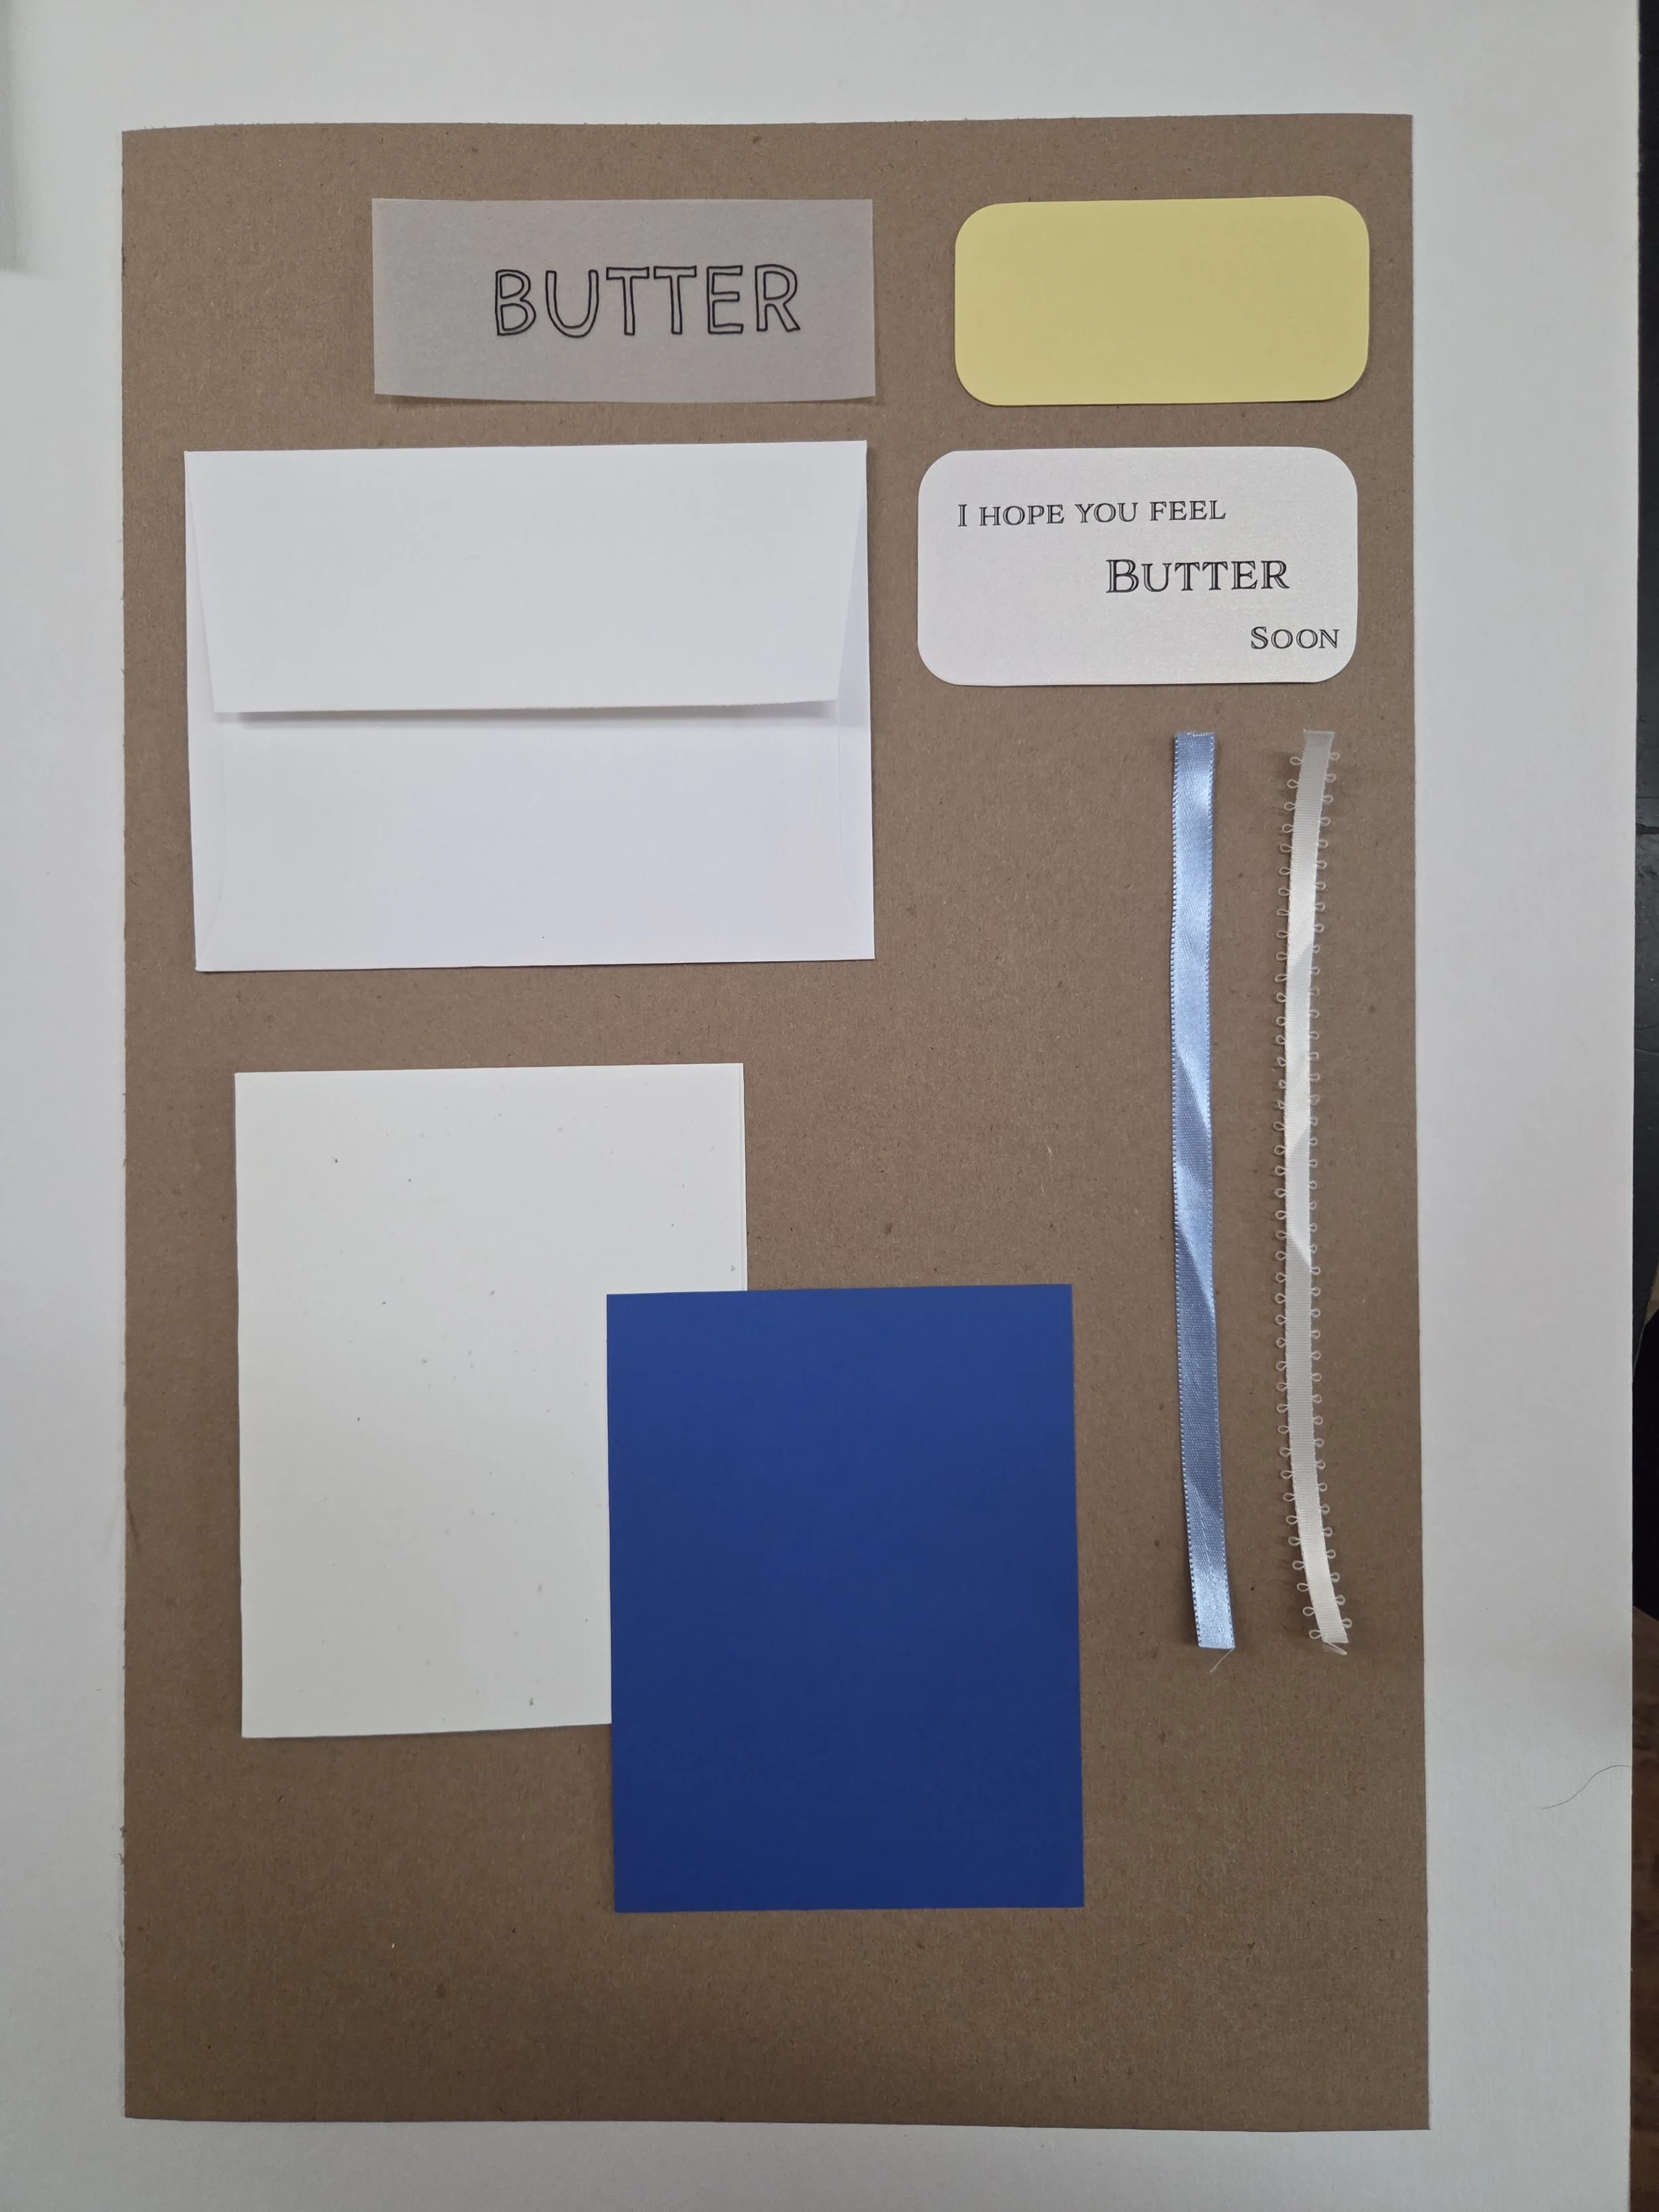
Inside your Make-and-Take kit, you’ll find:
White card base
Blue cardstock layering piece
White envelope
Vellum butter label
Yellow butter paper
Sentiment insert
Blue and white ribbons
You’ll want to make sure you also have on hand:
Scissors
Blue marker
Yellow marker
Double-sided tape
White glue
Watch the video below or follow along with the instructions!
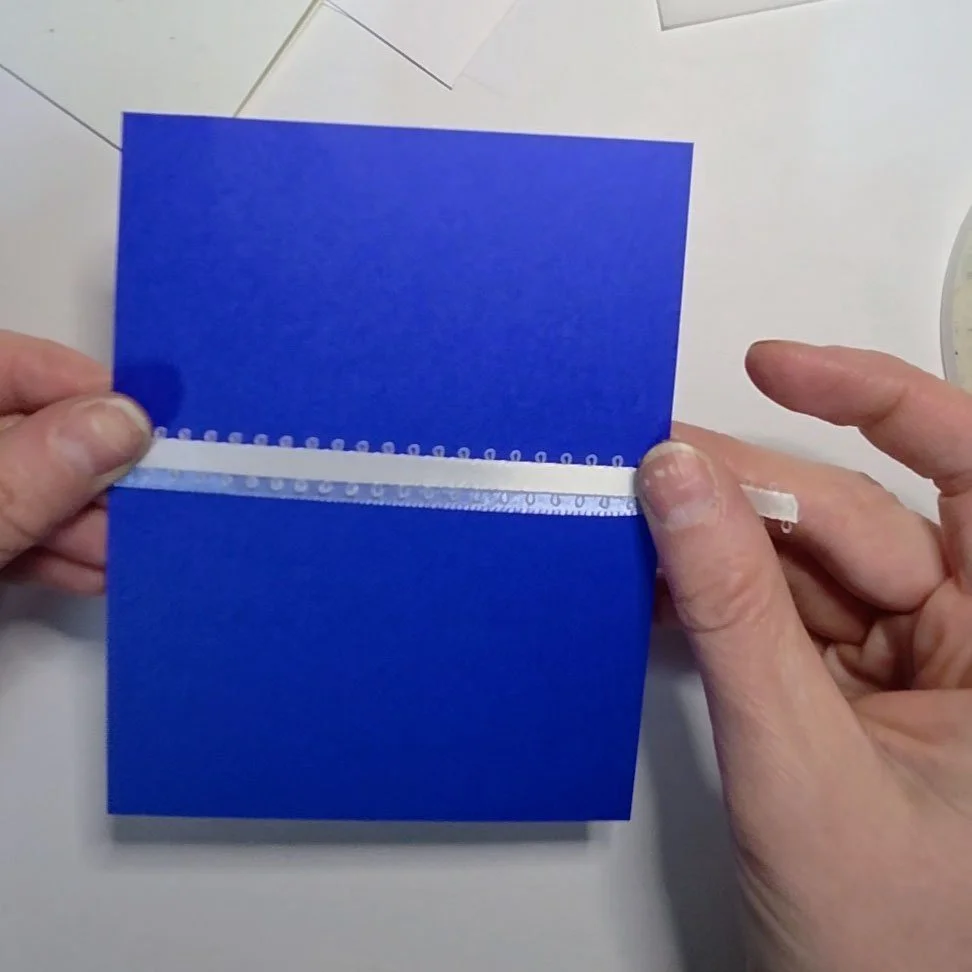
Step 1: Attach Ribbons
Use double-sided tape along the long edges of the back of the blue cardstock layering piece. Then place the ribbons across the middle of the front of the blue cardstock layering piece and wrap them around to the back, sticking them on the tape so they stay on either side. Add another small piece of double-sided tape over the top of the ribbons to make sure they really stay in place!
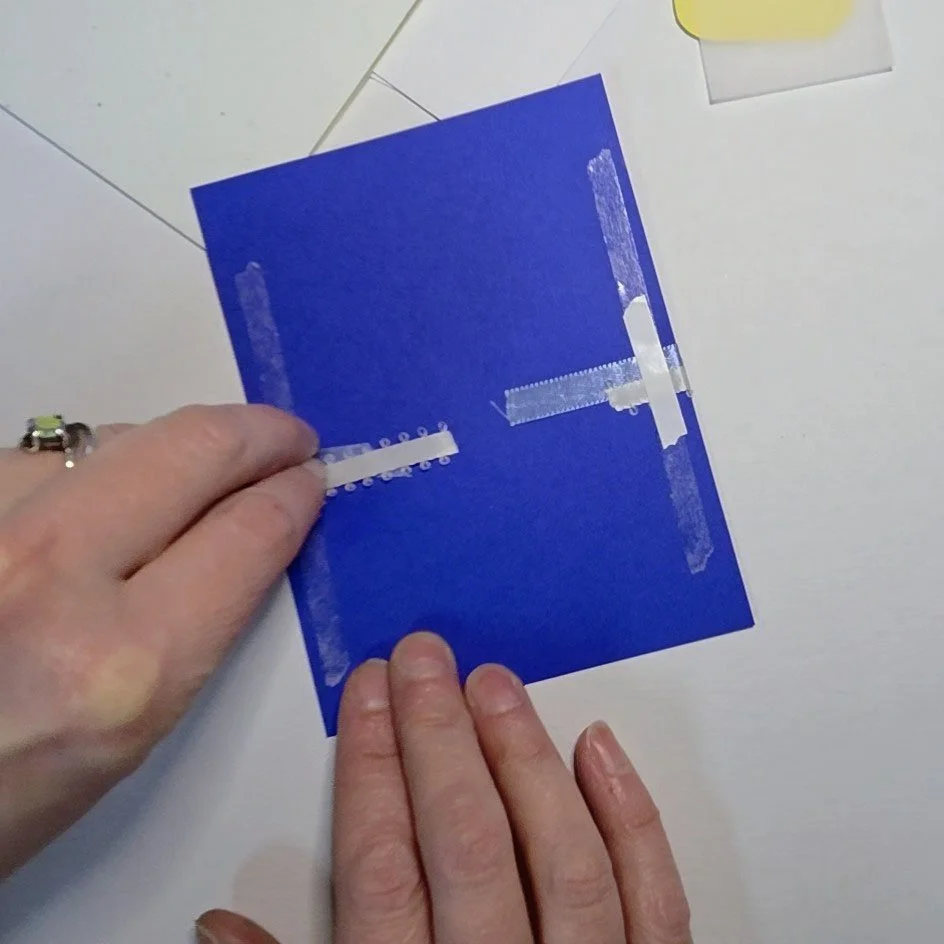
Step 2: Assemble card
First, make sure your white card base folds inward when you’re applying the blue layering to the front! You’ll want to center the blue cardstock layering piece on the white card base so that there is an even white border all the way around the blue. Press down all over to make sure it is thoroughly secured!
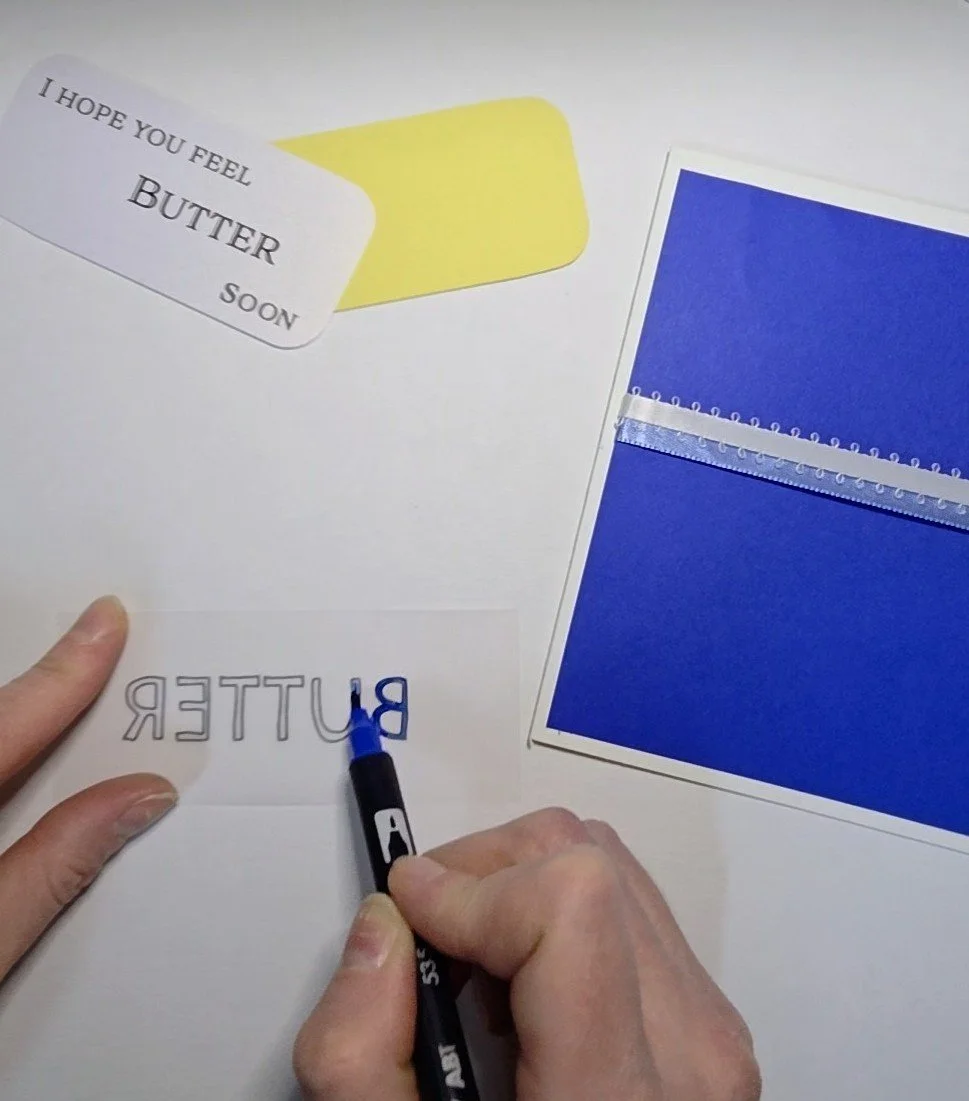
Step 3: Prepare your butter label
Flip your vellum butter label over and use your blue marker to color inside the letters on the back of the label. Make sure to use the letters as a guide and do your best to stay within the lines. Being verrrry careful not to rip the word butter, rip the end of the vellum label off — this way, is resembles the way you rip the wax paper off of a stick of butter!
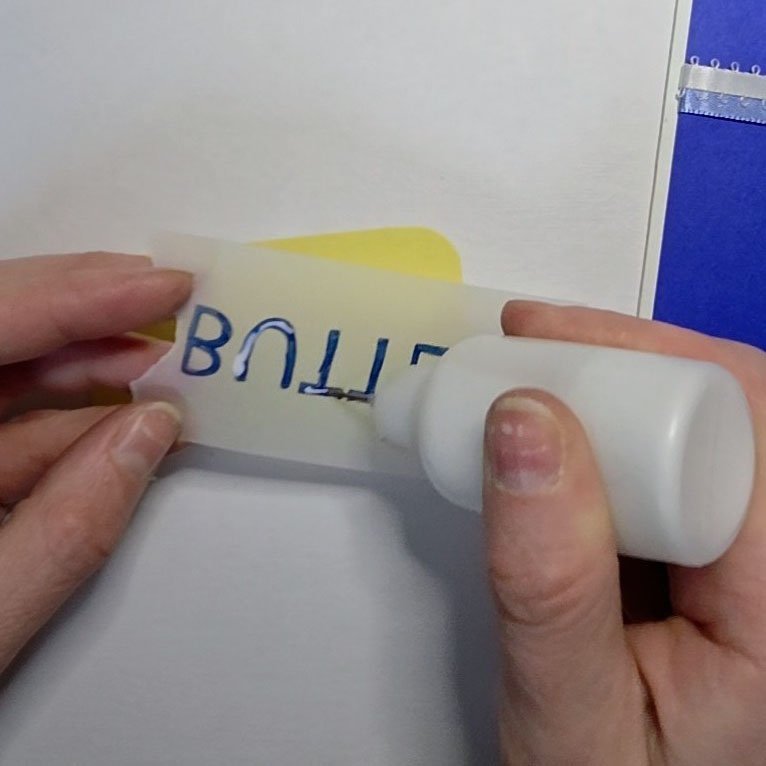
Step 4: Add glue to the letters!
Because the glue will be visible when it dries on the vellum, add dots of glue to the back of your letters, the same spots you colored. Then align your stick of butter piece with the edges of your butter wrapper, and press! Use your scissors to cut off the excess vellum on the end, using the end of the butter as a guide.
Optional: use your yellow marker to color on the end of your butter, giving it a slightly melty look.
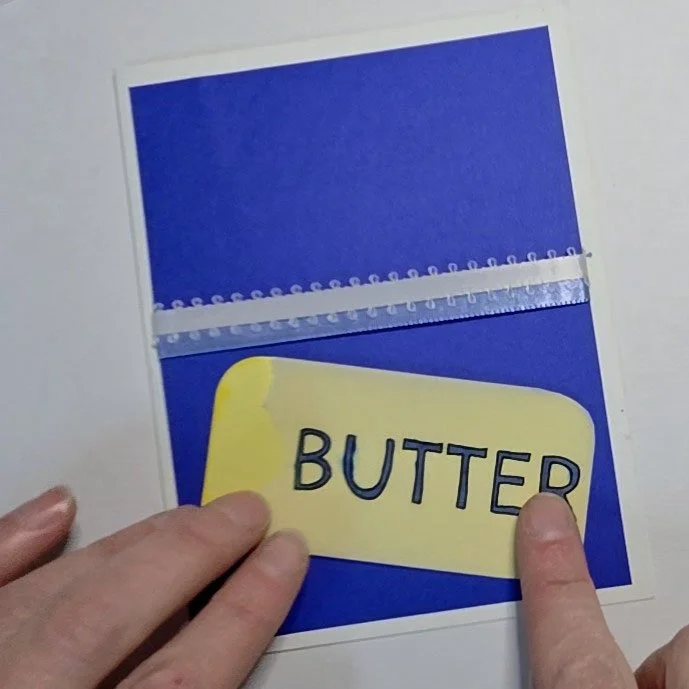
Step 5: Glue your butter to the front of your card
At whatever angle feels right to you, either above or below the ribbons, glue your stick of butter to the front of your card.
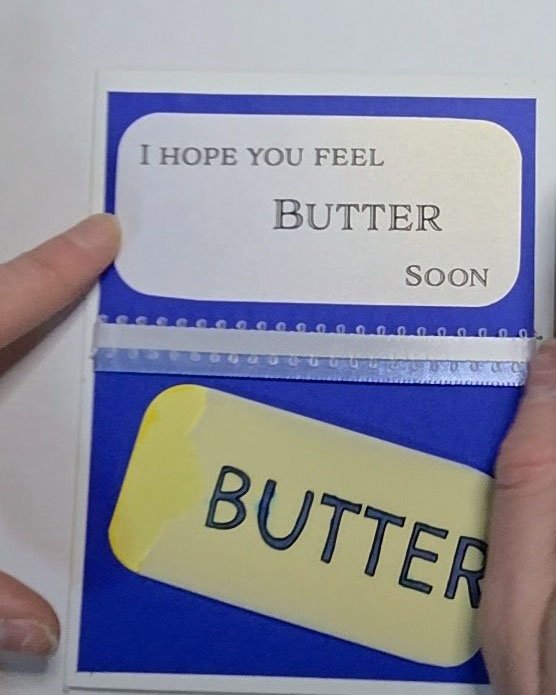
Step 6: Add sentiment
Use a small dot of glue in each corner on the back of the sentiment piece — be careful not to use too much glue, or it can warp the paper. Then add it to your card!
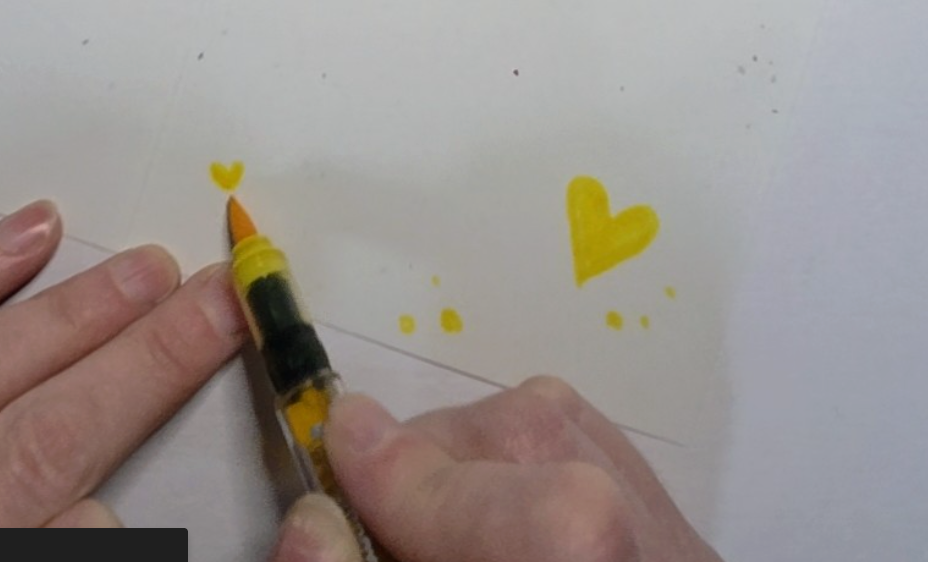
Step 7: Decorate the inside of your card
Open up your card and use your markers to decorate! In ours, we used the yellow marker to make some cute butter hearts and splatters. Now it’s ready for whatever words you want to write inside! Address it to your loved one and fill it with something from your heart.
All done!
This card is sure to put a smile on their face!!!!
Thanks for creating with us today!!
We can’t wait to make another craft with you!
See you soon, friends!
Art and Happiness
2004 James St
Bellingham WA 98225
Mon-Sat
10am-6pm
Sunday
Noon-5pm
(360)206-0389